![]()
The menu bar is located at the top of the software. It contains the menu for MADRIX.
This menu, in turn, has several submenus:
| • | File |
| • | Edit |
| • | Help |
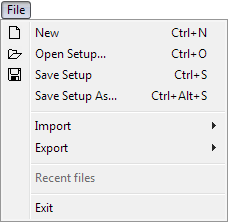
Click on the menu item "New" (or "Ctrl+N") and you will get a new, blank setup with emtpy Storages.
Furthermore, you can use "Open Setup" (or "Ctrl+O") (i.e. loading), "Save Setup" (or "Ctrl+S"), and "Save Setup As..." (or "Ctrl+Alt+S") for managing your setups.
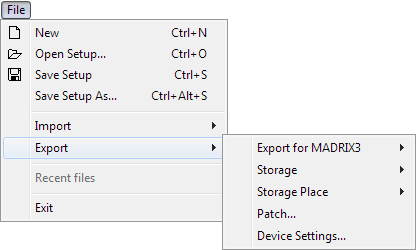
Use the menu entry "Import" to import (load) a complete Storage (all Storage Places of one single Storage Area), a Storage Place, the Patch, and Device Settings. Use the menu entry "Export" to export (save) a complete Storage (all Storage Places of one single Storage Area), a single Storage Place or all Storage Places but separately ("Storage All..."), the Patch, and all defined Device Settings.
In addition, you can convert MADRIX 2 files to MADRIX 3 files by choosing "Export" > "Export for MADRIX3...". Choose between "Setup" to export the whole Setup File, "Storage Place" > "Storage A"/"Storage B" to export the currently selected Storage Place on Storage A or Storage B, "Storage Place" > "All..." to export all occupied Storage Places from Storage A and from Storage B, or "Patch..." to export the Patch file only. A new window opens. Simply enter a name for the corresponding file and press "Save". You can then load the files in MADRIX 3.
The menu also displays a number of setups that were used last ("Recent files").
Click on the menu item "Exit" to close MADRIX.
Learn more in the chapter File Types.
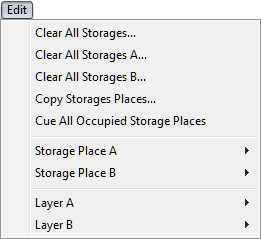
In the Edit menu you can "Clear All Storages", "Clear All Storages A", and "Clear All Storages B". This actions will clear all settings on selected Storages.
With the item "Copy Storage Places" you can copy one, multiple, or all Storage Places from Storage A to B or from Storage B to A. A new window will open. Read the chapter Storage Places, Submaster, and Cue for more information.
The option "Cue All Occupied Storage Places" adds all Storage Places to the Cue List if they are not empty.
The two items "Storage Place A" and "Storage Place B" represent the context menus of the Storage Places of Storage Area A or Storage Area B, respectively.
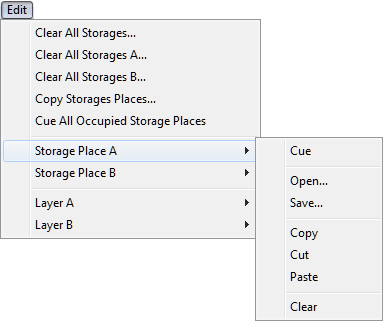
In these menus, use "Cue" in order to add the currently selected Storage Place to the Cue List. Use "Open" to load a Storage Place or "Save" the currently selected Storage Place (in *.mef format). Use "Copy", "Cut", and "Paste" to perform the analog actions. The "Clear" function will reset the currently selected Storage Place, i.e. all changes will be deleted. Learn more in the chapter Storage Places, Submaster, and Cue.
The two items "Layer A" and "Layer B" represent the context menus of the effect layers of Storage Place A or Storage Place B, respectively.
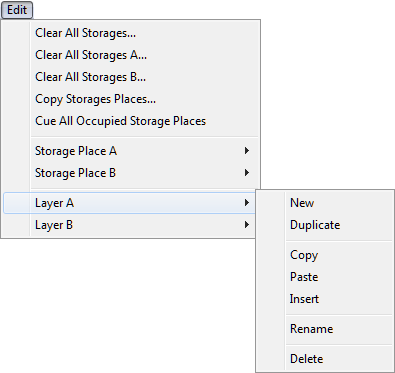
In these menus, use "New" to create a new layer with default settings. Use "Duplicate" to reproduce the selected layer, which will add a copy next to it. Use "Copy" to store the settings of the selected layer to the clipboard. Then, use "Paste" to apply the stored settings to the layer you have currently selected. This does not create a new layer, but overwrites the settings. Click "Insert" to create a new layer using the settings stored in the clipboard. "Rename" allows you to change the description of the layer tab. Use "Delete" in order to remove the layer in use from the effect. Learn more in the chapter Layers.
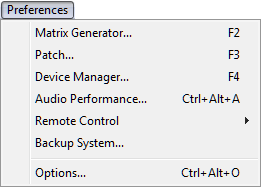
The Preferences menu contains various items for settings: the "Matrix Generator", the "Patch", "Device Manager" and "Audio Performance", "Remote Controls", the "Backup - System", and "Start Options".
The "Matrix Generator" (or "F2") is the easiest way to set up your light matrix (chapter). After creating your matrix with the help of the Matrix Generator you can use the "Patch" (or "F3") for further configuration (chapter).
The "Device Manager" (or "F4") is the main tool to configure your devices. You can set up your DMX (DMX-OUT and DMX-IN) or DVI devices, Art-Net or MIDI hardware, audio input settings, and visualizers, like WYSIWYG from Cast Software.
Click on "Audio Performance" (or "Ctrl+Alt+A") to open the dialog for setting up the audio performance and audio optimization.
You can use "Remote Control" with MADRIX by using DMX-IN, Art-Net Remote, MIDI-IN, and Remote HTTP.
MADRIX comes with an integrated web server and can be controlled remotely via an internet browser. You can activate this feature by clicking on the menu item "Remote Control" -> "HTTP". MADRIX includes an integrated DMX-IN and MIDI-IN feature as well and can be controlled remotely with your lighting desk or DJ/VJ MIDI console. You can activate this feature by clicking on the menu item "Remote Control" -> "DMX" or "MIDI". For more information, please have a look at the chapter INPUT & Remote Control.
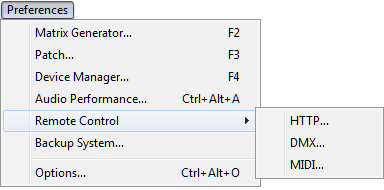
For more information regarding the integrated backup solution, have a look at the chapter Backup System.
You can access MADRIX options by clicking "Options" (or "Ctrl+Alt+O") in the preferences menu. Please read the corresponding chapter to get more details.
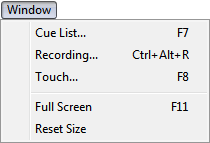
The window menu includes options for the "Cue List" window, the "Recording" window, the "Touch" Screen window and the MADRIX user interface (GUI) in general.
"Cue List" (or "F7") opens the implemented MADRIX Cue List. Read the chapter Cue List for more information.
"Recording" (or "Ctrl+Alt+R") opens a tool to record MADRIX effects. You can read more about the recording function in the Chapter Recording.
"Touch" (or "F8") opens the extra Touch Screen Window to control MADRIX via a touch screen panel. Read the chapter Touch Screen for more info.
"Full Screen" (or "F11") maximizes the graphical user interface of MADRIX to fit the full screen, i.e. the full size of your monitor. For more information, see Full Screen Mode.
"Reset Size" will apply the default size to the MADRIX user interface, in case you changed its size by moving the borders of the window.
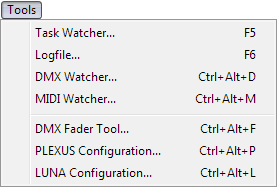
The "Task Watcher..." (or "F5") provides detailed operational information.
The "Logfile..." (or "F6") keeps track of all warnings and system information.
The "DMX Watcher..." (or "Ctrl+Alt+D") allows you to monitor your DMX output or Input while using MADRIX.
The "MIDI Watcher..." (or "Ctrl+Alt+M") allows you to check your MIDI connection.
The "DMX Fader Tool..." (or "Ctrl+Alt+F") can help to check whether single LED fixtures are working correctly or not.
The "PLEXUS Configuration..." (or "Ctrl+Alt+P") is the tool to configure and manage your MADRIX PLEXUS devices.
The "LUNA Configuration..." (or "Ctrl+Alt+L") is the tool to configure and manage your MADRIX LUNA devices.
You can read more in the chapter Tools,
in the chapter MADRIX PLEXUS,
or in the chapter MADRIX LUNA.
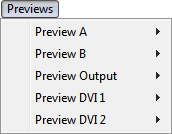
The output and preview windows of the software can be adjusted using the menu Previews. Those settings are explained in more detail in the next chapter Preview Windows.
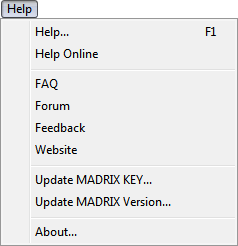
"Help..." (or "F1") will open this user guide document, locally on your computer.
"Online Help" will open the user guide online using your default web browser.
"FAQ" is an online link to frequently asked questions about the software.
"Forum" is an online link that will take you to the MADRIX user forum, where users and developers exchange ideas about MADRIX.
"Feedback" is an online link, which will open your web browser with a MADRIX Contact Form. If you wish, please enter your comments into the form and send it to us. Thank you!
"Website" will open the MADRIX website in your default web browser.
"Update MADRIX KEY..." allows user to upgrade or update the MADRIX KEY within MADRIX. See the chapter The MADRIX KEY for more details.
"Update MADRIX Version..." can be used if you wish to update the MADRIX manually. The software will then check online if newer versions are available for downloading.
"About..." will provide you with information about your MADRIX product and the MADRIX version.