Introduction
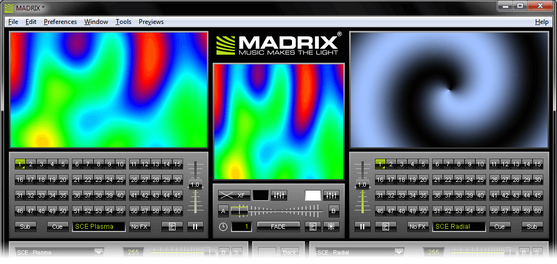
This chapter explains the three preview windows (Preview A, Preview B, and Preview Output).
"Preview A" and "Preview B" represent the two preview windows for the two MADRIX effect pipelines. The centered "Preview Output" window is a preview of the actual data output that is shown on your LEDs. With the help of the preview windows you are able to have a look at the effects before they are displayed on your installation.
DVI previews are explained at the end of this chapter.
Context Menu
Overview
All preview windows have a context menu. In order to show it, please click the right mouse button inside a preview window.
You can choose from "Grid", "Stretch Pixels", "Show Status Information", "Show Clock", "Use Background Image" and "Disable Preview".
You can also access this menu using the menu "Previews".
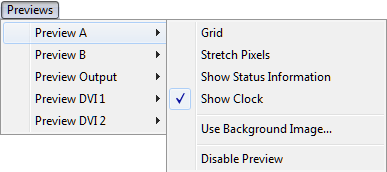
Grid
This option activates an optical raster display showing separating the single pixels. If the resolution is too high, the grid will not be visible anymore.
Stretch Pixels
Use this option to extend the preview windows to the full frame. If activated, the content will be stretched as well in the previews.
Show Status Information
The name of the preview, the current matrix size, and the current frames per second of this preview will be displayed at the top of a preview window, when this option is activated.
Show Clock
If you activate "Show Clock", you will see the system time in the preview. In the example above it is 14:28:159, German time (GMT +01), or 03:18:39 pm.
Background Image
If you click "Use Background Image" a dialog will open to select a file. You may load *.bmp, *.gif, *.jpg, *.png, *.tif, or *.tiff files as background images for your previews.
An example is given below.
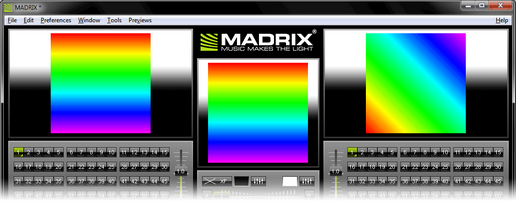
The recommended resolution for background images and Preview A or B is: |
|
The recommended resolution for background images for Preview Output is: |
|
Patch Mask
Only the Preview Output offers this option. Learn more: Activating or Deactivating Mask Mode.
Clear Message
Only the Preview Output offers this option. If necessary, MADRIX displays errors and warnings in this preview. Choose "Clear Message" to discard the message. It will not be displayed anymore. Such a message could look like this:

Disable Preview
If you want to deactivate a preview window, choose this option. This might be helpful to save resources and increase performance.
The Mask Mode - Previews With Darker Areas
Part 1 - Too Many Channels Used
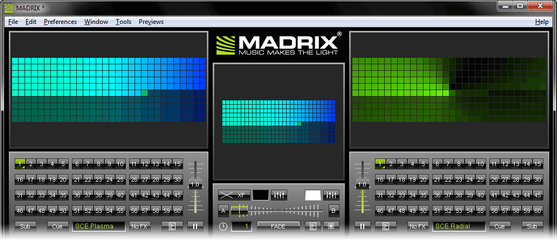
If a darker area is displayed in the preview windows, the size of your matrix is larger (the set-up has more DMX channels) than your MADRIX version supports. In the example above, you can see a darker area because this MADRIX set-up has more than 512 channels and the version is valid only up to 512 channels. As a result, all fixtures beyond 512 channels will be displayed darker than the first 512 channels.
You can check your MADRIX version here: "Help" -> "About MADRIX".
Part 2 - Creating An Individual Patch
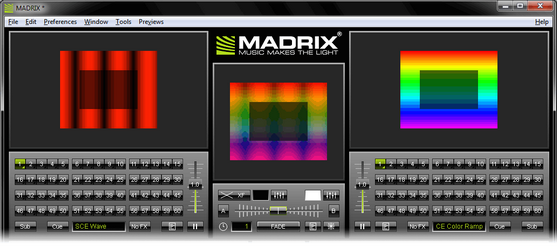
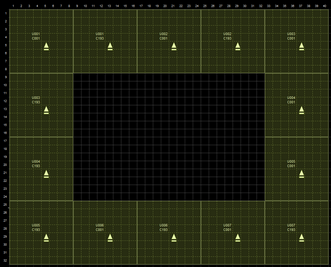
There is another possibility that you will see a darker area in the previews apart from the issue with the version. This will be the case if you have created a Patch with areas where no fixtures are located. These areas without any fixtures will automatically be displayed darker to indicate that this area is not in use. In the picture given above, a dark area is shown in the middle of all previews. The corresponding patch would look like this:
Activating or Deactivating Mask Mode
As was described above, the internal preview windows will reflect the Patch you have created. Every pattern will be visible. LEDs that will be used are displayed brighter than pixels without LED fixtures. In MADRIX you can select two different modes for this regarding Preview A, B, and Output.
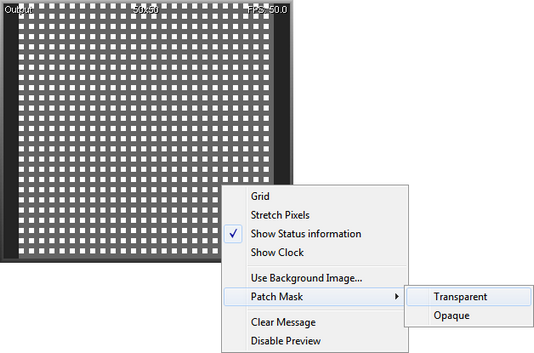
Activating Mask Mode (Transparent Pixels) |
If you would like to see all pixels of your overall LED matrix, perform a right-click in the Preview Output, navigate to "Patch Mask" and select "Transparent". This will influence all three Previews. |
|
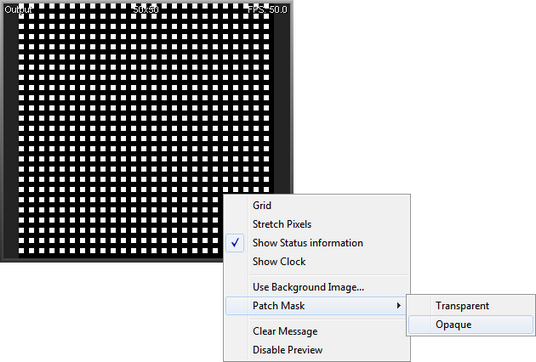
Deactivating Mask Mode (Opaque Pixels) |
If you would like to show only the grid that includes the pixels in use, perform a right-click in the Preview Output. Then, navigate to "Patch Mask" and select "Opaque". This will influence all three Previews. |
|
Further Configuration
To change the settings of the Previews, please read the chapters User Interface and Performance.
DVI Previews And DVI Output
With MADRIX dvi start, MADRIX dvi, MADRIX professional, and MADRIX ultimate you are provided with DVI output.
With the DVI output you can easily control LED pixel walls or use screen-capturing, for example.
Learn more about this in the chapter DVI.
