This topic includes:
MADRIX 5 includes recording features. The main areas of application are:
▪MADRIX AURA
[Stand-alone playback of pre-recorded scenes from SD card. Available via direct network record or conversion of record files.]
For more information about the product in this user manual, see »MADRIX AURA
▪MADRIX PLEXUS
[Discontinued product that is still supported by MADRIX 5.5. Stand-alone playback of pre-recorded scenes from SD card with up to 2 universes of output. Available via conversion of record files.]
For more information about the product in this user manual, see »MADRIX PLEXUS
▪SCE Video
[Playback of pre-recorded scenes within the MADRIX 5 Software itself, which provides specific advantages. See »MREC Conversion]
For more information about this MADRIX Effect in this user manual, see »SCE Video
All required workflows will be explained in this chapter in the sections below.
Initial Configuration
Target And Other Options
First, you need to decide what kind of record you wish to create:
▪Network Record
- Is only available for MADRIX AURA. By starting a Network Record, MADRIX AURA will automatically start the recording process, when you start recording in MADRIX 5.
- Make sure to send data to the device [Art-Net or Streaming ACN] before you start a recording process!
▪MADRIX Record
- MADRIX 5 Record files [of the file type *.mrec] can be used for MADRIX AURA [further conversion required as explained below], MADRIX PLEXUS [further conversion required as explained below], and SCE Video [direct playback available; no conversion required].
▪1] Go to the menu Preferences > Options... > Recording
[Keyboard shortcut: Ctrl+Alt+O > Recording]
▪2] Choose the type of record under General > Target
▪3] In addition, set up the required frequency [FPS]
- This refers to the main mixer of MADRIX 5 and its recording processing thread.
- If you are recording MADRIX Record *.mrec files, this is also the frame rate of the resulting file.
- If you are creating Network Records, the output settings of the Device Manager set the recorded frame rate for each device for unicast connections.
- If you are creating Network Records with broadcast connections, this is also the frame rate of the resulting file.
▪4] Set up the Buffer Size for MADRIX Records.
▪5] Set up Group if you have chosen Network Record. Depending on your Group settings, the record will be started for all connected MADRIX AURA or only for the devices in a specific sync group.
▪For more information, see »Recording

Patching
Configure your virtual LED matrix with the help of the »Matrix Generator or »Patch Editor to define the correct patch for your record.
Recording Locations
In order to record, there are several locations in the MADRIX 5 Software where you can create records.
Overview
You can find the Main Output Recording directly on the main user interface.
As the name implies, you will record everything from your Main Output. This will include any crossfades, effect changes, brightness changes, etc.

Important Note
▪Only the Main Output will be recorded. Make sure that your content is displayed on Preview Output before you start to record.
How To Record
▪Left Mouse Click - Click REC in order to start the recording process.
- The context menu allows for more options. Learn more below.

▪The button will now pulsate in red and a new window will open to see more details.

- State - Shows the current status of the recording process [Started, Stopped].
- FPS - Shows the currently set recording frequency in Frames Per Second. Learn more »Recording
- Duration - Shows how long the record currently is in HH:MM:SS:FF [hours:minutes:seconds:frames].
- Frame Count - Shows the total number of single frames that has been recorded and created.
- Key Frame Count - Shows the total number of frames that differ from each other. The MADRIX 5 Software will automatically optimize the file size of records if recorded frames are identical. Hence, the total number of frames can be different to the number of recorded key frames. For example, a color change [without a fade] might use only two colors. In this case, the record may have 400 frames in total, but just 2 key frames.
- Buffer Usage - Shows the status of the temporary memory when creating a MADRIX Record. The higher the progress bar, the more memory is used. You can set the Buffer Size in the Options. Learn more »Recording
- Memory Usage - Shows the currently used main memory [RAM] when creating a MADRIX Record. You will receive a warning icon if the recording process is likely to use too much memory with the following tooltip: The required memory has reached a critical amount in relation to the total physical memory (RAM)! Learn more »Recording
- Close - Only closes the watcher window, but does not stop the recording process.
▪Left Mouse Click - Click REC a second time in order to stop the recording process.
▪If you have Network Records enabled in the Options, the software will wait 2 seconds after each record to allow devices to process the received data. The recording status then shortly switches to Pending.

▪Please wait a few seconds to let the software process the data. You will be asked for the location to store the record file on your hard drive as well as a name for the file. Click Save in order to confirm.
▪If needed, you can edit your records after the initial recording process. Learn more below.
Context Menu
▪Right Mouse Click - Click REC in order to call up the context menu.
- Set Duration... - Allows you to set a specific time that the record should last [HH:MM:SS].
- Watch... - Calls up the Main Output Recording window again for more details.
- Options... - Calls up the Recording Options. Learn more »Recording
- Cancel - Aborts the recording process without asking you to save the file.
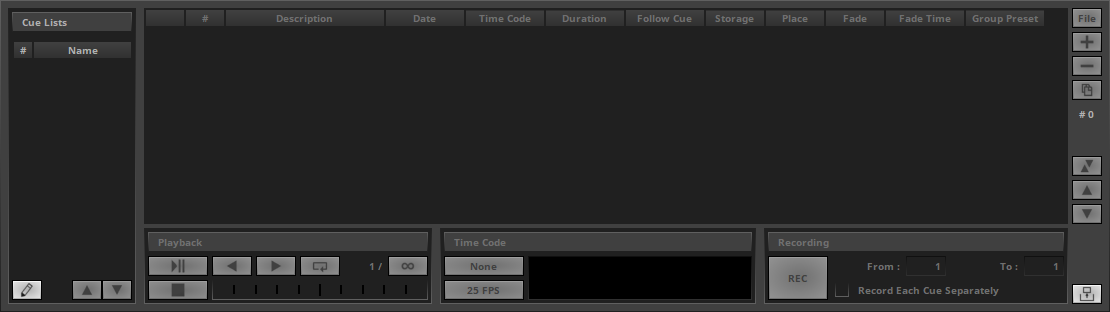
Overview
The Cue List Recording features are part of a Cue List.
You can open the Cue List Editor in 3 ways:
▪Go to the menu Tools > Cue Lists...
▪Or press F7
▪Or click Layers > Cue Lists on the user interface.
Important Notes
▪Make sure to create a Cue List first. Otherwise, Cue List Recording is not available.
▪All cues need to have a Duration!
▪Learn more »Cue List Editor
How To Record
▪From - Defines the cue to start with. Enter the desired value. The default value is 1.
▪To - Defines the last cue to record to, and thus creates a range from cue to cue. The default value is the last cue of the Cue List.
▪Record Each Cue Separately - Activate this option if you want to create single records of each single cue; instead of creating a recording that includes the entire duration of the Cue List including all of the cues.
- You will be asked to choose a folder first in which files will be created by the software [when using MADRIX Records as target].
- Fades and Fade Times will be ignored and will not be part of the created records.
- Files will be named CueNumber_CueListName_CueDescription.*
▪Left Mouse Click - Click REC in order to start the recording process.

▪The button will now pulsate in red and a new window will open to see more details.

- State - Shows the current status of the recording process [Started, Stopped].
- FPS - Shows the currently set recording frequency in Frames Per Second. Learn more »Recording
- Duration - Shows how long the record currently is in HH:MM:SS:FF [hours:minutes:seconds:frames].
- Frame Count - Shows the total number of single frames that has been recorded and created.
- Key Frame Count - Shows the total number of frames that differ from each other. The MADRIX 5 Software will automatically optimize the file size of records if recorded frames are identical. Hence, the total number of frames can be different to the number of recorded key frames. For example, a color change [without a fade] might use only two colors. In this case, the record may have 400 frames in total, but just 2 key frames.
- Buffer Usage - Shows the status of the temporary memory when creating a MADRIX Record. The higher the progress bar, the more memory is used. You can set the Buffer Size in the Options. Learn more »Recording
- Memory Usage - Shows the currently used main memory [RAM] when creating a MADRIX Record. You will receive a warning icon if the recording process is likely to use too much memory with the following tooltip: The required memory has reached a critical amount in relation to the total physical memory (RAM)!
Learn more »Recording
▪If you have Network Records enabled in the Options, the software will wait 2 seconds after each record to allow devices to process the received data. The recording status then shortly switches to Pending.

▪The software will automatically stop the recording process according to your settings.
▪Please wait a few seconds to let the software process the data. You will be asked for the location to store the record file on your hard drive as well as a name for the file. Click Save in order to confirm.
▪If needed, you can edit your records after the initial recording process. Learn more below.
Context Menu
▪Right Mouse Click - Click REC in order to call up the context menu.
- Watch... - Calls up the Cue List Recording window again for more details.
- Options... - Calls up the Recording Options. Learn more »Recording
- Cancel - Aborts the recording process without asking you to save the file.
Overview
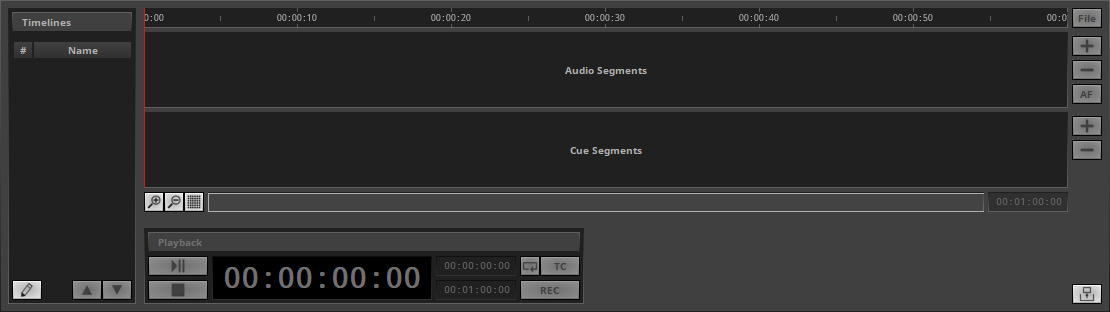
The Timeline Recording feature is part of the Timeline and Timeline Editor.
You can open the Timeline in 3 ways:
▪Go to the menu Tools > Timelines...
▪Or press F10
▪Or click Layers > Timelines on the user interface.
Important Note
▪Make sure to create a Timeline first. Otherwise, Timeline Recording is not available to you.
▪Learn more »Timeline Editor
How To Record
▪Set up Playback > Start Time and Playback > End Time to define the length of the record.
▪Left Mouse Click - Click REC in order to start the recording process.
- Playback of the Timeline will start automatically.
- The context menu allows for more options. Learn more below.
▪The button will now pulsate in red and a new window will open to see more details.
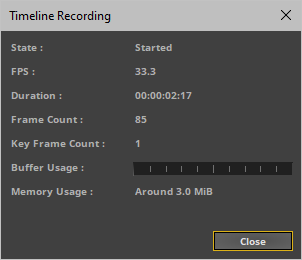
- State - Shows the current status of the recording process [Started, Stopped].
- FPS - Shows the currently set recording frequency in Frames Per Second. Learn more »Recording
- Duration - Shows how long the record currently is in HH:MM:SS:FF [hours:minutes:seconds:frames].
- Frame Count - Shows the total number of single frames that has been recorded and created.
- Key Frame Count - Shows the total number of frames that differ from each other. The MADRIX 5 Software will automatically optimize the file size of records if recorded frames are identical. Hence, the total number of frames can be different to the number of recorded key frames. For example, a color change [without a fade] might use only two colors. In this case, the record may have 400 frames in total, but just 2 key frames.
- Buffer Usage - Shows the status of the temporary memory when creating a MADRIX Record. The higher the progress bar, the more memory is used. You can set the Buffer Size in the Options. Learn more »Recording
- Memory Usage - Shows the currently used main memory [RAM] when creating a MADRIX Record. You will receive a warning icon if the recording process is likely to use too much memory with the following tooltip: The required memory has reached a critical amount in relation to the total physical memory (RAM)! Learn more »Recording
- Close - Only closes the watcher window, but does not stop the recording process.
▪Left Mouse Click - Click REC a second time in order to stop the recording process.
▪If you have Network Records enabled in the Options, the software will wait 2 seconds after each record to allow devices to process the received data. The recording status then shortly switches to Pending.
▪Please wait a few seconds to let the software process the data. You will be asked for the location to store the record file on your hard drive as well as a name for the file. Click Save in order to confirm.
▪If needed, you can edit your records after the initial recording process. Learn more below.
Context Menu
▪Right Mouse Click - Click REC in order to call up the context menu.

- Watch... - Calls up the Timeline Recording window again for more details.
- Options... - Calls up the Recording Options. Learn more »Recording
- Cancel - Aborts the recording process without asking you to save the file.
Overview
It is possible to edit MADRIX Record files for additional fine tuning.
▪Go to the menu Tools > Record Editing...
[Keyboard shortcut: Ctrl+Alt+R]
▪A new window will open.

Records
This section allows you to work with your record files.
Directory
|
▪Defines a directory on your harddisk/computer. All record files will be saved in this folder. By default, a useful folder is automatically already chosen for you [For example C:\Users\USERNAME\Documents\MADRIX5\records]. ▪Use ... to choose a different folder. |
Filter |
▪Simply enter a name/word and the filter will only show files that include these characters in their file name. Delete any input to show all files again. |
List |
▪Files, i.e. records, will be displayed in the large list of the Recording window. If you did not create any records yet, the list is empty [as shown above]. |
|
▪Shows all MADRIX 5 Record files [of the file type *.mrec] in the list that could be found in the specified directory. When activated, the button is green. Disable the option to hide all Record files. |
|
▪Show all DMX Data files [of the file type *.dxd] in the list that could be found in the specified directory. When activated, the button is green. Disable the option to hide all DMX Data files. |
|
▪Refreshes the list of records. Please make sure to select your preferred records directory first. |
File |
▪Shows the name of the record and its file type [of the file type *.mrec or *.dxd]. Double-click on the list entry to change the name of the file. |
Date - Time |
▪Shows the time and date when the record was created. |
Matrix Size |
▪Shows the size of the virtual matrix [Matrix Size] used for this record. Learn more »Patch Editor |
Duration |
▪Shows the length of the record, i.e. how long it is. The format is HH:MM:SS:FF [Hours:Minutes:Seconds:Frames]. |
KF |
▪Stands for Key Frames. MADRIX 5 will automatically optimize the file size of records if recorded frames are identical. Hence, the total number of frames can be different to the number of recorded key frames. For example, a color change [without a fade] might use only two colors. In this case, the record may have 400 frames in total, but just 2 key frames. |
FPS |
▪Stands for Frames Per Second. Shows the number of frames recorded per second of the record file. |
|
▪Deletes selected files from your harddisk. You can also use the Del key on your keyboard. |


File Information
▪Select a file in the list.
▪Go to the tab File Information to show detailed information about the record file you have created.

Record-Editing Process
▪1] Select your Record file in the list.
▪2] Select the tab Record Editing

▪A small preview window is provided in the lower left to inspect the record.
▪Please note: If you see the message !NO MADRIX 5 KEY! in the preview window and a rotating cross, that means that you are using MADRIX 5 in demo mode. However, this is no problem. Your record will NOT include this text!
▪3] Use the provided controls to edit your record:
|
▪Use the slider to select a specific frame. ▪Use the small, white triangles to manually set up the In Frame [start frame] and the Out Frame [end frame] for the record. |
|
▪This field displays the current frame that is also shown in the small preview window. Enter a number to jump directly to this frame. |
|
▪Start or stop the preview playback. |
|
▪Rewind or forward one frame per click. |
|
▪Skip directly to the In Frame or the Out Frame. |
|
▪Skip to the beginning or the end of the record. |
|
▪Enter a number or use the slider to select a specific frame. Then, use the S button to set the In Frame [start frame]. |
|
▪Enter a number or use the slider to select a specific frame. Then, use the S button to set the Out Frame [end frame]. |
|
▪MADRIX 5 will search the Record File in order to find a segment that is loopable. It will automatically set the In Frame and Out Frame afterwards. Use the button Export to export your loop. Before that, you can also insert Blend Frames. |
|
▪Insert Blend Frames into your record if you want to. |
|
▪Use this button to export the edited record. Choose a name in the second step. |


Overview
Edited or unedited MADRIX Record files can be played back directly in SCE Video.
MADRIX AURA and MADRIX PLEXUS require additional conversion, as explained below.
Follow these steps to play back a record file in SCE Video:
1] Select the effect SCE Video.

2] The controls of the SCE Video effect become available as a result.

3] Load your MADRIX 5 Record file [of the file type *.mrec].
 Use Open and select the file you wish to play.
4] The SCE Video effect will play your Record file.

Overview
MADRIX Record files cannot be used with MADRIX AURA or MADRIX PLEXUS without converting them into DMX Data files [of the file type *.dxd] first.

Requirements
MADRIX 5 License
▪A MADRIX KEY with a valid MADRIX 5 License that unlocks the needed DMX channels is required in order to use this feature!
Patching
Configure your virtual LED matrix with the help of the »Matrix Generator or »Patch Editor to define the correct patch for your record.
Note
▪The DXD Conversion tab only factors in the settings of the Patch and not the settings of the Device Manager.
▪If your live output via the Device Manager works and you have changed the assignment of DMX universes, please make sure to adjust the settings in the DXD Conversion tab as well!
Step-By-Step Instructions
▪1] Go to the menu Tools > Record Editing... > DXD Conversion
[Keyboard shortcut: Ctrl+Alt+R]
▪2] First, select one *.mrec file from the list of Records at the top.
- Only generate from one, single *.mrec file at a time. It is not possible to generate from multiple *.mrec files at the same time. Repeat the steps for each record file you wish to convert.
▪3] Add new items for the conversion in the following way:
Note: If your are using more than 1 device at the same time [for example, 3x MADRIX AURA 2 in Master-Slave Synchronization], make sure to create a list entry for each device.
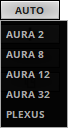
|
AUTO - Automatically adds items to the list for the conversion. Choose the type of device first: AURA 2, AURA 8, AURA 32, PLEXUS The number of entries will automatically be added according to the number of patched DMX universes in your Patch in the Patch Editor. The more universes are configured, the more entries will be added. |
|
+ - Allows you to manually add items to the list for the conversion. Choose the type of device first: AURA 2, AURA 8, AURA 32, PLEXUS Add as many entries as needed. For example if you want to convert one record file for different types of devices or if one record file should be played back simultaneously by several devices with different universe assignments each.
|
|
— - Removes an item from the list. Select an item in the list first. |
|
Duplicate - Creates copies of list items. Select one or several items in the list first. |


▪4] Edit the properties in the following way:
# |
Index - References the number of items in the list. |
Device Type |
Shows the device type that had been chosen before creating the list item. Left Mouse Double-Click - Allows you to edit the value. Choose a different device type if needed [AURA 2, AURA 8, AURA 32, PLEXUS]. |
DMX |
Defines which DMX universes of your Patch (virtual LED matrix) will be used for the output ports of the chosen device type. Please assign the correct universes. At least one universe needs to be assigned. Universes that are not included in the Patch will be automatically removed. ▪AURA 2 - A maximum of 2 DMX universes can be assigned. ▪AURA 8 - A maximum of 8 DMX universes can be assigned. ▪AURA 32 - A maximum of 32 DMX universes can be assigned. ▪PLEXUS - A maximum of 2 DMX universes can be assigned. Left Mouse Double-Click - Allows you to edit the value. Simply enter each number of the required universes you would like to assign. Separate multiple universes by entering a , [comma] in-between. Use Enter to apply the changes. - The software will automatically fill in default values according to the assigned DMX universes in your Patch in the Patch Editor.
Please note: Consider the particular situation when recording with MADRIX 5 for MADRIX AURA: |
Author |
Is automatically filled in by the software by using the name of your Windows account. Left Mouse Double-Click - Allows you to edit the value. Simply enter a different name. Use Enter to apply the changes. |
Scene Name |
Is automatically filled in by the software by using the name of the record file. Left Mouse Double-Click - Allows you to edit the value. Simply enter a different name. Use Enter to apply the changes. |
File Name |
Is automatically filled in by the software by using the name of the record file and adding an index number. Left Mouse Double-Click - Allows you to edit the value. Simply enter a different name. Make sure that the file name has the ending .dxd. Use Enter to apply the changes. |
Incorporate Recorded Master Values |
Can be activated if you have used the Master during recording. Then, your converted record will include the brightness levels set by the Master during the recording. Leave the option unchanged if your did not use the Master or do not want to include it. |
▪5] Convert record files by generating the final DXD files:
|
Generate - Starts the conversion process to convert MADRIX Record files [*.mrec] into DMX Data files [*.dxd]. ▪Generate DMX Data files [*.dxd] for each of your recordings. ▪You may create several, different DMX Data files [*.dxd] from a single MADRIX Record file [*.mrec] ▪Your MADRIX Record file [*.mrec] will not be deleted when DMX Data files [*.dxd] are generated. ▪You cannot generate different DMX Data files [*.dxd] from different MADRIX Record file [*.mrec] at the same time! Only generate DMX Data files [*.dxd] from one, single MADRIX Record file [*.mrec] every time. ▪When using multiple devices at the same time in one installation, you will need multiple DMX Data files [*.dxd]. Usually, each device receives its own file or files with their specific universe assignments. |
|
Progress Bar - Shows the progression of the current conversion with the help of a progress bar. |


▪6] Upload the DXD files to your devices and create a configuration [PLEXUS] or Cue List [AURA] according to your requirements.
▪Example:
Creating DXD files from one record file for 3x MADRIX AURA 2 in Master-Slave Synchronization could look like this for example:

Warnings
You might encounter certain warnings during your workflow.
Correct Patch
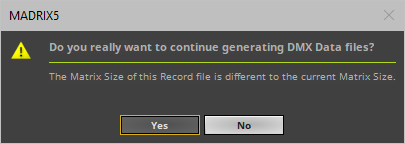
▪As described above, you need to configure your virtual LED matrix (Patch including Matrix Size) correctly, before generating DMX Data files. This message box is a reminder to check if your Patch settings in the Patch Editor are configured correctly.
▪Click Yes if you would like to proceed with your current settings.
▪Click No if you would like to change your settings.
Frame Rate For MADRIX PLEXUS
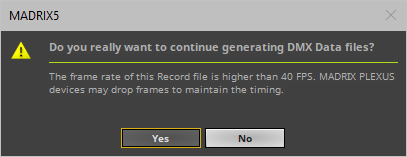
▪The maximum recommended frame rate for the MADRIX PLEXUS is 40 FPS (a frame time of 25ms). This message box is a reminder to check if your frame rate settings in the Preferences > Options > Recording are configured correctly.
▪Click Yes if you would like to continue with your current settings.
▪Click No if you would like to change your settings.
| MADRIX 5.7. |
| [Ctrl & +/-] = Zoom In/Out | [Ctrl & 0] = 100% |
|
Previous Next
|
|
Enable Automatic Translation | Activer La Traduction Automatique | 启用自动翻译 |