This topic includes:
▪Menu
▪Context-Menu And Keyboard Navigation
The Patch is an extremely useful tool to quickly address and connect RDM devices [mainly lighting fixtures], that is setting their DMX start address. It considerably speeds up the configuration and setup times of your lighting project.
▪Go to the menu Devices > Patch...
[Keyboard shortcut: F3]
The following is a general overview. The workflows on how to work with this tool are described below.
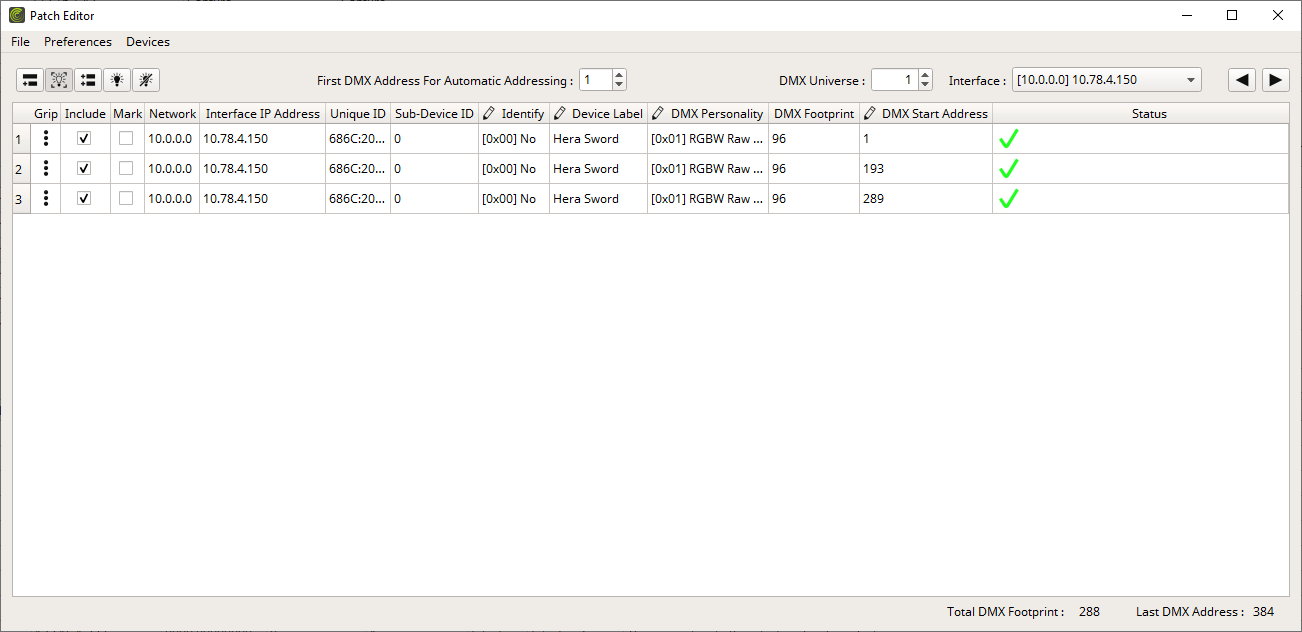
Grip |
Left Mouse Click + Hold + Drag & Drop - Indicates that you can change the order of devices by dragging & dropping the corresponding lines in the list. The order determines the addressing order when using the automatic patching process. Learn more below. |
Include
|
Allows you to choose which devices to include in the automatic patching process. Learn more below. |
Mark |
Colorizes the corresponding line of the list in green to label it for easy referencing, especially in long lists. |
Network |
Shows the network adapter, and its network IP address in particular, to which the RDM device is connected. [This information refers to »Art-Net.] |
Interface IP Address |
Shows the IP address of the hardware interface to which the RDM device is connected. [This information refers to »Art-Net.] |
Unique ID |
Represents a unique identifier of the RDM device. It is shown as HEX [without 0x] and using a colon [:] as separator. The first part is the ESTA ID of the manufacturer and the second part is a number, which can be freely defined by the manufacturer. |
Sub-Device ID |
Shows the sub-device ID for RDM devices that have one. For all others, the value is 0. |
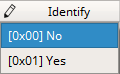
Identify |
Can be edited. Allows you to choose/activate the built-in identification mode of the RDM device if available from the device. This usually means that the device will fully flash in white. |
Device Label |
Can be edited. Shows the currently set name or description of the RDM device. |
DMX Personality |
Can be edited. Shows the currently set DMX personality of the RDM device. This can also be referred to as operation mode of the RDM device. |
DMX Foot Print |
Shows the number of DMX channels a device uses; and as such requires for individual control. Depends on the currently set DMX personality. |
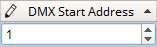
DMX Start Address |
Can be edited. Shows the currently set DMX start address of the RDM device. [Learn more »Glossary] |
Status
|
Shows the current status of the patching process regarding this device. |
Total DMX Footprint
|
Shows how many channels are currently occupied by the devices in the list. |
Last DMX Channel
|
Shows the last occupied channel of the currently selected DMX universe. - If the channels of the last RDM device exceed the defined limited of 512 of the DMX standard, the number will be highlighted in orange. |


Please note: This list cannot be sorted by clicking on one of the column headers. The order of list entries defines the order devices are addressed when activating automatic addressing. The order of items needs to be set completely intentionally by you.
File
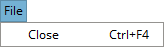
▪Close - Closes the Patch window.
Preferences

▪Address Devices Automatically - Enables and activates the automatic patching process. Learn more below. Is disabled by default to not re-address devices unintentionally. It will also automatically be deactivated again after closing the Patch.
[Keyboard shortcut: Ctrl + Shift + R]
▪Identify Selected Devices Automatically - Automatically sets the Identify parameter to On in case one or more devices are selected in the list. [The parameter is set to Off for all devices that are not selected; or upon deselection.]
Devices

▪Address Devices Continuously (Set:DmxStartAddress) - Recalculates the DMX addresses for all currently shown RDM devices and sets the new addresses [by sending the corresponding request to the devices].
[Keyboard shortcut: Ctrl + R]
- As such you can trigger the automatic patching process once for the currently shown devices.
▪Identify All Devices (Set:IdentifyDevice) - Sets the Identify parameter to On for all devices.
[Keyboard shortcut: Ctrl + Alt + Shift + F7]
▪Stop Identifying All Devices (Set:IdentifyDevice) - Sets the Identify parameter to Off for all devices.
[Keyboard shortcut: Ctrl + Shift + F7]
|
Address Devices Automatically - Enables and activates the automatic patching process. Learn more below. |
|
Identify Selected Devices Automatically - Automatically sets the Identify parameter to On in case one or more devices are selected in the list. |
|
Address Devices Continuously (Set:DmxStartAddress) - Recalculates the DMX addresses for all currently shown RDM devices and sets the new addresses [by sending the corresponding request to the devices]. - As such you can trigger the automatic patching process once for the currently shown devices. |
|
Identify All Devices (Set:IdentifyDevice) - Sets the Identify parameter to On for all devices. |
|
Stop Identifying All Devices (Set:IdentifyDevice) - Sets the Identify parameter to Off for all devices. |
First DMX Address For Automatic Addressing |
Defines the first DMX address to use when addressing devices in the automatic patching process. As such, it defines the DMX start address of the first device in the list. |
DMX Universe |
Defines which DMX universe is currently shown; and as such shows all devices that are assigned to this universe. Pay attention to this setting! It has a profound effect on how the Patch works and how it shows the current status. For example, if Universe is set to 1 and Interface is set to All, the Patch is likely to display status messages for issues, which may not be an issue at all. Make sure to switch to a single interface in order to check or use Previous / Next to check all interfaces and universes one by one. |
Interface |
Shows all interfaces that have RDM devices connected for the currently selected DMX Universe. As such, it allows you to narrow the list of shown RDM devices to specific hardware interfaces. Pay attention to this setting! It has a profound effect on how the Patch works and how it shows the current status. For example, if Universe is set to 1 and Interface is set to All, the Patch is likely to display status messages for issues, which may not be an issue at all. Make sure to switch to a single interface in order to check or use Previous / Next to check all interfaces and universes one by one. |
|
Previous / Next - Provide buttons for quick navigation. |


Context-Menu And Keyboard Navigation
▪Right Mouse Click - Perform a click with your right mouse button on an entry.
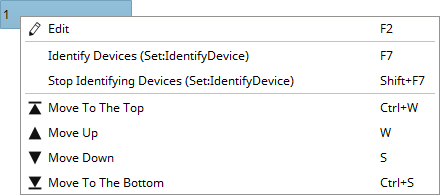
Identify Selected Devices (Set:IdentifyDevice) |
Sets the Identify parameter to On for all currently selected devices. [Keyboard shortcut: F7] |
Stop Identifying Selected Devices (Set:IdentifyDevice) |
Stops the identification mode for all currently selected devices. [Keyboard shortcut: Shift + F7] |
Move Selected Devices To The Top |
Sends the currently selected item to the very top of the list in order to place it first. |
Move Selected Devices Up |
Moves the currently selected item one place up in the list. |
Move Selected Devices Down |
Moves the currently selected item one place down in the list. |
Move Selected Devices To The Bottom |
Sends the currently selected item to the very bottom of the list in order to place it last. |
It is recommended to set the correct Universe and Interface first or use Previous / Next accordingly [as described above].
Overview
▪ In specific cases, the edit icon [that is, a pen] shows that the respective information/column can be edited by you.
Single Edits
▪Left Mouse Click + Hold - Allows you to select a single cell.
▪Left Mouse Double-Click - Perform a double-click with your left mouse button on a value in order to edit it.
▪Keyboard shortcut: F2
▪Confirm with Enter [or click outside of the currently active cell with the mouse]. Abort any changes with Escape.
|
You may be presented with different choices for the specific parameter. |
|
You may be able to directly enter numbers or text as input. |
Multi-Edits
▪Ctrl + Left Mouse Click or Shift + Left Mouse Click + Select First List Entry + Select Last List Entry - Allows you to select multiple items in the list.
▪Ctrl + A - Selects all devices in the list.
▪F2 - Activates the edit mode for multiple devices at once. Select multiple devices first.
▪Confirm with Enter [or click outside of the currently active cell with the mouse]. Abort any changes with Escape.
Valid Values And Limits
The valid values for each parameter are defined by the RDM device and its set of features [such as DMX Personality], the RDM standard [such as Identify], or a different standard [such as DMX Start Address for DMX512].
Visual Feedback For Edits
The software will show you if any changes you have made are set successfully or not. This status is shown for a couple of seconds after each change.
|
Green - The RDM device reported back that the changes were successfully set. |
|
Yellow - The request is currently pending. |
|
Red - The RDM device could not successfully set the new value or the request timed out. Learn more »Missing Responses From RDM Devices |


You can use the Patch to quickly set the DMX addresses for RDM devices [lighting fixtures]. As such, a workflow could look like described below.
Please note the available settings as described above as well as the individual characteristics of each project.
1] Set up the First DMX Address For Automatic Addressing.
2] Choose the DMX Universe you wish to work in.
3] Change Interface > All to the first interface.
4] Activate Address Devices Automatically [via keyboard shortcut, the menu, or the toolbar]. MADRIX RADAR will automatically address each RDM device according to the order in the list and their equivalent DMX foot print.
5] Select each device in the list while having Identify Selected Devices Automatically activated. The corresponding fixture will light up on the installation.
6] If a fixture is not addressed correctly, use drag & drop in the list to correct the order of devices. MADRIX RADAR will automatically re-address all subsequent RDM devices.
7] Select a device to set its identify mode to On and double-check the order of devices and their addresses again.
8] ![]() - Quickly navigate through universes and hardware interfaces using the navigation buttons and repeat the above steps for each universe/hardware interface.
- Quickly navigate through universes and hardware interfaces using the navigation buttons and repeat the above steps for each universe/hardware interface.
You can manually set up the DMX addresses of an RDM device. As such, a workflow could look like described below.
It is recommended to set the correct Universe and Interface first or use Previous / Next accordingly [as described above].
1] Select a device in the list while having Identify Selected Devices Automatically activated. The corresponding fixture will light up on the installation.
2] Manually enter the correct DMX Start Address in the corresponding column of the list.
3] Proceed accordingly with the next RDM devices.
4] ![]() - Quickly navigate through universes and hardware interfaces using the navigation buttons and repeat the above steps for each universe/hardware interface.
- Quickly navigate through universes and hardware interfaces using the navigation buttons and repeat the above steps for each universe/hardware interface.
▪The Patch will only show devices if their display is covered by a valid MADRIX RADAR license. Learn more »License System
▪Please note that if a device reports back a DMX foot print of 0, automatic patching will not work in this case.
▪RDM does not support changing the assignment of the DMX universe of a device.
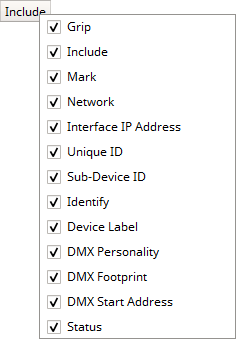
MADRIX RADAR allows you to choose which columns are presented in this view. You can decide which columns are hidden or shown.
▪Right Mouse Click - Perform a click with your right mouse button anywhere on the header of the list.
|
Shown - A checkmark means that columns are shown. |
|
Hidden - No checkmark means that columns are hidden. |
Grid |
Shows or hides the Grid column. |
Include |
Shows or hides the Include column. |
Mark |
Shows or hides the Mark column. |
Network |
Shows or hides the Network column. |
Interface IP Address |
Shows or hides the Interface IP Address column. |
Unique ID |
Shows or hides the Unique ID column. |
Sub-Device ID |
Shows or hides the Sub-Device ID column. |
Identify |
Shows or hides the Identify column. |
Device Label |
Shows or hides the Device Label column. |
DMX Personality |
Shows or hides the DMX Personality column. |
DMX Footprint |
Shows or hides the DMX Foot Print column. |
DMX Start Address |
Shows or hides the DMX Start Address column. |
Status |
Shows or hides the Status column. |