This topic includes:
Merging several Patches into a single Patch is a feature and part of the MADRIX 5 Patch Editor. Learn more »Patch Editor
While the Patch Editor can only load and activate 1 Patch at a time, it allows you to merge Patches together.
That means you can combine separate Patch files into one Patch file.
▪The Patch Editor allows you to merge 2 Patches in one procedure.
▪By repeating the procedure, you can merge more than 2 Patches.
Merging several Patches can be useful, for example, when:
▪Working on a large LED installation and first creating and testing the Patch for each section separately.
▪Having different team members create different parts of an overall Patch.
▪Wanting to join two separate LED projects into one larger project later.
1] Create Your Patches
▪In order to merge two Patches, the different Patches need to be ready and available first.
▪Make sure to have all Patch files saved and available in one location, such as the hard drive of your computer.
Patch 1 Example |
Patch 2 Example |
|
|


2] Load Patch 1
▪Load Patch 1 in the Patch Editor [menu Preferences > Patch Editor... > File > Open Patch...].
▪Or load Patch 1 as part of a MADRIX 5 Setup [menu File > Open Setup...].
3] Activate The Merge Patches Feature
▪Go to the menu Preferences > Patch Editor... > File > Merge Patches...
▪Select Patch 2 from its stored location, such as the hard drive of your computer.
▪A new window will open.

4] Adjust The Settings
▪The Merge Patches windows provides information about Patch 1 and Patch 2 and it requires you to adjust several settings in order that both Patches are merged according to your requirements.
▪See the following table for more information:
General Information |
|||
Properties |
Patch 1 |
Patch 2 |
Merged Patch |
DMX Fixture Count |
Shows the total number of DMX fixtures included in Patch 1. |
Shows the total number of DMX fixtures included in Patch 2. |
Shows the total number of DMX fixtures that will be included when the Patches are merged into one Patch. |
DVI Fixture Count |
Shows the total number of DVI fixtures included in Patch 1. |
Shows the total number of DVI fixtures included in Patch 2. |
Shows the total number of DVI fixtures that will be included when the Patches are merged into one Patch. |
Fixture Group Count |
Shows the total number of fixture groups in Patch 1. |
Shows the total number of fixture groups in Patch 2. |
Shows the total number of fixture groups that will be included when the Patches are merged into one Patch. |
Merge Settings |
|||
Properties |
Patch 1 |
Patch 2 |
Adjusted Patch 2 |
Fixture IDs |
Shows the unique identifiers for fixtures included in Patch 1. |
Shows the unique identifiers for fixtures included in Patch 2. |
- Since all Fixture IDs need to be unique, the settings for Patch 2 need to be adjusted here. |
Fixture Group IDs |
Shows the unique identifiers for fixture groups included in Patch 1. |
Shows the unique identifiers for fixture groups included in Patch 2. |
- Since all Fixture Group IDs need to be unique, the settings for Patch 2 need to be adjusted here. |
|
|
|
|
Map Area X |
Shows where fixtures are mapped in Patch 1 along the X-axis (e.g., position |
Shows where fixtures are mapped in Patch 2 along the X-axis (e.g., position |
- Defines the adjusted position of Patch 2 in X. |
Map Area Y |
Shows where fixtures are mapped in Patch 1 along the Y-axis (e.g., position |
Shows where fixtures are mapped in Patch 2 along the Y-axis (e.g., position |
- Defines the adjusted position of Patch 2 in Y. |
Map Area Z |
Shows where fixtures are mapped in Patch 1 along the Z-axis (e.g., position 1) and how many pixels are mapped in Z in total (e.g., 1 px). |
Shows where fixtures are mapped in Patch 2 along the Z-axis (e.g., position 1) and how many pixels are mapped in Z in total (e.g., 1 px). |
- Defines the adjusted position of Patch 2 in Z. |
|
|
|
|
DMX Universes |
Shows which DMX universes are used in Patch 1. |
Shows which DMX universes are used in Patch 2. |
- Defines the adjusted DMX universes for Patch 2. |
Properties |
Patch 1 |
Patch 2 |
Merged Patch |
Matrix Size X |
Shows the total number of DMX fixtures included in Patch 1. |
Shows the total number of DMX fixtures included in Patch 2. |
- Defines the Matrix Size in X that will be set when the Patches are merged into one Patch. |
Matrix Size Y |
Shows the total number of DVI fixtures included in Patch 1. |
Shows the total number of DVI fixtures included in Patch 2. |
- Defines the Matrix Size in Y that will be set when the Patches are merged into one Patch. |
Matrix Size Z |
Shows the total number of fixture groups in Patch 1. |
Shows the total number of fixture groups in Patch 2. |
- Defines the Matrix Size in Z that will be set when the Patches are merged into one Patch. |
Color Depth |
Shows the maximum color depth as defined in Patch 1. |
Shows the maximum color depth as defined in Patch 2. |
- Defines the color depth that will be set when the Patches are merged into one Patch. |
▪Please set up all settings of the column Adjusted Patch 2 as required and confirm with OK
▪You can abort the process at any time with Cancel
5] Result
▪As a result of the Merge Patches procedure, you will now have created 1 Patch out of 2 Patches.
▪Overlapping will be activated in the Patch Editor automatically if needed.
▪The Workspace of the Patch Editor will be extended automatically if needed.
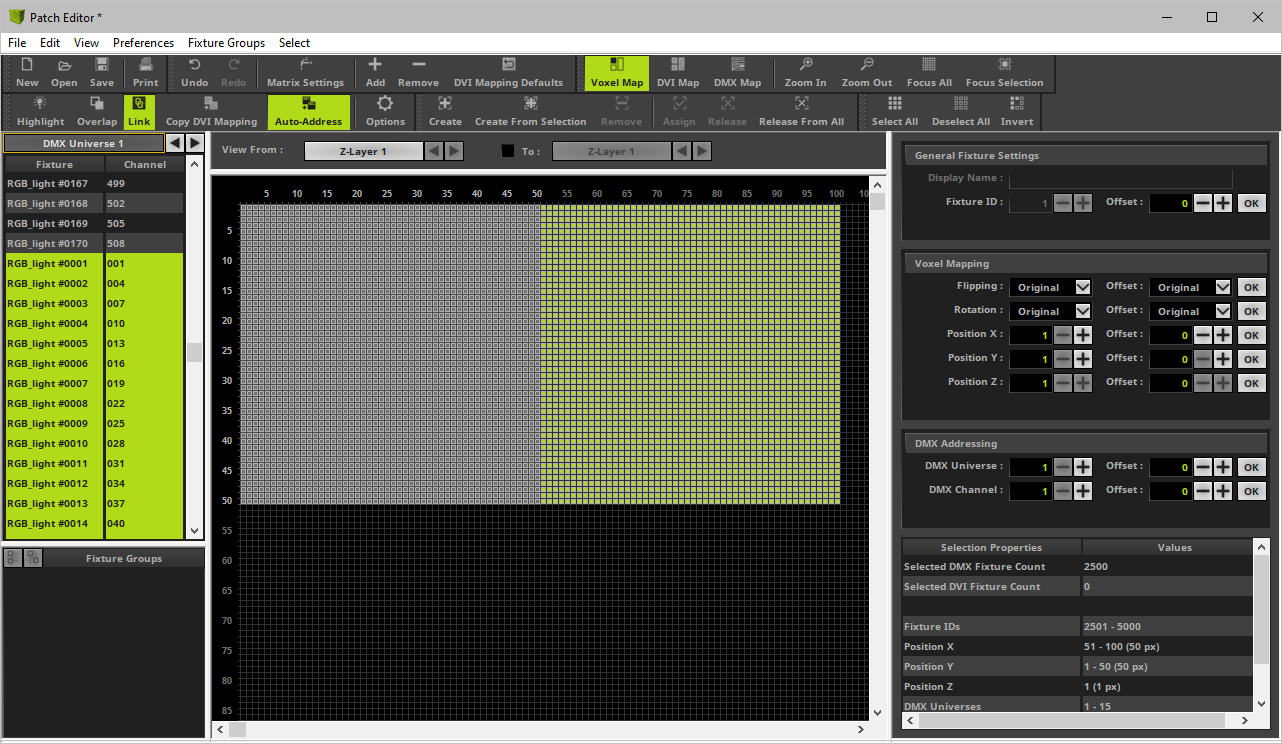
▪All imported fixtures of Patch 2 will be automatically selected for you after the procedure.
▪You can use Undo or Redo to rewind the procedure or apply it again after a rewinding.
▪Make sure to save your Patch or MADRIX 5 Setup afterwards!
Merge Settings Result Example |
|
Merged Patch Result Example |
|

| MADRIX 5.7. |
| [Ctrl & +/-] = Zoom In/Out | [Ctrl & 0] = 100% |
|
Previous Next
|
|
Enable Automatic Translation | Activer La Traduction Automatique | 启用自动翻译 |