This topic includes:
▪DMX-IN Via Ethernet Network [Streaming ACN / sACN]
DMX-IN Via Ethernet Network [Streaming ACN / sACN]
You can connect MADRIX STELLA over Ethernet network to the network card of your computer that runs the MADRIX 5 Software. Data is sent to the STELLA via a port and from the STELLA to the MADRIX 5 via Ethernet network.
▪Connect your external DMX controller to the DMX port of MADRIX STELLA.
▪Connect MADRIX STELLA to power.
[Please see safety instructions in the MADRIX STELLA Technical Manual & Quick Start Guide!]
▪Connect MADRIX STELLA to your computer via network cabling.
▪It is highly recommended to use Gigabit Ethernet network components [network card, switches, etc.].
▪Set up the corresponding settings in the »Configuration Using A Web Browser
▪MADRIX 5 automatically sets up Streaming ACN network settings for you.
▪You only need a computer with a network card and a valid IP address.
▪You do not have to change the IP address settings in Windows for Streaming ACN!
▪The IP address range for sACN devices is 239.255.X.X according to the Streaming ACN specifications.
[Even if your sACN devices are set to a different IP address range, you may try the connection from MADRIX 5 to your devices.]
▪Make sure that your Firewall does not block data of the 239.255.X.X IP address range!
▪Check the settings of the Windows Firewall.
▪Learn more »Tips [Microsoft Windows / Networks / USB]
▪Go to the menu Preferences > Options... > Devices Network
[Keyboard shortcut: Ctrl+Alt+O > Devices Network]
▪Activate ESTA - Streaming ACN
▪Choose your network card from the drop-down list. Make sure to select the correct network adapter that will be used for Streaming ACN!
[The IP address and Subnet mask label should help you select the correct adapter. It is not necessary to change any of these networks settings.]
▪ACN Device Count - Set up how many you are going to use.
[This is the total amount of OUT and IN devices. Please set the exact number of devices you are using. If the count is higher, this creates unnecessary network traffic.]
▪Click Apply
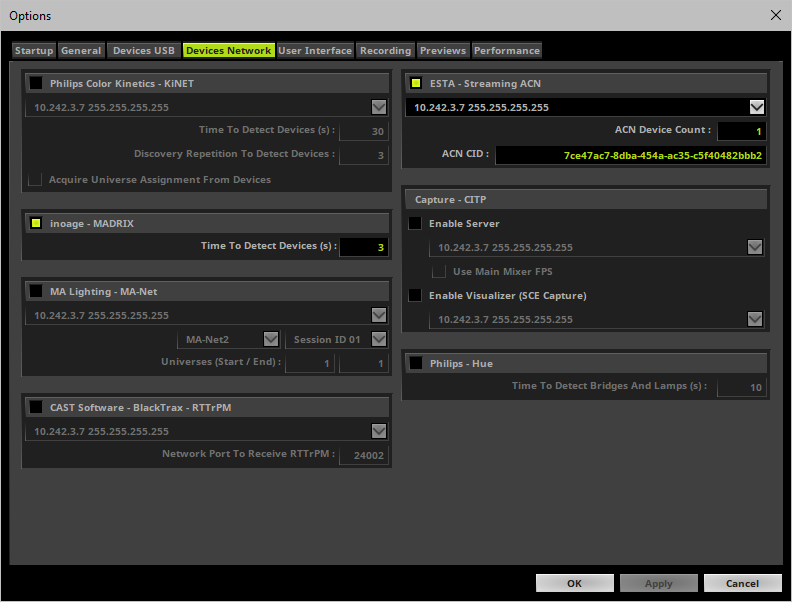
▪ACN CID - Being a network protocol, Streaming ACN sends a so-called CIDs [Component Identifier].
- Every single ACN device has such a unique ID.
- When using Streaming ACN, your MADRIX 5 Software is one of those devices.
- When you start MADRIX 5 for the first time, this ID will be generated automatically for you. From this point onwards it will be used on your PC.
- With this ID your MADRIX 5 Software can be easily identified in the network. Interfaces can detect this unique ID and can be configured to receive data from this particular device. Please note that the ACN interface must support this feature.
- Do not change the ACN CID, unless you are an experienced user!
▪Click OK to close the window.
▪Go to Preferences > Device Manager... > DMX Devices
[Keyboard shortcut: F4]
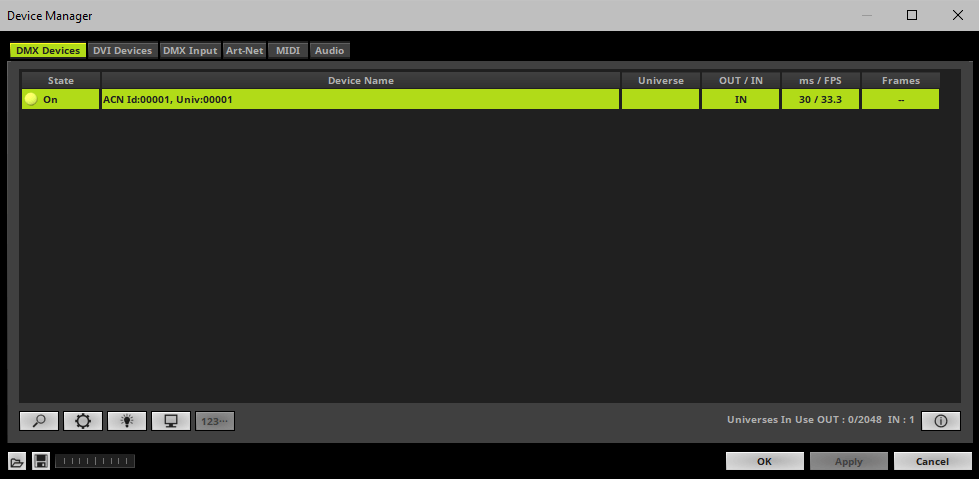
▪MADRIX 5 automatically creates and adds the number of interfaces to the list.
[according to ACN Device Count]
▪Select your device.
▪Right Mouse Click on the column OUT / IN to set to IN for data input if you wish to receive incoming data through this device.
▪In DMX-IN mode, you will not be able to select the ACN protocol. MADRIX 5 will automatically select the correct protocol version.
▪Set up the frame time for your device.
- Right Mouse Click or Left Mouse Double-Click on the column ms / FPS and enter the required number.
- The frame time [in milliseconds; ms] affects the frame rate. The frame rate specifies how fast data is sent to the device or received from it [in Frames Per Second; FPS].
- Increase the frame time in order to decrease the frame rate [e.g., 40 ms = 25 FPS].
- Decrease the frame time in order to increase the frame rate [e.g., 20 ms = 50 FPS].
- The default value is 30 ms / 33.3 FPS.
- The minimum value is 1000 ms / 1 FPS.
- The maximum value is 5 ms / 200 FPS.
Please note: If you want to output high frame rates, make sure to set Main Mixing FPS in the Options to the same value in order to render the same frame rate [It is set to 50 FPS by default. Otherwise, frames will be duplicated].
Please note: If you want to input high frame rates, make sure to set DMX Controller Input FPS in the Options to the same value in order to process the same frame rate [It is set to 50 FPS by default. Otherwise, frames will be duplicated].
- Some LED fixtures might have problems with a low frame time / high frame rate. Then, it is recommended to increase the frame time / decrease the frame rate.
▪Note: If you are loading a MADRIX 5 Setup, please check if the number of ACN devices in your setup corresponds with the number that is activated. The Setup stores the number of devices. But if you changed the amount and then loaded the Setup, the newly defined number will be activated.
▪Make sure that your device is still selected under Preferences > Device Manager... > DMX Devices
▪Click ![]()
▪A new window will open.
Set up the following settings for your devices:
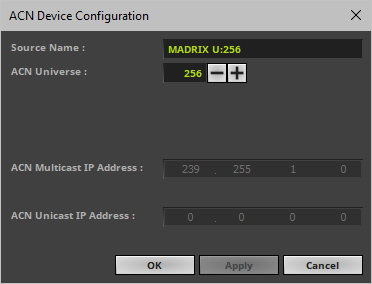
▪Source Name - Allows you to set up a specific name for the device. This name is send via network as well. Therefore, interfaces may be able to retrieve this name and can be configured to receive data from this source.
- If you are using the default name MADRIX U:X, the universe will automatically be displayed in the name [represented by X: 1, 2, 3, etc.].
▪ACN Universe - Defines the DMX universe from which data is received.
- Set up the same universe that is set up in your MADRIX STELLA according to the Web Configuration. By default, MADRIX STELLA sends input data to network universe 256 for DMX 1 and universe 255 for DMX 2. You can change these settings in the Web Configuration if required.
- According to the Streaming ACN specifications, MADRIX 5 will automatically change the ACN IP Address according to the ACN Universe.
▪Click Apply to confirm your changes.
▪Click OK to close the window.
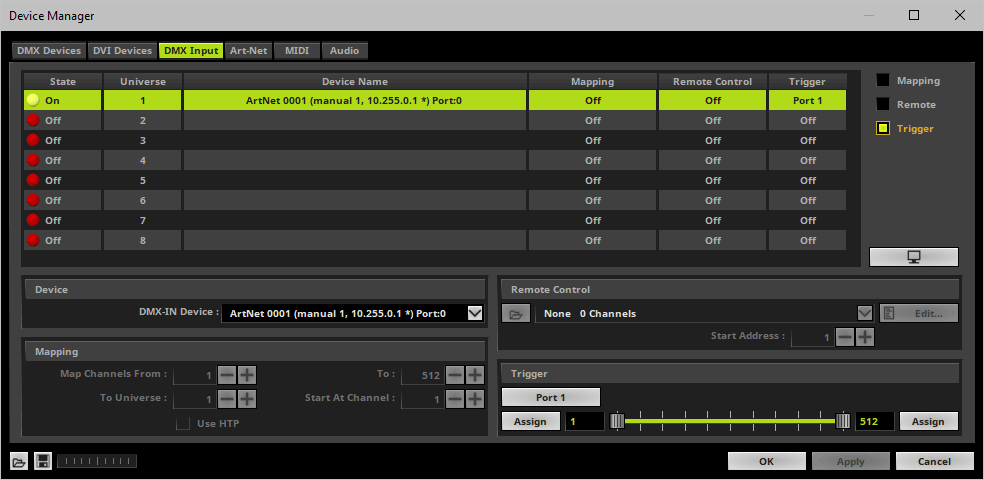
▪Go to the menu Preferences > Device Manager... > DMX Input
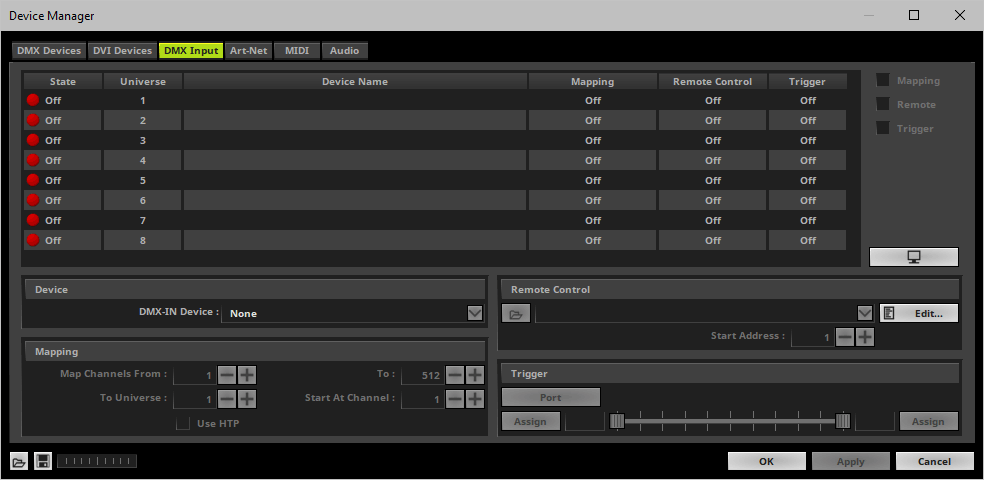
▪Select your preferred DMX Universe in the list.
[By default, DMX universe 1 to 8 are listed. If you wish to increase the number of DMX-IN universes, you can change the setting under menu Preferences > Options... > Performance]
▪Choose your DMX-IN Device in the section Device
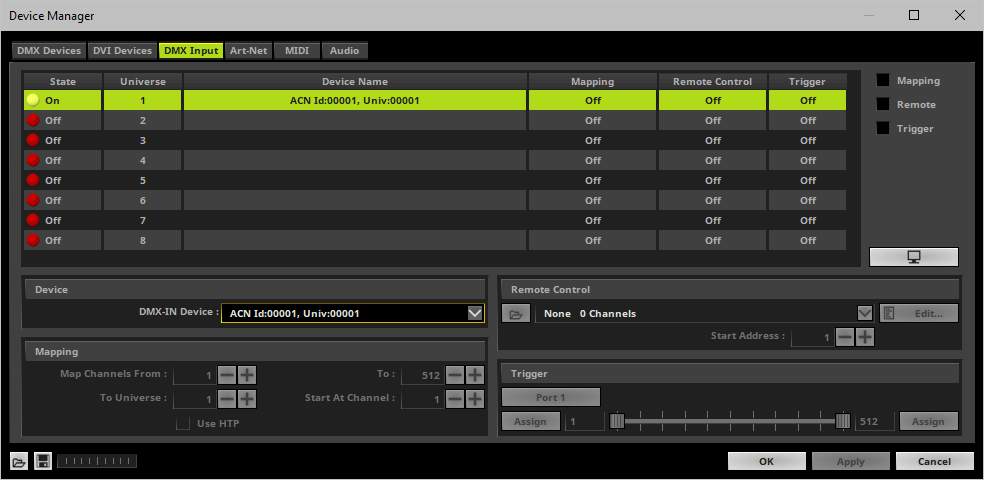
▪[If needed, you can disable DMX-IN by choosing None for your DMX-IN Device in the section Device]
▪sACN input is now activated. MADRIX 5 can already receive DMX data.
▪Now, choose how to use incoming data as explained below.
Data
▪At this point, MADRIX 5 is now already receiving any incoming data.
▪You can now use this data, for example for Scripts and Macros.
▪If you want to monitor incoming signals, select your DMX universe/DMX device in the list and click 
Mapping
▪Use Mapping, if you want to route incoming DMX signals through MADRIX 5 to your output [DMX-Thru].
▪First, select your device in the list.
▪Activate Mapping
▪This feature maps incoming data to the specified DMX universe and channels.
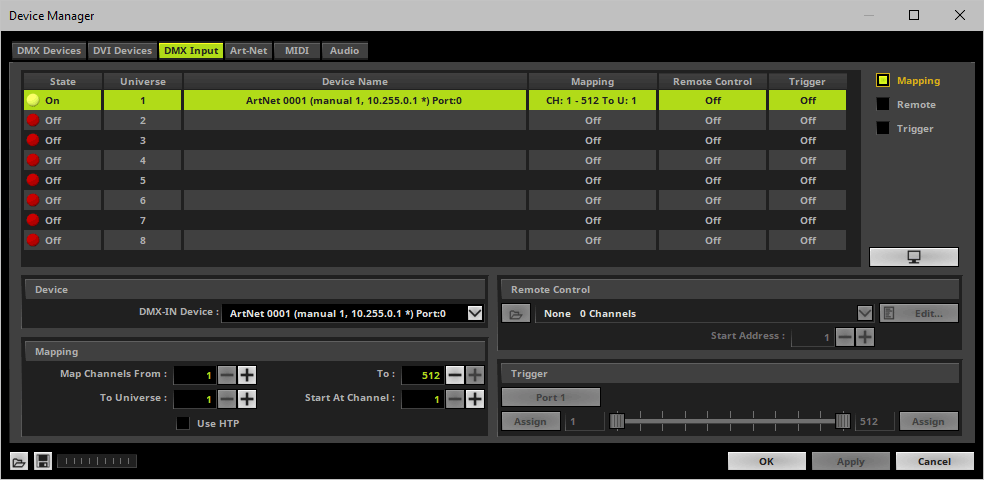
▪Configure the following settings in the section Mapping
- Map Channels From - Defines which incoming channels are used. This is the start channel to specify the range of channels.
- To - Defines which incoming channels are used. This is the end channel to specify the range of channels.
- To Universe - Defines onto which output DMX universe MADRIX 5 should map the specified range of incoming channels.
- Start At Channel - Defines the first DMX channel of the output DMX universe MADRIX 5 should use.
- Use HTP - Activates the Highest Takes Precedence feature. You can map incoming data to a DMX address range that MADRIX 5 already controls. Use HTP and MADRIX 5 will compare incoming values with the DMX data it sends to the DMX output. As a result, MADRIX 5 will only use the highest of both values on a particular channel and send it to the output.
▪Click Apply to confirm.
Remote Control
▪Use Remote Control, if you want to control the MADRIX 5 Software remotely
▪First, select your device in the list.
▪Activate Remote
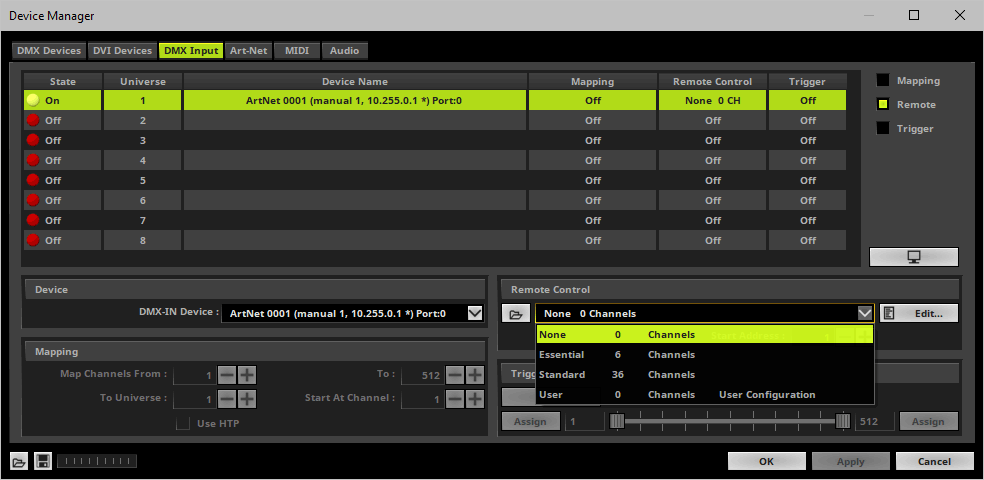
▪Select one of the built-in protocols in the section Remote Control as explained below
or create your own remote configuration.
|
Open - Loads a previously saved MADRIX 5 DMX Remote Configuration file [of the file type *.mdrx]. |
|
Protocols - Choose from a pre-configured protocol [configuration]. |
|
DMX-IN Remote Editor - Allows you to modify a configuration or create a new configuration. |
|
Start Address - Defines on which particular DMX channel the protocol should start. The whole protocol will be mapped to this new address area. |
|
DMX Watcher - Opens the DMX Watcher to monitor your DMX output or input. |
Trigger
▪Use Trigger, if you want to use incoming signals for the MADRIX 5 TRI Effects.
▪First, select your device in the list.
▪Activate Trigger
|
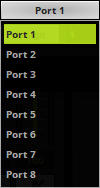
Port - Defines the port [Port 1 - 8] that is assigned to this DMX-IN Device. MADRIX 5 allows you to send trigger signals from up to 8 different devices [8 ports] and assign a MADRIX 5 TRI Effect the corresponding port. |
|
Value Range - Defines the range of incoming DMX values that can be used as trigger signal. |
|
Assign Minimum Value - Automatically assigns the minimum value when using the controller. |
|
Assign Maximum Value - Automatically assigns the maximum value when using the controller. |


