This topic includes:
File Transfer Control [FTC] aims to provide a standard method for the transfer of files.
RDM devices need to support this particular feature!
Make sure to select one or more devices first!
Please note that FTC can be used for extensive maintenance, such as transferring and applying firmware/bootloader files. Such processes are likely to interrupt the operation of the device causing temporary unavailability. It is thus not recommended to use FTC during live operation!
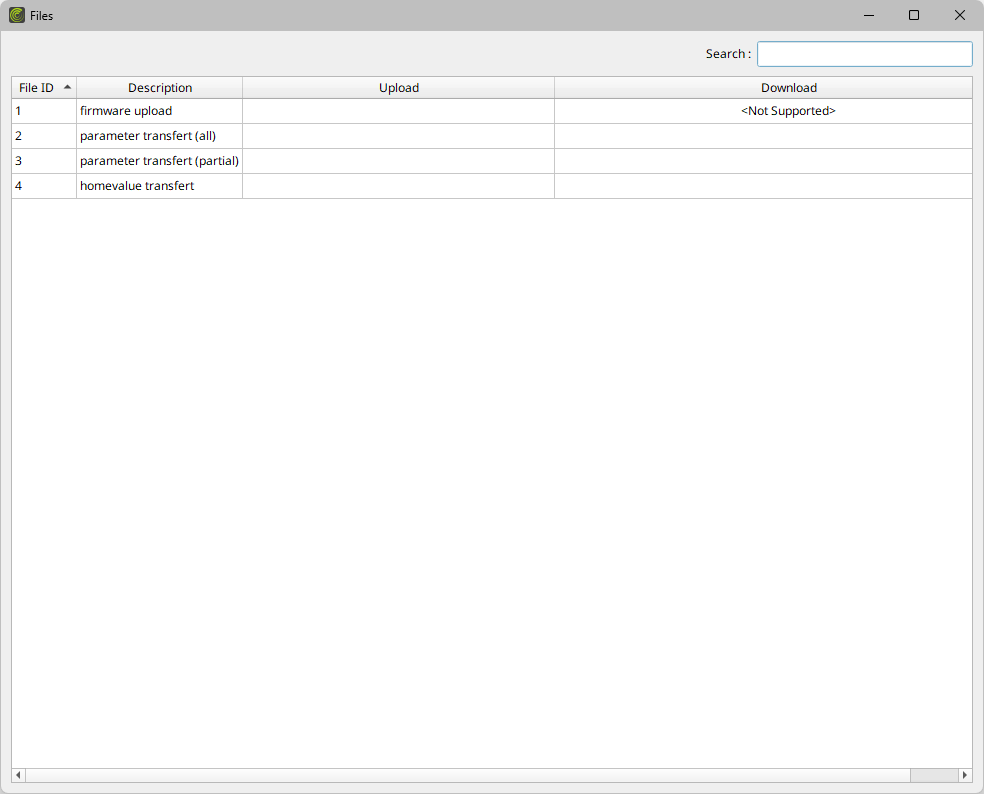
By default, the following information is provided since the following columns are enabled in the list:
File ID |
Represents the different file types/file formats a device supports [as reported by the device]. |
Description |
Shows a more in-depth explanation of the File ID [as reported by the device]. |
Upload |
Allows you to upload files to the device for the reported File ID. |
Download |
Allows you to download files from the device for the reported File ID. |
Make sure to upload only files with the correct file type/file format!
Workflow
Step 1]
Double-Click |
Perform a double-click with your mouse on a row. |
Step 2]
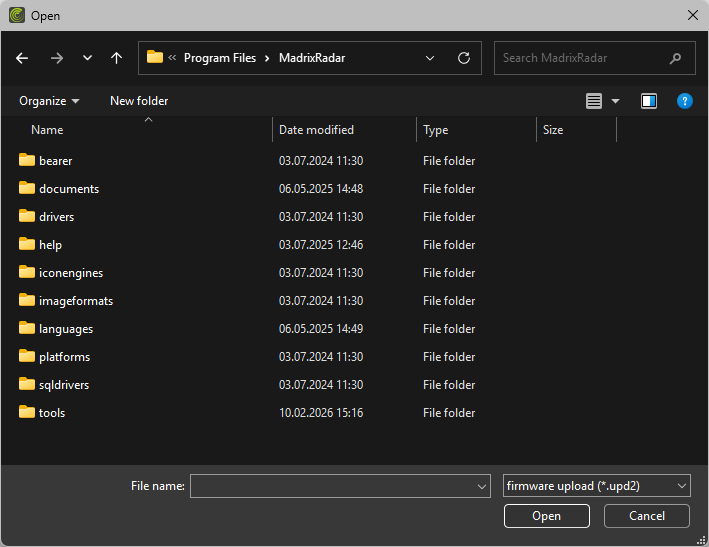
 |
Allows you to enter a complete file path, i.e. directory and file name, if you have that detailed information. |
 |
Allows you to choose a file from your system. |
Step 3]
 |
A progress bar shows the progression of the file upload. |
Step 4]
  |
Status messages show the current status of the process. Queued - The process will start soon. Initializing... - The process has been started. Committing... - The process is in its final stages, such as applying the new firmware on the device. Cancelling... - A cancellation has been manually ordered by the user. Successful - The process has been completed. Failed - There was a problem and the process has not been completed. Cancelled - The cancellation has been carried out. |
Step 5]
Manufacturers can define certain wait times during the process that the software will adhere to.
You can use the »Log to see how long RADAR needs to wait by searching for entries, such as "ftc", "initial delay time", "inter packet delay", "validation delay", "commit delay".
Multiple Devices
When selecting and uploading to several devices, MADRIX RADAR will ask you how to proceed:
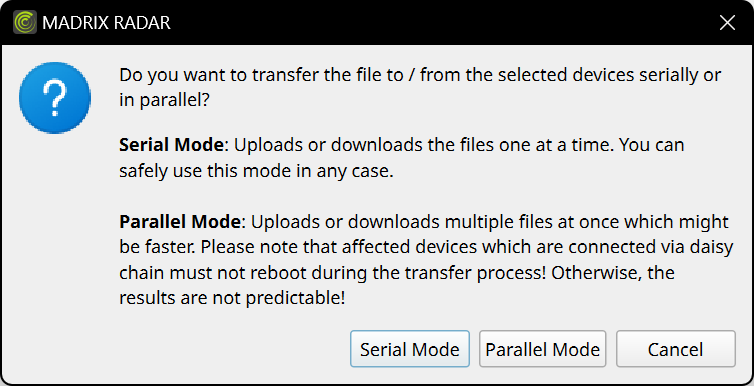
Choose Serial Mode if you are unsure how your devices are connected!
Serial Mode |
Is the slower but safer way of performing multiple uploads. |
Parallel Mode |
Is the faster but more risky way of performing multiple uploads. |
Cancel |
Aborts the upload process entirely. |
Workflow
Step 1]
Double-Click |
Perform a double-click with your mouse on a row. |
Step 2]
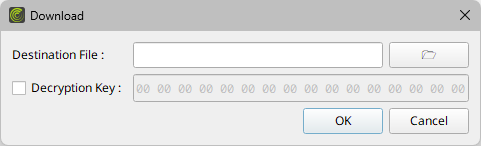 |
A new file dialog opens. |
Destination File |
Allows you to enter a complete file path, i.e. directory and file name, if you know that detailed information. Allows you to navigate on your system. A new file dialog opens [Save As]. Please navigate to the correct folder and enter a file name. 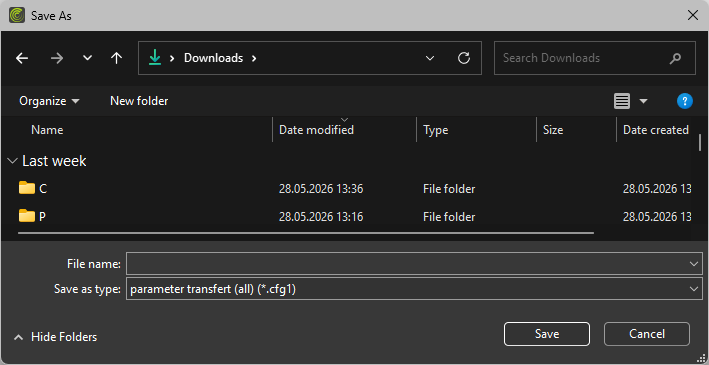 |
Decryption Key |
Some downloads my require you to enter a password before a download is permitted.
|
 Activate this option if you know a password is required.
Step 3]
|
A progress bar shows the progression of the file download. |
Step 4]
|
Status messages show the current status of the process. Queued - The process will start soon. Initializing... - The process has been started. Committing... - The process is in its final stages, such as validating the file. Cancelling... - A cancellation has been manually ordered by the user. Successful - The process has been completed. Failed - There was a problem and the process has not been completed. Cancelled - The cancellation has been carried out. |
Step 5]
Manufacturers can define certain wait times during the process that the software will adhere to.
You can use the »Log to see how long RADAR needs to wait by searching for entries, such as "ftc", "initial delay time", "inter packet delay", "validation delay", "commit delay".
Multiple Devices
When selecting and downloading from several devices, MADRIX RADAR will ask you how to proceed:
Choose Serial Mode if you are unsure how your devices are connected or operating!
Serial Mode |
Is the slower but safer way of performing multiple downloads. |
Parallel Mode |
Is the faster but more risky way of performing multiple uploads. |
Cancel |
Aborts the download process entirely. |
▪Right Mouse Click - Perform a click with your right mouse button on an entry.
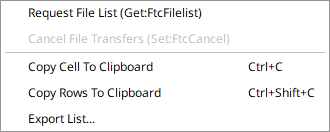
Request File List (Get:FtcFilelist) |
Sends a manual request to ask devices for their file list. |
Cancel File Transfers (Set:FtcCancel) |
Sends a manual request to abort any file transfers. |
Copy Cell To Clipboard |
Copies the currently selected cell [that is, single information] into the clipboard/temporary memory. [Keyboard shortcut: Ctrl + C] |
Copy Rows To Clipboard |
Copies the currently selected line or lines [that is, all parameter information] into the clipboard/temporary memory. [Keyboard shortcut: Ctrl + Shift + C] |
Export List... |
Saves the entire, currently shown list/view/table as a preformatted text file. |

▪Search - Enter any text in order to search all parameters in the list.
- Any device/line that includes the search term will be shown. All others are temporarily filtered out.
- Terms can be case-insensitive. You don't have to use capital letters.
- Feel free to use terms that are incomplete. For example, mad will include results for MADRIX.
- You may specify certain columns by using a colon [:].
- For example: Desc:Int shows all lines that include intensity slots by referencing the column Description, for example.
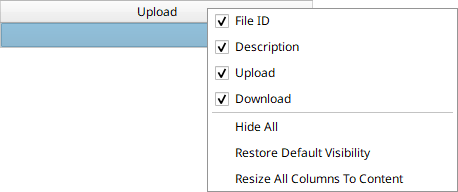
MADRIX RADAR allows you to choose which columns are presented in this view. You can decide which columns are hidden or shown.
▪Right Mouse Click - Perform a click with your right mouse button anywhere on the header of the list.
|
Shown - A checkmark means that columns are shown. |
|
Hidden - No checkmark means that columns are hidden. |
File ID |
Shows or hides the File ID column. |
Description |
Shows or hides the Description column. |
Upload |
Shows or hides the Upload column. |
Download |
Shows or hides the Download column. |
Hide All/Show All |
Hides or shows all columns, except for the first column. |
Restore Default Visibility |
Resets the view to the default settings. |
Resize All Columns To Content |
Automatically adjusts the width of all columns to be wider or smaller to comfortably fit all list entries as well as column headers. [This often means that the size of columns is reduced and more information can be displayed in the given space.] |

| MADRIX RADAR User Manual 1.5. |
| [Ctrl & +/-] = Zoom In/Out | [Ctrl & 0] = 100% |
|
Previous Next
|
|
Enable Automatic Translation | Activer La Traduction Automatique | 启用自动翻译 |