This topic includes:

MIDI [short for Musical Instrument Digital Interface] is a widely-known communication standard and digital interface.
In MADRIX 5, the main areas of application for MIDI are:
▪Using MIDI devices for audio input via MIDI
▪Using MIDI controllers for Remote Control
▪Using MIDI Time Code
▪Using MIDI controllers for MADRIX 5 TRI Effects
MIDI devices are often simply connected directly via USB or via a MIDI-to-USB interface to the computer.
To ensure interruption-free operation of the software and devices, please make sure to check the power-saving settings of Windows.
Learn more »PC Power Management
1] Connect your MIDI device.
2] Search for devices.
3] Choose how to use devices and incoming signals.
1] Connect Your MIDI Device
▪Connect your MIDI device to the computer.
▪Make sure that Windows recognizes the device and install drivers if necessary.
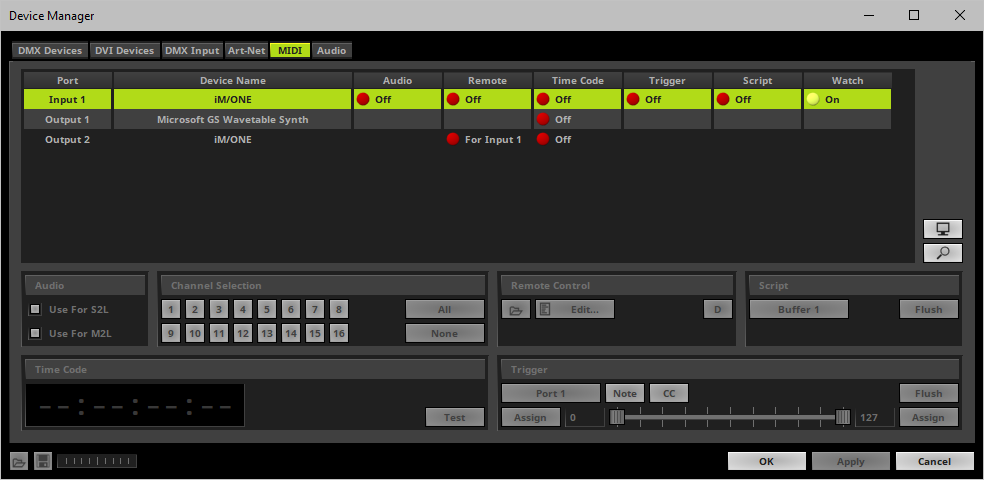
2] Search For Devices
▪Go to the menu Preferences > Remote Control > MIDI...
or to Preferences > Device Manager... > MIDI
[Keyboard shortcut: F4 > MIDI ]
▪A new window will open.
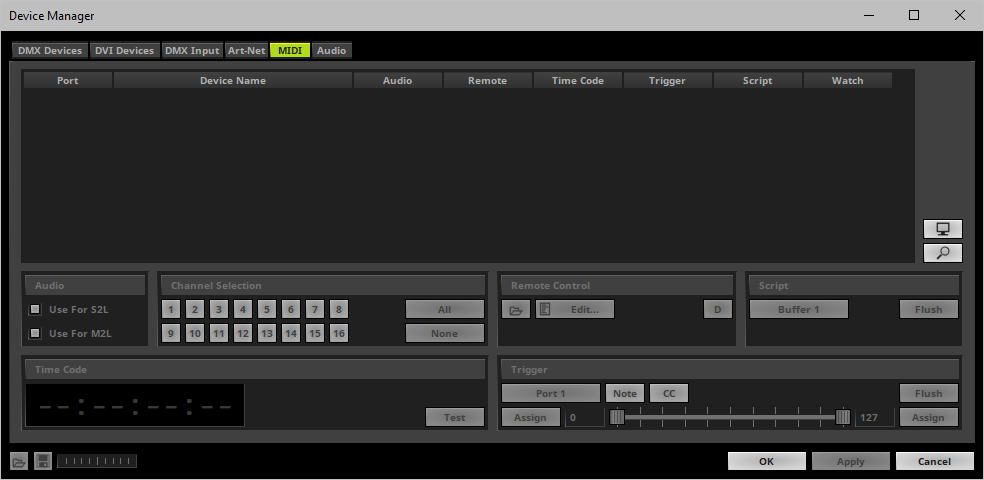
▪Click ![]()
- MADRIX 5 will search for connected devices.
- Your MIDI devices will be shown in the list.
3] Choose How To Use MIDI
Now, several options are available to you:
▪Audio - Activates your MIDI device to be used as audio source [a MIDI keyboard, for example].
Learn more MIDI Audio
▪Remote - You can use your MIDI controller to control MADRIX 5 remotely.
Learn more MIDI Remote Control
▪Time Code - You can use MADRIX 5 to receive external MIDI Time Code, or to send it.
Learn more MIDI Time Code
▪Trigger - You can use your MIDI controller to trigger MADRIX 5 TRI Effects.
Learn more MIDI Trigger
▪Script - You can use the input of your MIDI device for MADRIX scripting.
Learn more MIDI Script
▪Watch - Launches the MIDI Watcher to monitor incoming signals or troubleshoot.
Learn more MIDI Watcher
▪You can use several MIDI devices at the same time.
▪You can use several options at the same time.
▪Go to the menu Preferences > Remote Control > MIDI...
or to Preferences > Device Manager... > MIDI
[Keyboard shortcut: F4 > MIDI ]
▪If not already open, a new window will open.
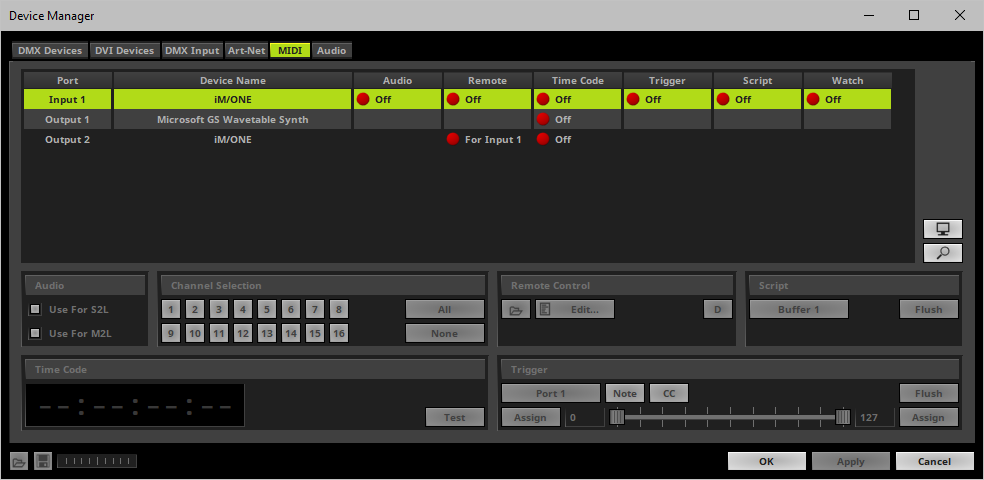
▪Select your device in the list.
- Make sure it is an Input device.
- Search for your connected device if it is not already in the list.
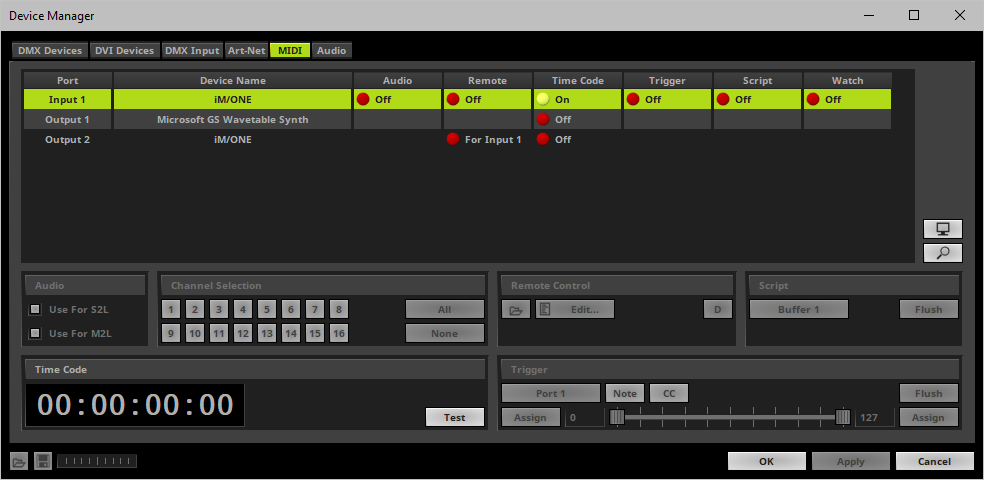
▪Left Mouse Double-Click / Right Mouse Click - In the column Audio, set your device from Off to On
▪The Audio section becomes active and available.


▪Use For S2L - Activates the audio analysis of incoming MIDI signals for Sound2Light effects. This option is activated by default.
▪Use For M2L - Activates the audio analysis of incoming MIDI signals for Music2Light effects. This option is activated by default.
▪Channel Selection - Defines which MIDI channel will be scanned and used by MADRIX 5.
- In general, MIDI offers 16 channels. You can configure each MIDI device to send on a particular channel. Make sure that this channel is also selected in this section here.
- If you wish to filter a channel, deselect the according number [the button will change from green to gray]. As a result, the channel will not be used for MIDI-IN Configuration in combination with MADRIX 5.
- By default, all 16 channels are activated and will be used by MADRIX 5.
- All - Activates all 16 channels.
- None - Deactivates all 16 channels.
Configuration
▪Go to the menu Preferences > Remote Control > MIDI...
or to Preferences > Device Manager... > MIDI
[Keyboard shortcut: F4 > MIDI ]
▪If not already open, a new window will open.
▪Select your device in the list.
- Make sure it is an Input device.
- Search for your connected device if it is not already in the list.
▪Left Mouse Double-Click / Right Mouse Click - In the column Remote, set your device from Off to On
▪The Remote Control section becomes active and available.
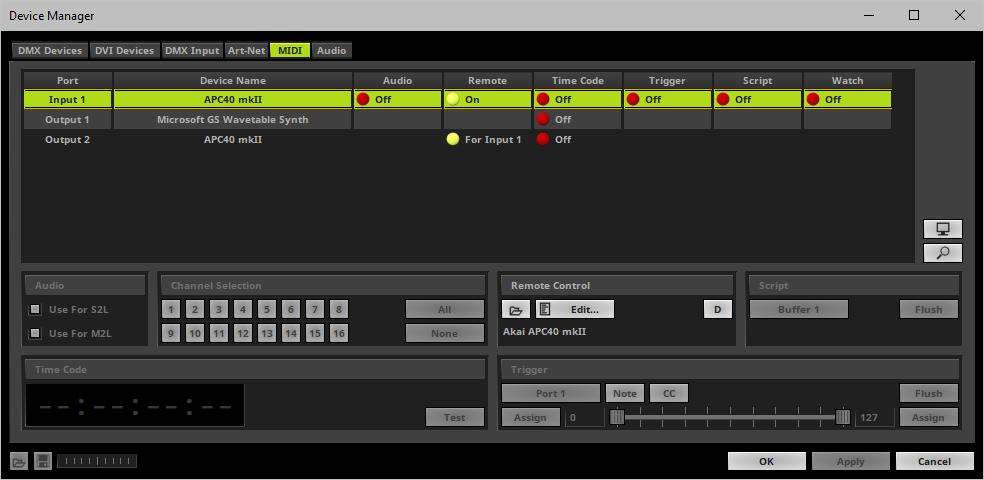
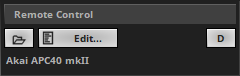
Akai APC40 mkII |
Controllers who are officially supported and have a pre-built MIDI map, will be automatically recognized and their name shown here. |
|
Open - Loads a previously saved MADRIX 5 MIDI Remote Configuration file [of the file type *.mmrx]. |
|
MIDI Remote Editor - Allows you to modify a configuration or create a new MIDI map. Learn more »MIDI-IN Configuration Remote Editor |
|
Restore Default Settings - Restores the default MIDI map for the controller. |


MIDI Commands
MADRIX 5 can receive the following MIDI command types:
▪Control Change
▪Note
▪Pitch Bend
▪Program Change
MADRIX 5 includes a number of preprogrammed MIDI maps. Learn more in the following chapters.
Input / Receiving
▪Go to the menu Preferences > Remote Control > MIDI...
or to Preferences > Device Manager... > MIDI
[Keyboard shortcut: F4 > MIDI ]
▪If not already open, a new window will open.
▪Select your device in the list.
- Make sure it is an Input device.
- Search for your connected device if it is not already in the list.
▪Left Mouse Double-Click / Right Mouse Click - In the column Time Code, set your device from Off to On
▪The Time Code section becomes active and available.

- Time code that is received is shown in HH:MM:SS:FF.
- Test - Allows you to send a sample time code for testing with 25 FPS starting at 00:00:00:00. [Time code will still be generated if the Device Manager is being closed and the feature has not yet been deactivated.]
- If quarter-frame messages are received, 2 frames will be added to the signal when forwarded to the MADRIX 5 Software as is the recommendation of the MIDI specification.
▪Now, you can receive MIDI Time Code via a Cue List.
Learn more »Cue List Editor
Output / Sending
▪Go to the menu Preferences > Remote Control > MIDI...
or to Preferences > Device Manager... > MIDI
[Keyboard shortcut: F4 > MIDI ]
▪If not already open, a new window will open.
▪Select your device in the list.
- Make sure it is an Output device.
- Search for your connected device if it is not already in the list.
▪Left Mouse Double-Click / Right Mouse Click - In the column Time Code, set your device from Off to On
▪The Time Code section becomes active and available.
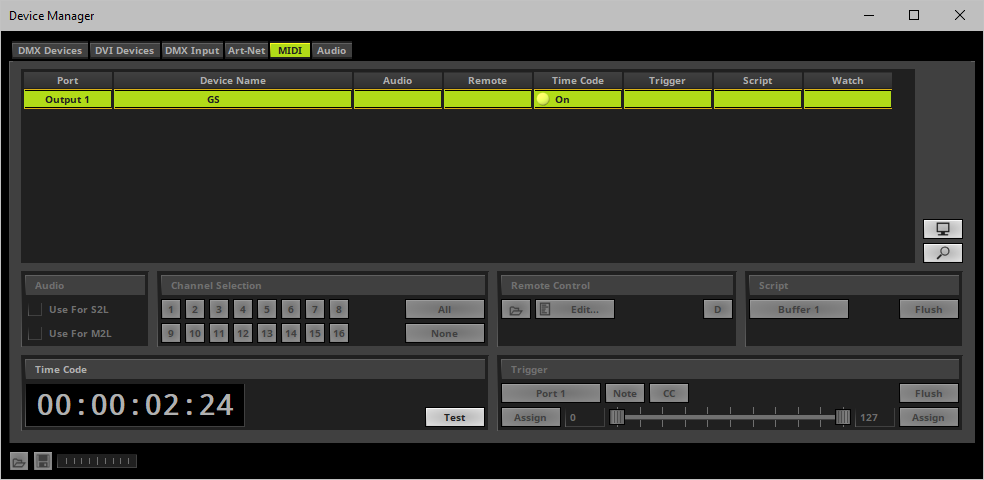
- Time code that is sent is shown in HH:MM:SS:FF.
- Test - Allows you to send a sample time code for testing with 25 FPS starting at 00:00:00:00. [Time code will still be generated if the Device Manager is being closed and the feature has not yet been deactivated.]
▪Now, you can send MIDI Time Code via the Timeline Editor.
Learn more »Timeline Editor
▪Go to the menu Preferences > Remote Control > MIDI...
or to Preferences > Device Manager... > MIDI
[Keyboard shortcut: F4 > MIDI ]
▪If not already open, a new window will open.
▪Select your device in the list.
- Make sure it is an Input device.
- Search for your connected device if it is not already in the list.
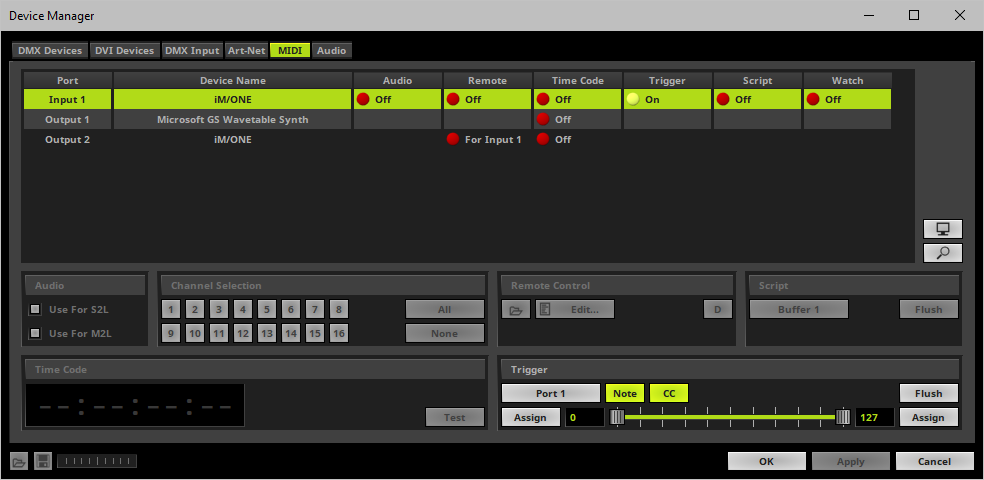
▪Left Mouse Double-Click / Right Mouse Click - In the column Trigger, set your device from Off to On
▪The Time Code section becomes active and available.

|
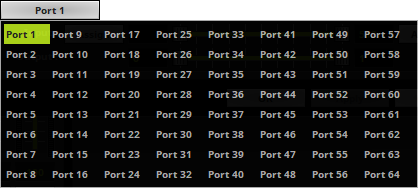
Port - Assigns a trigger port [Port 1 - 64] to this MIDI Device. MADRIX 5 allows you to send trigger signals from up to 64 different devices [64 ports] and assign a MADRIX 5 TRI Effect to the corresponding port. |
|
Note - Enables that MADRIX 5 can receive Note messages for trigger input. |
|
CC - Enables that MADRIX 5 can receive Control Change messages for trigger input. |
|
Flush - Clears any pending trigger events that may not have been processed yet, but should also not be processed anymore. |
|
Input Value Range - Defines the incoming MIDI values that are used for the trigger signal. |
|
Assign Minimum Value - Automatically assigns the minimum value when using the controller. |
|
Assign Maximum Value - Automatically assigns the maximum value when using the controller. |
|
Output Value Range - Defines how the input is mapped to the MADRIX 5 Effect. |


Learn more »[TRI] Trigger Effects
▪Go to the menu Preferences > Remote Control > MIDI...
or to Preferences > Device Manager... > MIDI
[Keyboard shortcut: F4 > MIDI ]
▪If not already open, a new window will open.
▪Select your device in the list.
- Make sure it is an Input device.
- Search for your connected device if it is not already in the list.
▪Left Mouse Double-Click / Right Mouse Click - In the column Script, set your device from Off to On
▪The Script section becomes active and available.

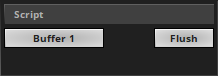
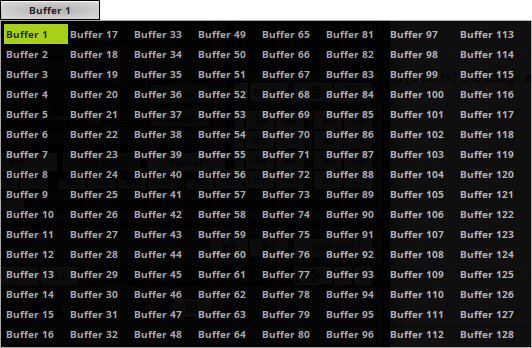
|
Buffer - Defines the script buffer [Buffer 1 - 128] that is assigned to this MIDI device. [In this way, you can use many different input devices to achieve different outcomes with scripts.] |
|
Flush - Clears the MIDI input buffer. |
▪Go to the menu Preferences > Remote Control > MIDI...
or to Preferences > Device Manager... > MIDI
[Keyboard shortcut: F4 > MIDI ]
▪If not already open, a new window will open.
▪Select your device in the list.
- Make sure it is an Input device.
- Search for your connected device if it is not already in the list.
▪Left Mouse Double-Click / Right Mouse Click - In the column Watch, set your device from Off to On
▪It is now possible to monitor incoming MIDI signals.
▪Click ![]()
▪A new window will open.
▪You can now check incoming signals in the MIDI Watcher
Learn more »Tools
▪Before using a MIDI device, make sure that your MIDI device is connected to your computer and that all necessary drivers are installed.
▪Please also make sure to save your MADRIX 5 Setup after following configuration process.
| MADRIX 5.7. |
| [Ctrl & +/-] = Zoom In/Out | [Ctrl & 0] = 100% |
|
Previous Next
|
|
Enable Automatic Translation | Activer La Traduction Automatique | 启用自动翻译 |