This topic includes:
▪Introduction
▪Initial Configuration
▪Overview
▪Keyboard Shortcuts
MIDI controllers are often used to control MADRIX 5 remotely.
While you can use pre-configured MIDI maps [i.e., a MIDI Remote Configuration], you can also set up your own MIDI map according to your needs with the help of the MIDI Remote Editor.
▪Make sure to configure your MIDI controller first.
▪Set up MIDI Remote Control.
▪Learn more »MIDI Configuration
▪ Go to the menu Preferences > Remote Control > MIDI...
or to Preferences > Device Manager... > MIDI
[Keyboard shortcut: F4 > MIDI ]
▪ Click Edit... to open the MIDI Remote Editor
▪A new window will open.
▪If you are creating a new MIDI map, the list will be empty.
▪If you are modifying an existing MIDI map, the list will already contain all preconfigured settings.

|
Add - Adds a new item to the list. |
|
Duplicate - Copies and duplicates the currently selected list item. The new item will be added to the list right after the selected item. You can change its settings afterwards. |
|
Navigation - Allows you to select the next or previous list item. |
|
New - Creates a new MIDI Remote Configuration while deleting all previous list items with your permission. |
|
Open - Loads a MIDI Remote Configuration into the MIDI Remote Editor from an external file [of the file type *.mmrx]. |
|
Save - Saves the current MIDI Remote Configuration to an external file [of the file type *.mmrx]. |
|
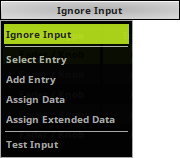
Ignore Input - Is the default option. No incoming data is processed. Test Input - Processes incoming data for testing purposes. |
|
Configuration Name - Allows you to type in an individual description for your MIDI configuration. |


Ctrl + A |
Selects all items in the list. |
Ctrl + N |
Creates a new MIDI map. |
Ctrl + O |
Opens a MIDI map. |
Ctrl + S |
Saves a MIDI map. |
Del |
Removes selected items from the list. |
Arrow Up |
Navigates upwards in the list. |
Arrow Down |
Navigates downwards in the list. |
Left Mouse Double-Click / Right Mouse Click On An Item |
Calls up the context menu for the column. |
Left Mouse Double-Click On A Head Row Of The List |
Sorts the list alphabetically according to the column [ascending or descending]. |
Overview
▪Each list item represents 1 MIDI-remote functionality using 1 MIDI control [i.e., button, fader, note, etc.].
▪Configure each list item as required.
▪Configure each column of an list item.
▪Add or remove list items to add or remove functionality as you require it.
▪Left Mouse Double-Click / Right Mouse Click On An Item - Allows you to edit an item.
Function |
|
1] Create a new item with + 2] Select the general topic [e.g., Audio] 3] Select the exact function you wish to configure [e.g., Output Level] |
MIDI Command |
|
Defines the MIDI channel [e.g., Channel 01], MIDI type [e.g., Control Change], and the value [e.g., 011] MADRIX 5 can receive the following MIDI command types: ▪Control Change ▪Note ▪Program Change ▪Pitch Bend |
Control Type |
|
Defines the type of the control of your MIDI controller [e.g., Button]. ▪Fader / Knob - Defines a fader or knob control that has a wide range of available values with starting point and end point. ▪Encoder / Jogwheel - Defines a knob or wheel control that has a wide range of available values that functions endlessly without a starting point or endpoint. ▪Button - Defines a button control that has two states [On or Off]; often as switch, push button, or button. |
Interaction |
|
- If you have several list items with different control types selected, the software will show all possible interaction types, but you can only choose from the types that are available for all selected list items. ▪Toggle - Defines that the Control Type only has two states [On or Off]. Is usually used for Button. ▪Relative Signed - Is a mode how encoders / jogwheels can work. Use Assign to automatically detect the mode or consult the manual of the MIDI controller. ▪Relative Signed 2 - Is a mode how encoders / jogwheels can work. Use Assign to automatically detect the mode or consult the manual of the MIDI controller. ▪Relative Binary Offset - Is a mode how encoders / jogwheels can work. Use Assign to automatically detect the mode or consult the manual of the MIDI controller. ▪Relative Signed 2's Complement - Is a mode how encoders / jogwheels can work. Use Assign to automatically detect the mode or consult the manual of the MIDI controller. ▪Absolute - Defines that the Control Type uses all available values [e.g., 0 to 255]. Is usually used for Fader / Knob. |
Invert |
|
Defines if incoming values will be inverted. ▪Choose between No and Yes |
|
Defines if there is condition required to be met before the functionality is executed. - None is the default value. Learn more Modifiers |
|
MIN, MAX, |
|
▪MIN - Defines a minimum value for this functionality. The default value is 0. ▪MAX - Defines a maximum value for this functionality. ▪Factor - Valid values range from -127 and +127. 0 is the default value. Use this factor to slow down [-127 to -1] or speed up [+1 to +127] controls of your MIDI controller. |
Feedback |
|
Defines if the function should enable MIDI Feedback. - Support of this feature depends on each MIDI controller, and might be supported or not.
▪None is the default value. ▪State defines if the control is On or Off. [Usually refers to a button lighting up or not.] ▪Value defines if the control can reflect a specific value as MIDI feedback. [Usually refers to a fader function, such as Master, mapped to a physical control, such fader or rotary fader, which can show its position via an LED scale.] |
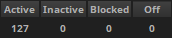
Active, Inactive, Blocked, Off |
|
▪Active - Defines the MIDI value that is sent to the MIDI controller when the button or control in the software is active and this state should be represented by the controller. Valid values range from 0 to 127. ▪Inactive - Defines the MIDI value that is sent to the MIDI controller when the button or control in the software is inactive and this state should be represented by the controller. Valid values range from 0 to 127. ▪Blocked - Defines the MIDI value that is sent to the MIDI controller when the button or control in the software is blocked and this state should be represented by the controller, such as currently blocked Storage Places [which is the main use case]. Valid values range from 0 to 127. ▪Off - Defines the MIDI value that is sent to the MIDI controller when the button or control in the software is completely off and this state should be represented by the controller, such as empty Storages or Storage Places [which are the main use cases]. Valid values range from 0 to 127. |
Description |
|
▪Description - Allows you to enter a text to describe the functionality. |


Specific Functions
▪Global Colors > Global ID
- Controls Global Colors [not Global Color Lists].
- Allows you to choose up to 64 individual selectors.
- Each selector can have an individual ID assigned to it.
- Valid values range from 1 to 255. Value 0 means no selection.
- That means you can control up to 64 different IDs.
[Selectors 1 - 64 do not necessarily control IDs 1 - 64. Instead you can choose the ID with this function.]
▪Global Colors > Global ID / Red / Green / Blue / White / Alpha
- Controls the corresponding color channels for the corresponding selector, which in turn has the Global Color selected via Global ID.
- Valid values for the color channels range from 0 to 255.
Custom Default Values For MAX
The following functions have their default MAX values set according to the number of items their functionality provides. For example, Output Filter Color Mode has 3 modes and a MIN / MAX range of 0 / 2, which is a total of three:
▪Output > Filter Color > Mode
- Mode 1 [Allow Through] will be active for all values until 85 [<= 85].
- Mode 2 [Filter Out] will be active for all values from 86 to 170 [86 <= 170].
- Mode 3 [Colorize] will be active for all values from 171 to 255 [171 <= 255].
The following functions work similarly:
▪Cue List > Play / Pause / Stop
▪Deck A/B > Filter Color > Mode
▪Deck A/B > Filter
▪Deck A/B > Storage Place > Filter
▪Deck A/B > Storage Place > Layer > Mix Mode > Current Layer / Layer 1 - 8
▪Deck A/B > Storage Place > Layer > Filter > Current Layer / Layer 1 - 8
▪Fade > Type
▪Output > Filter Color > Mode
▪Output > Filter
▪Output > Strobe Color > Mode
Overview
The MIDI Remote Editor allows you to create advanced MIDI configurations.
▪Modifiers allow you to set certain conditions.
▪In general, these are the steps to follow:
1] Create a new item with + or select a list item and perform a double-click with your mouse on the column Function
2] Select Modifier
3] Select a State or Value
4] Create a new list item and configure its Function or use an existing list item
5] Assign the condition to this function.
Learn more Condition
State
▪State - Creates a requirement/condition that is required before the function will work.
▪You can define up to 8 States.
▪Valid values are Yes [Value = 1] or No [Value = 0].
▪Normally, you should set up MIN = 0 and MAX = 1 for the corresponding State.
▪Example:
- List item 1 defines a button as a Modifier, State 1 to be toggled. When pressed, MAX defines that a value of 1 is send to MADRIX 5. When not pressed, MIN defines that value 0 is sent to MADRIX 5.
- List item 2 is a function to control the Master [Global Master]. A Condition was set up for this functionality. If MADRIX 5 receives value 1 [Yes] from State 1, the function can be used.
- Because of the Condition, the Master Fader can only be used when the button is pressed at the same time:

- If no condition is assigned, the fader can be moved and the Master will always respond accordingly:

- When Test is activated, MADRIX 5 shows the status of a State in the MIDI Remote Editor. A green button indicates status Yes, a gray button indicates status No.
Value
▪Value - Allows to add several functions to one or more controls of the MIDI controller by combining it with other available controls.
▪You can define up to 8 Values.
▪Valid values range from 0 to 127.
▪Example:
- Your MIDI controller may only have 1 fader and a number of buttons.
- But you would want to control the Master, the Speed Master Deck A, and the Speed Master Deck B with this one fader.
- In this example, we have configured 3 buttons that activate three different configurations for the fader.
- If button 1 is pressed one time, the fader will act as the Master.
- If button 2 is pressed one time, the fader will act as Speed Master Deck A.
- If button 3 is pressed one time, the fader will act as Speed Master Deck B.
- Depending on which button is pressed, the modifier value changes between 1, 2, or 3. MADRIX 5 checks this value and allows the fader to control the corresponding function on the MADRIX 5 user interface.
▪Note: Always assign the correct values to modifier and function.
- For example if your modifier is assigned to Value 1 and Max. value 2, the function needs to have Value 1=002 as a Condition. In this case, Value 2=002 will not work!

▪When Test is activated, MADRIX 5 shows the status of a Value in the MIDI Remote Editor.
Saving Your Configuration
▪Please save your configuration after you have configured all functions!
▪If you are closing the MIDI Remote Editor and have not yet saved, the MADRIX 5 Software will remind you to save the file.
▪If you do not save, your configuration will be discarded and is lost.

▪The MADRIX 5 Setup file does not include the external MIDI Remote Configuration file, but will store the directory and a reference link in order to reload it when the Setup is loaded again.
Example 1
▪You wish to use single buttons of your MIDI controller for each Storage Place.
▪Click the + button to add a new function.
▪Select Deck A > Place ID +Fade
▪Use Assign to match your button to this function. Disable Assign again when done.
▪Set MAX to 0 in order to trigger Storage Deck A S1 P1 [Storage 1 Place 1].
▪Repeat the steps and set up MAX for each Storage Place you wish to control.
- MAX will always have a value that is -1 compared to the actual Storage Place index number [e.g., set MAX to 6 in order to control S1 P7].
▪Use Deck B > Place ID +Fade and repeat the steps accordingly to control the Storage Places on the right side.
Example 2
▪You wish to use single buttons of your MIDI controller for each Cue List entry.
▪Use + to create a new function.
▪Select Cue List > Goto > Goto
▪Use Assign to match your button to this function. Disable Assign again when done.
▪Set MAX to 0 in order to trigger Cue 1.
▪Repeat the steps and set up MAX for each Cue you wish to control.
- MAX will always have a value that is -1 compared to the actual Cue List index number [e.g., set MAX to 6 in order to control Cue 7].
| MADRIX 5.7. |
| [Ctrl & +/-] = Zoom In/Out | [Ctrl & 0] = 100% |
|
Previous Next
|
|
Enable Automatic Translation | Activer La Traduction Automatique | 启用自动翻译 |