This topic includes:
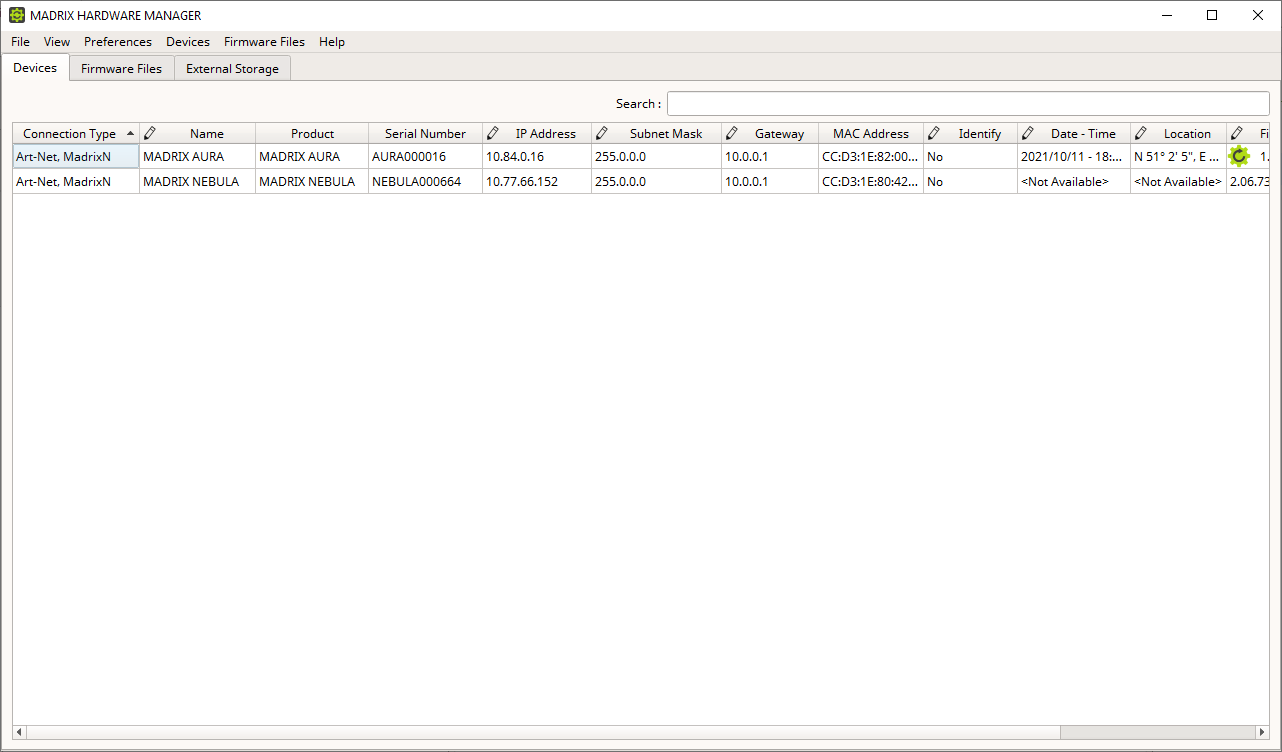
The list of devices shows all connected hardware interfaces and their main information and settings in a list.
1] Physical Connection
▪Connect your devices over USB or via an Ethernet network connection to the computer that is running the MADRIX HARDWARE MANAGER.
- See the Technical Manuals of each device for more information on how to properly connect them.
- Either use USB or the Ethernet connection!
- When using both connection types devices will be shown with two different entries in the list, which may lead to severe issues when accidentally updating the device over both connections simultaneously.
- Either use the connection over USB, and make sure to disconnect the network cables. Or use the network connection and for corresponding devices use an external power supply, such as a USB power supply.
Connect only over USB or only via Ethernet. Do not connect devices using both USB and Ethernet!
2] Device Discovery
▪MADRIX HARDWARE MANAGER automatically tracks the connection to your devices, especially when it comes to USB. New connections or disconnects over USB should be registered immediately.
▪Regarding Ethernet, polls are sent out to devices every 30 seconds. New connections should be registered within 1 minute. Disconnects are registered within 1 to 2 minutes. You can manually start the discovery process to search for network devices via menu Devices > Discover Devices
3] Device Management
▪After successfully establishing a connection to your devices, you can manage them using the list of devices as explained below.
▪Make sure to -stop- sending control data to your devices when managing them with MADRIX HARDWARE MANAGER.
- This refers to input and/or output over Art-Net, sACN, DMX512, etc.
- Otherwise, changes and updates might fail. If an update fails, stop sending data and try to update the firmware again.
By default, the following information regarding connected devices is provided since the following columns are enabled in the list.
Note: Certain information may not be available for all devices at all times. Then, <Not Available> will be shown accordingly.
Connection Type |
Shows how devices are connected. Interface drivers are required for the connection over USB. See »Installation Process Connect either over USB or Ethernet, but not both! |
Name |
Shows the description of the devices. Corresponds to the Name that can be set using the web configuration or the Art-Net Long Name. |
Product |
Shows the official name of the connected device [product/model]. |
Serial Number |
Shows the unique numerical identifier of the device. May not be available for devices connected only over Art-Net. |
IP Address |
Shows the currently set IPv4 network address, which is part of the basic network settings. |
Subnet Mask |
Shows the currently set network mask, which is part of the basic network settings. |
Gateway |
Shows the currently set network gateway. |
MAC Address |
Shows the Media-Access-Control address of the device, which is used as unique identifier in networks. Is always available for devices connected via Art-Net or MadrixN. May not be available for devices connected over USB. |
Indicator |
Allows you to choose/activate the built-in identification mode of the device by switching on its indicators. May not be retrievable as information for devices connected over USB using older firmware versions, but it should still be possible to set it. |
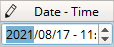
Date - Time |
Shows the currently set date and time [YYYY/MM/DD - HH:MM:SS]. |
Location |
Shows the currently set location of the device [N/S d°m°s", E/W ddd°m's"]. |
Firmware |
Shows the currently used firmware version. The firmware provides the software features of the device. ▪Only devices which meet all requirements will be updated. ▪Firmware updates might reset the device settings. / Firmware downgrades always require the device settings to be reset. Learn more »Firmware Updates |
Bootloader |
Shows the currently used bootloader version. The bootloader is a subsystem of the device's software that manages the underlying functionality of components and launches the firmware. Certain firmware versions may require a specific bootloader version. |
HW Revision |
Short for Hardware Revision. Shows the edition/revision of the connected hardware interface. |
Overview
▪In general, this list shows information provided by the devices.
▪ In certain cases, the edit icon [that is, a pen] shows that the respective information/column can be edited by you.
Single Edits
▪Left Mouse Click - Allows you to select a single cell.
▪Left Mouse Double-Click - Perform a double-click with your left mouse button on a value in order to edit it.
[Keyboard shortcut: F2]
▪Confirm with Enter [or click outside of the currently active cell with the mouse]. Abort any changes with Escape.
 |
You may be presented with different choices. |
  |
You may be able to directly enter numbers or text as input. |
Multi-Edits
▪Ctrl + Left Mouse Click or Shift + Left Mouse Click + Select First List Entry + Select Last List Entry - Allows you to select multiple items in a column in the list.
▪Ctrl + A - Selects all devices in the list.
▪F2 - Activates the edit mode for multiple devices at once. Select multiple devices first.
▪Confirm with Enter [or click outside of the currently active cell with the mouse]. Abort any changes with Escape.
▪Please note that different devices may support different values.
Visual Feedback For Edits
The software will show you if any changes you have made are set successfully or not. This status is shown for a couple of seconds after each change.
 |
Green - The changes were successfully set. |
 |
Yellow - The request is currently pending. |
 |
Red - The new value could not be set. |
▪Right Mouse Click - Perform a click with your right mouse button on a device.
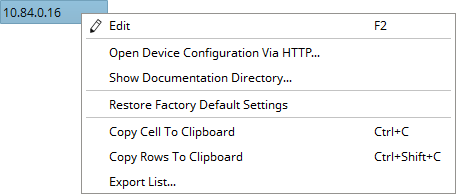
Edit |
Allows you to change the entry [if it can be edited]. |
Open Device Configuration Via HTTP... |
Opens the website configuration of the device using its IP address via the default web browser on your computer. |
Show Documentation Directory... |
Opens the folder on your PC/file system with the latest documentation files for this device type, such as Technical Manual, Datasheet, and User Manual. |
Restore Factory Default Settings |
Restores the original settings of the device. |
Copy Cell To Clipboard |
Copies the currently selected cell [that is, single information] into the clipboard/temporary memory. |
Copy Rows To Clipboard |
Copies the currently selected line or lines [that is, all device information] into the clipboard/temporary memory. If several lines are selected, the header of the column will be copied as well. Content is divided by single spaces. |
Export List... |
Saves the entire, currently shown list/view/table as a preformatted text file. |

▪Search - Enter any text in order to search all devices in the list.
- Any device/line that includes the search term will be shown. All others are temporarily filtered out.
- Terms can be case-insensitive. You don't have to use capital letters.
- Feel free to use terms that are incomplete. For example, mad will include results for MADRIX.
- You may specify certain columns by using a colon [:]. Only columns that are currently shown and visible can be searched this way.
- For example: Prod:AUR shows all lines where a MADRIX AURA hardware interface is connected by referencing the column Product for example. If no column is shown that includes 'Prod', MADRIX HARDWARE MANAGER will search all shown columns for the specifically entered term.
- You may execute RegEx searches [regular expression] by prefixing search terms via /r
MADRIX HARDWARE MANAGER allows you to choose which parameters are presented in this view. You can decide which columns are hidden or shown.
▪Right Mouse Click - Perform a click with your right mouse button anywhere on the header of the list.
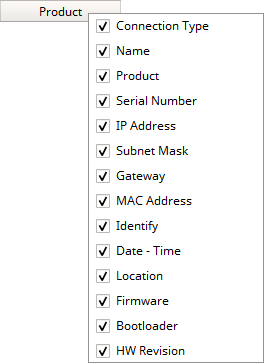
 |
Shown - A checkmark means that columns are shown. |
 |
Hidden - No checkmark means that columns are hidden. |
Connection Type |
Shows or hides the Connection Type column. |
Name |
Shows or hides the Name column. |
Product |
Shows or hides the Product column. |
Serial Number |
Shows or hides the Serial Number column. |
IP Address |
Shows or hides the IP Address column. |
Subnet Mask |
Shows or hides the Subnet Mask column. |
Gateway |
Shows or hides the Gateway column. |
MAC Address |
Shows or hides the MAC Address column. |
Identify |
Shows or hides the Identify column. |
Date - Time |
Shows or hides the Date - Time column. |
Location |
Shows or hides the Location column. |
Firmware |
Shows or hides the Firmware column. |
Bootloader |
Shows or hides the Bootloader column. |
HW Revision |
Shows or hides the HW Revision column [Hardware Revision]. |
For example, if you wish to sort via Product, make sure to activate column Product and click on the corresponding header to sort in ascending or descending order.
| MADRIX HARDWARE MANAGER User Manual 1.2. |
| [Ctrl & +/-] = Zoom In/Out | [Ctrl & 0] = 100% |
|
Previous Next
|
|
Enable Automatic Translation | Activer La Traduction Automatique | 启用自动翻译 |