Topics of this chapter:
▪Note
The MADRIX 5 Software natively supports Philips hue.
The protocol is implemented directly into the software, which makes it easy to use Philips hue bridges and lamps with MADRIX 5.
The MADRIX 5 Software requires that hue bridges/products use at least API version 1.15.
The following lamps are currently supported:
▪LCT
LCT001
LCT002
LCT003
LCT007
LCT010
LCT011
LCT012
LCT014
LCT015
LCT016
▪LDD
LDD001
LDD002
▪LDF
LDF001
LDF002
▪LDT
LDT001
▪LFF
LFF001
▪LLC
LLC005
LLC006
LLC007
LLC010
LLC011
LLC012
LLC013
LLC014
LLC020
▪LLM
LLM001
LLM010
LLM011
LLM012
▪LST
LST001
LST002
▪LTC
LTC001
LTC002
LTC003
LTC004
LTC011
LTC012
▪LTD
LTD001
LTD002
LTD003
▪LTF
LTF001
LTF002
▪LTP
LTP001
LTP002
LTP003
LTP004
LTP005
▪LTT
LTT001
▪LTW
LTW001
LTW004
LTW010
LTW011
LTW012
LTW013
LTW014
LTW015
▪LWB
LWB004
LWB006
LWB007
LWB010
LWB014
▪MWM
MWM001
▪Multisource Luminaires - Using The Color Light Module (LLM001)
HBL001
HBL002
HBL003
HEL001
HEL002
HIL001
HIL002
▪Multisource Luminaires - Using The Color Temperature Module (LLM010/LLM011/LLM012)
HML001
HML002
HML003
HML004
HML005
HML006
HML007
The following gamuts are currently supported:
▪COLOR_GAMUT_NONE
[Valid value for single-color white lamps, for example]
▪COLOR_GAMUT_A
▪COLOR_GAMUT_B
▪COLOR_GAMUT_C
▪COLOR_GAMUT_2200K_6500K
There are several steps required to set up Philips hue products in MADRIX 5. This chapter is only part of the process. You need to set up other configurations as well [such as virtual LED matrix, DMX Devices, MADRIX Effects, Audio, etc.].
1] Set up the correct network settings in Windows.
2] Enable drivers in MADRIX 5.
3] Authorize a bridge.
4] Set up the DMX universe.
5] Set up the Frame Time.
1] Network Settings
Philips hue is a network-based protocol. MADRIX 5 will use the network card of your computer to send data to the bridges.
▪Connect the computer that runs the MADRIX 5 Software and your Philips hue bridges with the same computer network.
▪To use Philips hue, you need to have a separate DHCP server.
▪This can be a software or hardware DHCP server, which handles and assigns the IP addresses to the hue bridges and to the MADRIX computer.
▪It is recommended that the DHCP server binds MAC addresses to IP addresses.
2] Enabling Drivers In MADRIX 5
▪Go to the menu Preferences > Options... > Devices Network
[Keyboard shortcut: Ctrl+Alt+O > Devices Network]
▪Activate Philips - hue
")
▪Time To Detect Bridges And Lamps (s) - Defines how long MADRIX 5 searches the network for devices during startup. Type in a value in seconds.
- The default value is 10.
- We recommend to utilize at least a value of 10 to allow for a sufficient search.
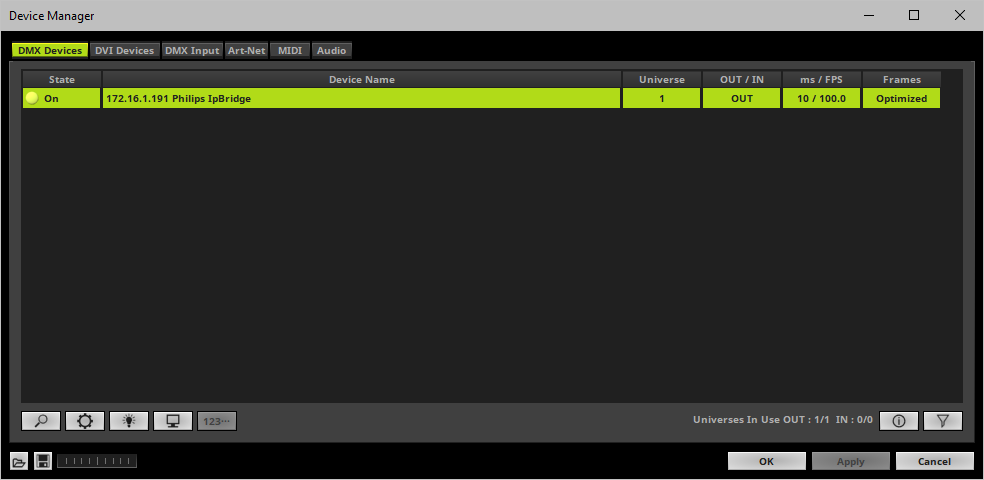
3] Authorize A Bridge
▪Go to the menu Preferences > Device Manager... > DMX Devices
[Keyboard shortcut: F4]
▪MADRIX 5 automatically adds network devices it has found during startup to the list.
▪Click ![]() if the devices have not been found.
if the devices have not been found.
- MADRIX 5 disconnects all devices and starts to search for new or newly connected devices.
- Do not rescan for devices if all of your interfaces have been found correctly.

▪Select your device in the list.
▪Right Mouse Click on the column State to set from Off to On [indicated by green light].
[Alternatively, you can perform a Left Mouse Double-Click]

1] When connecting a hue bridge to MADRIX 5 for the first time, you need to authorize the bridge first. MADRIX 5 will ask you to authorize it:
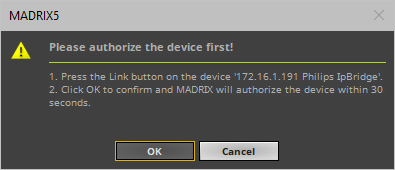
2] In order to authorize the bridge, press the large Link button on the bridge itself.
3] Click OK in MADRIX 5 in order to confirm that you have pressed the button on the bridge.
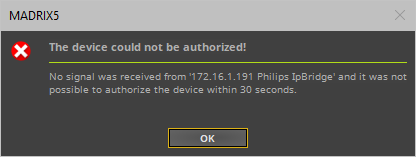
4] The authorization process starts. MADRIX 5 will wait up to 30 seconds for the device to respond.
5A] When unsuccessful, MADRIX 5 will provide an error message that the authorization process failed. If that is the case, please try to authorize it again.
5B] When successful, the bridge will be authorized and enabled in MADRIX 5.
▪If you wish to deactivate a bridge, select it in the Device Manager > DMX Devices and set its State from On to Off
5] DMX Universe
▪Make sure that your device is still selected.
▪Set up Universe
- Right Mouse Click or Left Mouse Double-Click on the column Universe and enter the required number.
▪This setting assigns a specific DMX universe [of the Patch] to the device or the port of the device. Learn more »Virtual DMX Universes
▪Make sure to assign the correct universe according to your requirements.
6] Frame Time
▪Make sure that your device is still selected.
▪Set up the frame time for your device.
- Right Mouse Click or Left Mouse Double-Click on the column ms / FPS and enter the required number.
- The frame time [in milliseconds; ms] affects the frame rate. The frame rate specifies how fast data is sent to the device or received from it [in Frames Per Second; FPS].
- Increase the frame time in order to decrease the frame rate [e.g., 40 ms = 25 FPS].
- Decrease the frame time in order to increase the frame rate [e.g., 20 ms = 50 FPS].
- The default value is 30 ms / 33.3 FPS.
- Some LED fixtures might have problems with a low frame time / high frame rate. Then, it is recommended to increase the frame time / decrease the frame rate.
DMX Devices
Learn more about setting up devices under Preferences > Device Manager... > DMX Devices here »DMX512 [DMX-OUT]
Remember to configure your virtual LED matrix in the »Matrix Generator or »Patch Editor
Make sure to save your MADRIX 5 Setup after the configuration process.
▪Keep in mind that network devices, if activated, cause network traffic!
▪When using a network-based output protocol and when the Startup option Start MADRIX After Booting Windows is used, it is highly recommended to also activate the Startup option Start With Timeout(s) with a value of 30 or higher.
▪A hue bridge often has several status LEDs. Please consult the hue manuals for more information. In general, they usually show these statuses:
- Power LED Off: No power supplied.
- Power LED Permanently On: Power supplied.
- Network LED Off: No network connected.
- Network LED Blinking: No IP address assigned.
- Network LED Permanently On: IP address successfully acquired.
- Internet LED Off: No network connected.
- Internet LED Blinking: No internet access available.
- Internet LED Permanently On: Internet conenction successfully established.
▪You can use the official Philips hue mobile App to update the firmware of your Philips hue bridges.
▪MADRIX 5.4 adds compatibility for firmware version 1.40.
| MADRIX 5.7. |
| [Ctrl & +/-] = Zoom In/Out | [Ctrl & 0] = 100% |
|
Previous Next
|
|
Enable Automatic Translation | Activer La Traduction Automatique | 启用自动翻译 |