This tutorial shows you how you can create stand-alone files for MADRIX PLEXUS (of the file type *.dxd).
Date: 10/2014
MADRIX Version: 3.3 (Created with)
Note: In this example we want to create *.dxd files for 4 DMX Universes (for 2 MADRIX PLEXUS).
1. |
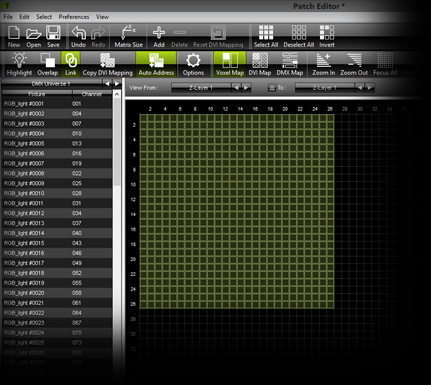
Start MADRIX and press the F2 key on your keyboard. In the Matrix Generator, create a new Patch with 26 x 26 x 1 generic RGB lights. To do so, choose:
You can find detailed information about the Matrix Generator in a previous tutorial (»The First Patch).
|
||||||
2. |
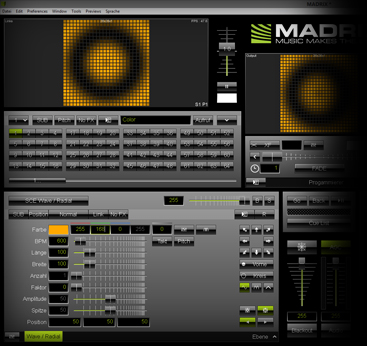
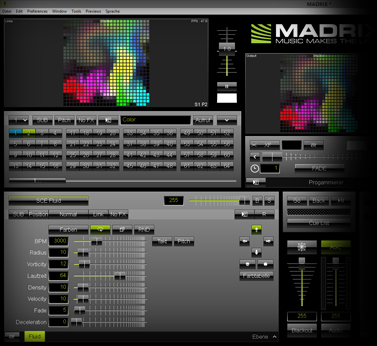
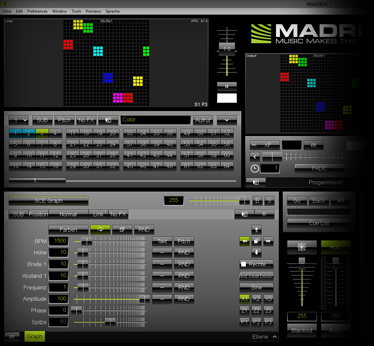
In order to continue we have to create visuals or open an existing Setup file. In this example, we will create three simple effects, including SCE Wave / Radial, SCE Fluid and an SCE Graph effect.
SCE Fluid is located at Storage Place S1 P2 and all effect settings are set to their defaults.
SCE Graph is located at Storage Place S1 P3 with its default settings.
|
||||||
3. |
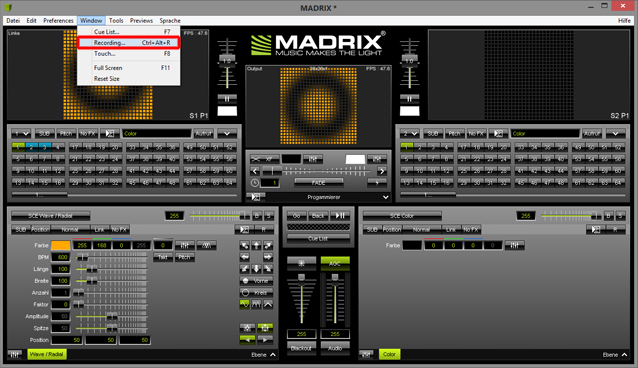
Go to Window > Recording... or press Ctrl+Alt+R together on your keyboard.
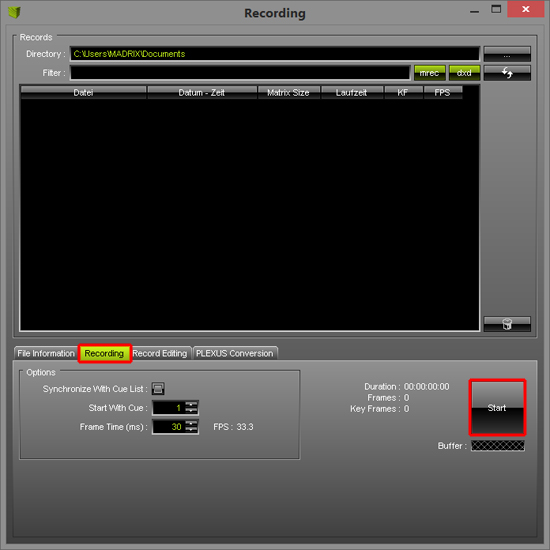
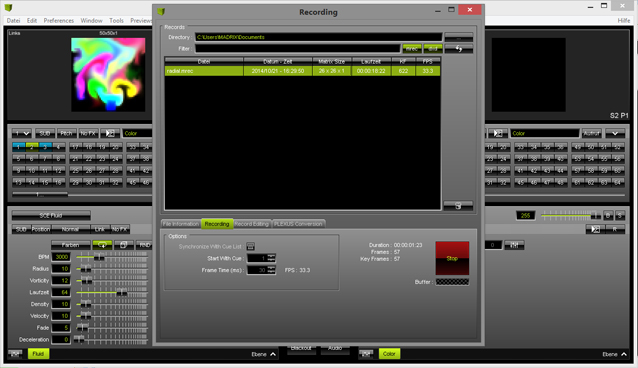
The Recording window will be opened. We want to record Storage Place S1 P1 first. Therefore, activate this Storage Place and move the crossfader accordingly to show the Storage where the effect is running. In this example it is Storage Left. You should see the effect in the Preview Output as a result. Please select the Recording tab and then click the Start button. The output of MADRIX (as shown in the Preview Output) will be recorded.
Let the recording process run for a sufficient time or as long as needed (In this example we stopped recording after 18 seconds and 23 frames). Click the Start button again, which now reads Stop. You can now see the recorded file with additional information in the file list.
|
||||||
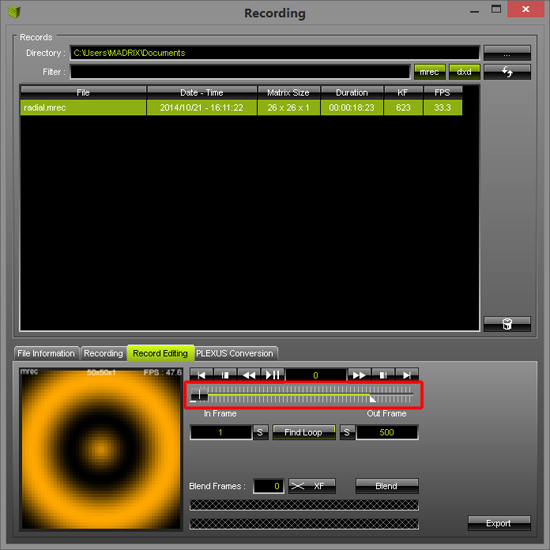
5. |
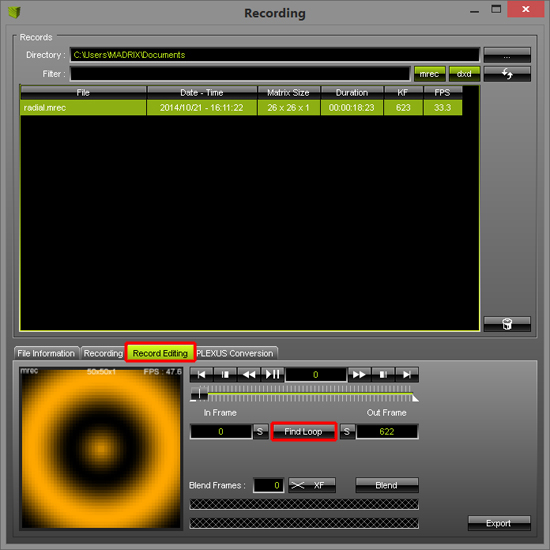
Please switch to the Record Editing tab, select the recorded *.mrec file in the list (it will be illuminated in green in the list), and then click Find Loop.
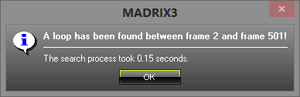
If a loop was found, the following message appears:
Click OK and you can see that the Out Frame will be set automatically. The Out Frame marker will be shifted to left. That means the file will be cut there.
|
||||||
6. |
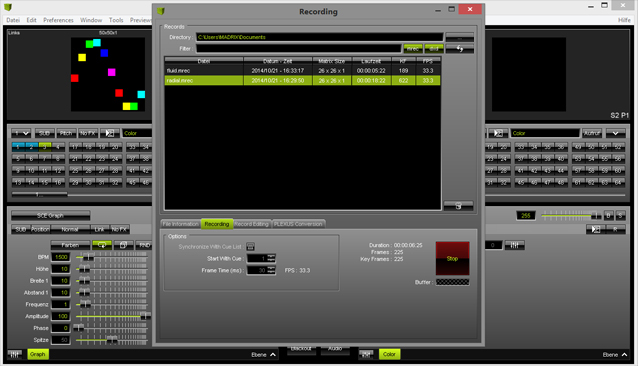
Now, switch to Storage Place S1 P2, SCE Fluid, record it, and save the file.
|
||||||
7. |
Repeat the recording process while the SCE Graph effect is selected on Storage Place S1 P3.
|
||||||
8. |
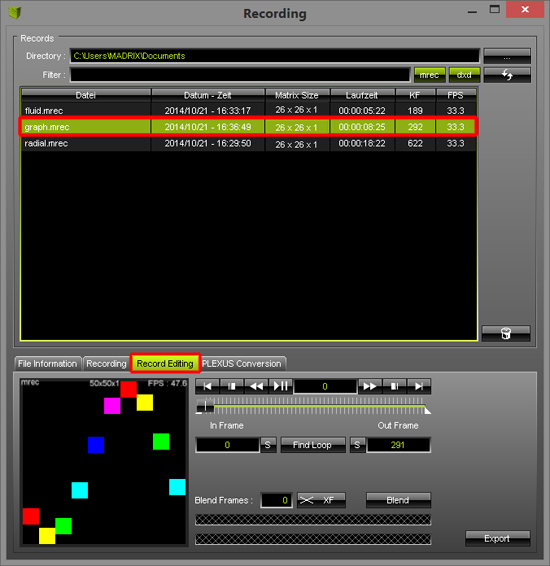
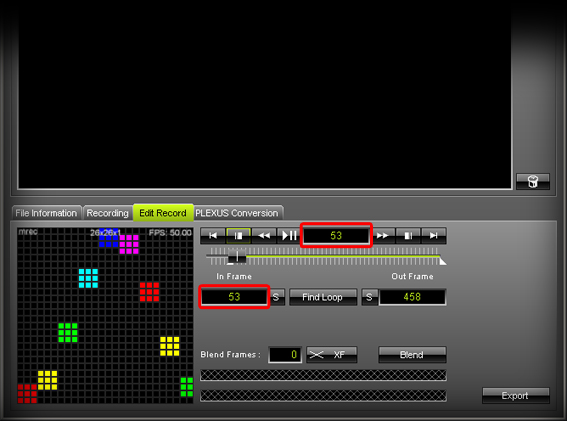
Switch again to the Record Editing tab and select your recorded file for the SCE Graph.
We want adjust the record to achieve better visuals. Start by changing the In Frame to a position where the left, red square of the effect is displayed at the bottom. In this example it is at frame 53. You can search for the correct frame by moving the slider. Then, click S to set the In Frame or manually enter the frame (such as 53).
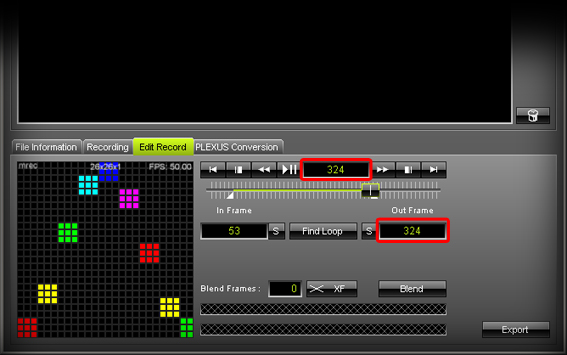
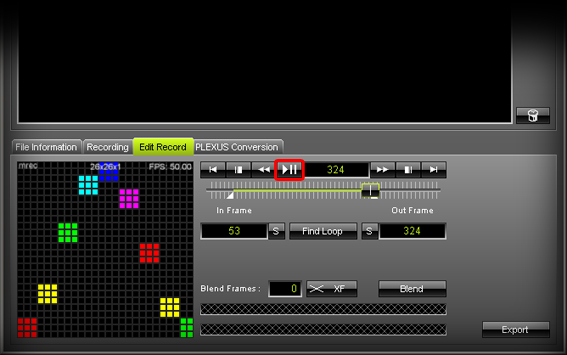
We also want to change the Out Frame to a position where the left, green shape is at the bottom in order to create a smooth animation. In this example, it is at frame 324. We therefore set the Out Frame to 324. Click Play/Pause to preview the edited record. Adjust In Frame and Out Frame if the animation needs adjustment.
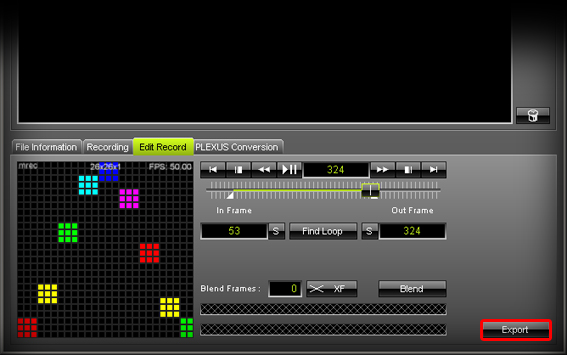
When the visuals are ready, click the Export button and the Save As window will be opened again. Choose a file name and click Save. In this example, the existing file will be overwritten.
|
||||||
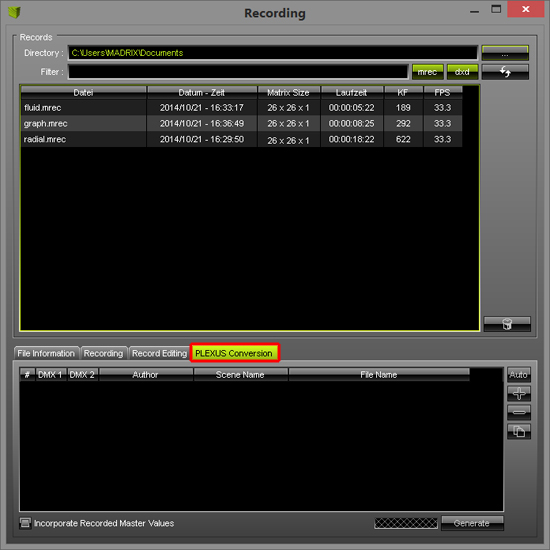
9. |
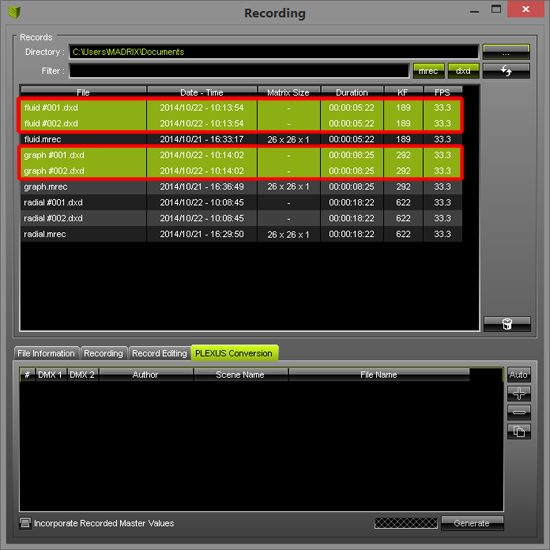
Switch to the PLEXUS Conversation tab. You can see all recorded *.mrec files in the upper half of the Recording window. (These are files which are stored in the chosen Directory).
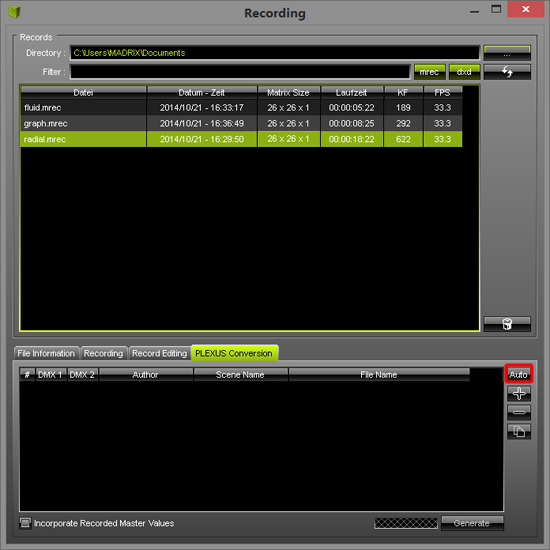
Now, select one of the *.mrec files and then click the Auto button.
MADRIX will automatically calculate and suggest the settings for each DMX Universe and fill the list with the settings for the required *.dxd files. Note: If the created Patch uses more than 2 DMX universes, several *.dxd files will be created. The reason is that a file is created for each PLEXUS which contains the output settings for two DMX universes.
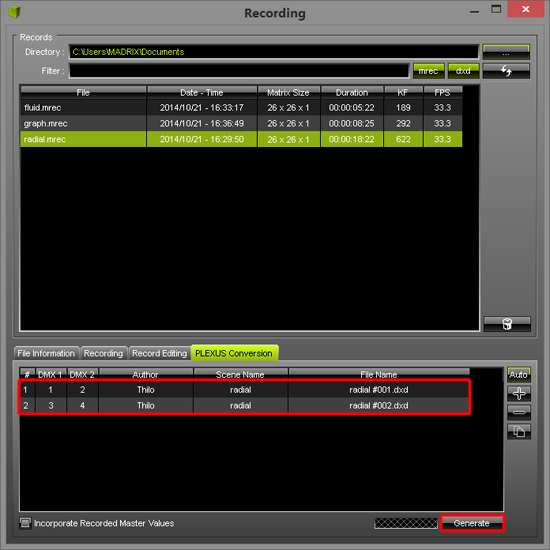
To create the *.dxd files, click the Generate button. Note: The list entries for DMX 1 and DMX 2 are the corresponding DMX universe numbers from the Patch. That means the data for these DMX universes will be saved in the *.dxd file and assigned to the DMX 1 and DMX 2 output ports of a MADRIX PLEXUS. You can change the DMX routing by performing a double-click with the left mouse button on the number you want to change. (In this example, *.dxd file 001 will contain data of DMX universe 1 and 2, while *.dxd file 002 will contain the data of DMX universe 3 and 4.)
|
||||||
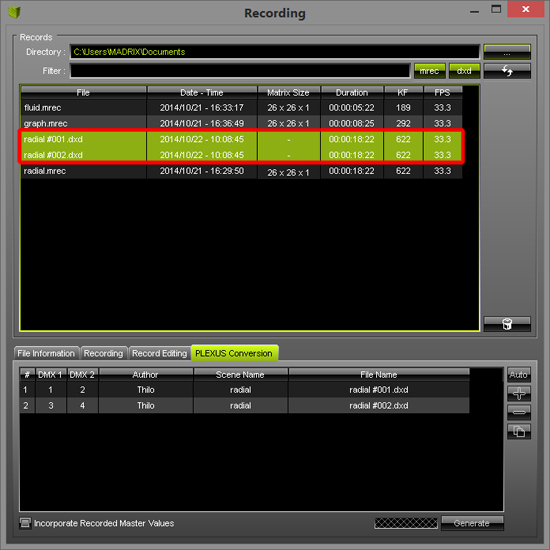
10. |
After generating the *.dxd files, you can see the new files in the file list above. These are the *.dxd files which you can copy to the SD card of a MADRIX PLEXUS. (Learn how to copy the files to the MADRIX PLEXUS in the next tutorial »Copying Stand-Alone Files To MADRIX PLEXUS.)
Repeat the file generation steps above for the 2 other recorded *.mrec files. In the end, you should have created 6 *.dxd files (two for each Storage Place).
|

Congratulations! You have just created MADRIX PLEXUS stand-alone files.