In this tutorial, you will learn how to copy *.dxd stand-alone files to MADRIX PLEXUS.
There are different ways to copy such files. You could copy *.dxd files directly to the SD-Card using an SD card reader connected to your computer. In this tutorial, we will use the PLEXUS Configuration window and use two MADRIX PLEXUS with an inserted SD card.
Date: 10/2014
MADRIX Version: 3.3 (Created with)
Note: You will need *.dxd files for this tutorial. Learn how to create *.dxd files in this tutorial.
1. |
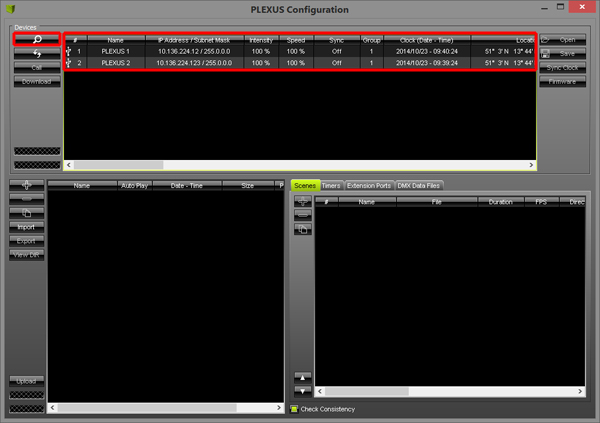
Open MADRIX and go to Tools > PLEXUS Configuration...
|
2. |
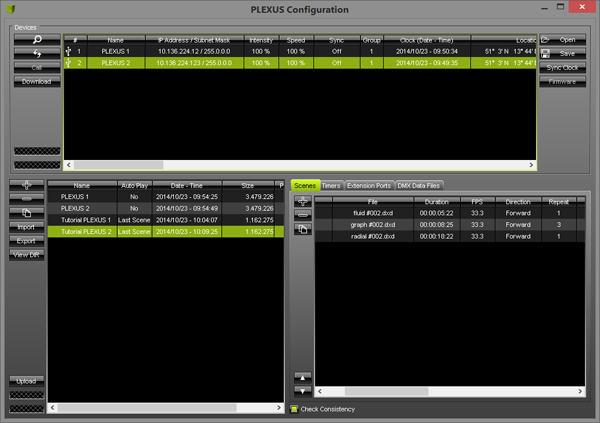
The PLEXUS Configuration window will be opened and you can see connected PLEXUS devices. In this example two MADRIX PLEXUS are connected via USB. MADRIX PLEXUS could also be connected via Art-Net.
|
3. |
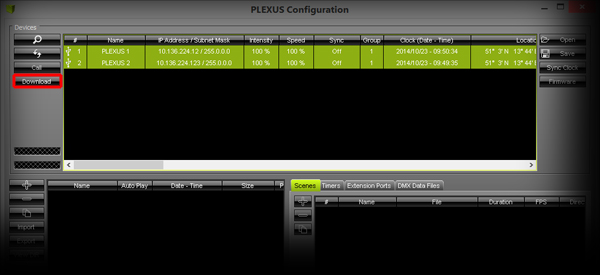
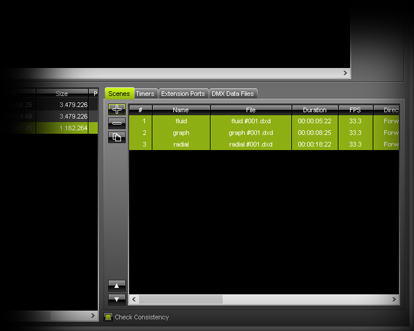
First, we want to download any Scenes that are already uploaded to the PLEXUS. Therefore, select the PLEXUS unit from which you want to download the files. In this example we want to download the Scenes from every device. That is why we first select all of them and then click the Download button.
When the download is complete, you can see the downloaded Configurations in the left Configuration section and the Scenes of a Configuration in the Scenes section to the right.
|
4. |
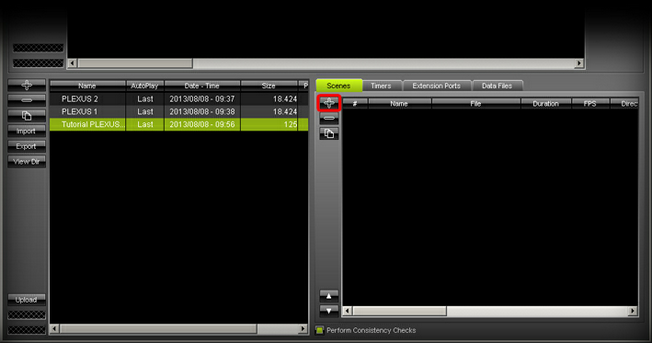
We will now prepare our two PLEXUS devices for stand-alone playback. We will have to create a new Configuration for each PLEXUS. To create a new Configuration, click the + button to the left of the Configuration section.
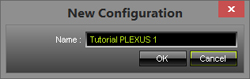
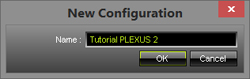
In the next step, type in a Name for the new Configuration and click OK. In this example the first Configuration is called Tutorial PLEXUS 1.
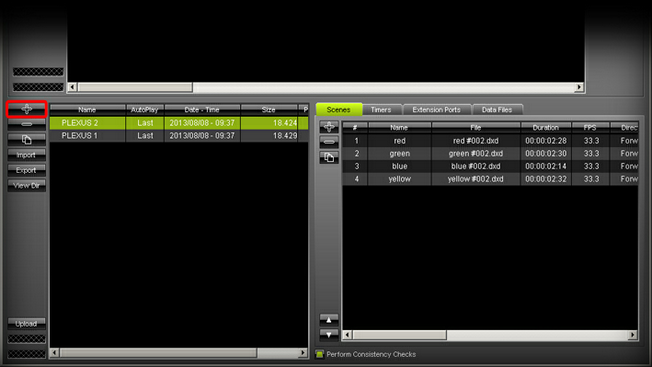
Every new Configuration is empty at first. To add Scenes to the Configuration, please select the Configuration and press the + button in the Scenes section.
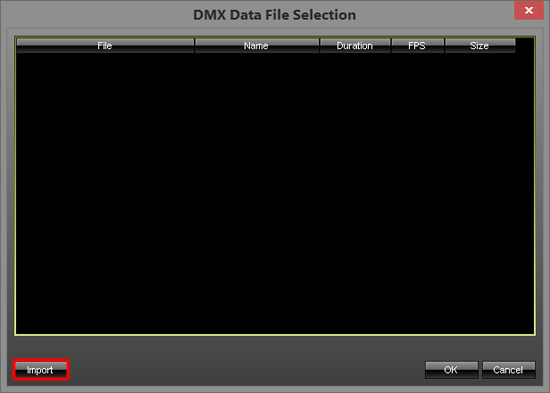
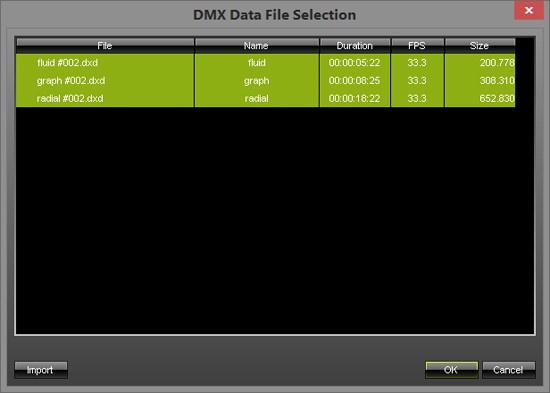
A new window will be opened. Here you can select which Scenes are added to the Configuration. To import new Scenes, click the Import button and select the desired *.dxd files on your harddisk. Right now, we are creating the Configuration for the first PLEXUS. That is why we will select all *.dxd files with #001.dxd in their file name. Confirm with Open.
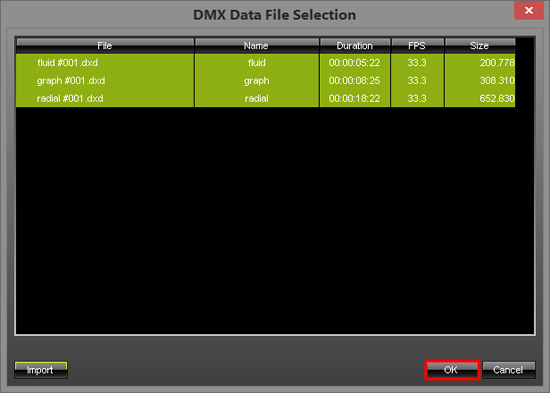
All imported files will be shown in the list. Now, select the required files and confirm with OK.
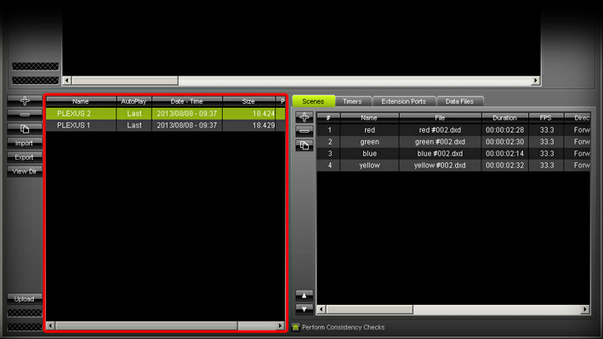
You can see that the Scenes have been added to the Configuration.
|
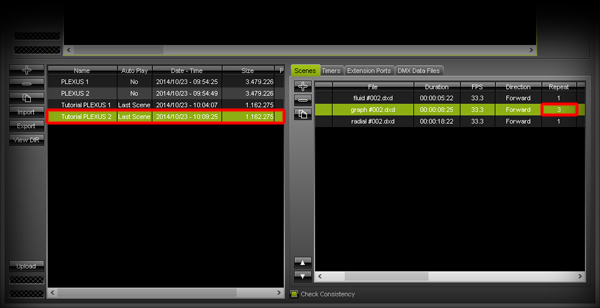
5. |
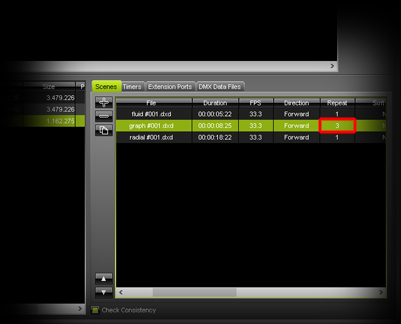
In this step, we want to make a small adjustment to the Configuration. One Scene should be played back in a loop.
|
6. |
The Configuration of the first MADRIX PLEXUS is now complete. We will still have to create another Configuration for the second MADRIX PLEXUS.
Continue by importing and adding all *.dxd files to this Configuration that have #002.dxd in their file name.
Note: It is important that the order of the *.dxd files and other settings of each file, such as the loop count, are the same as in the first Configuration. In this example, we have to change the Repeat count of the graph#002.dxd to 3.
|
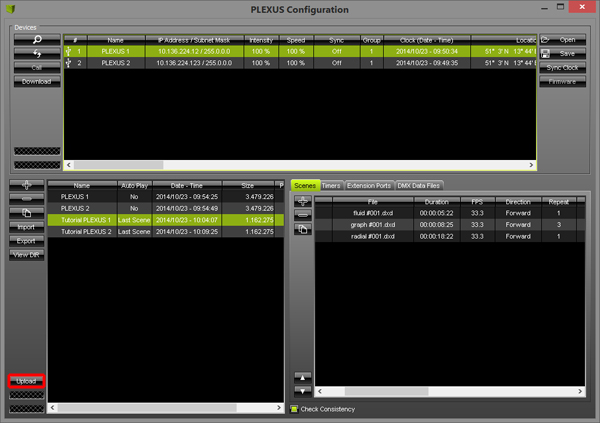
7. |
We have now created 2 new PLEXUS Configurations, which we can upload to the PLEXUS units. Please note that each PLEXUS will receive its own configuration.
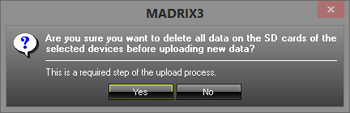
A confirmation window will be opened. Please click Yes.
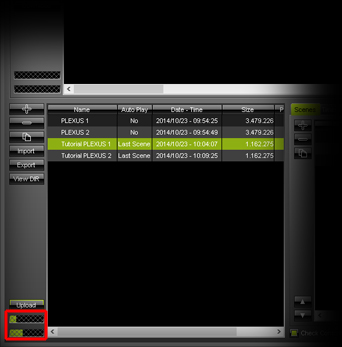
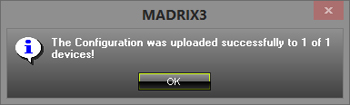
Note: Before the upload process of the Configuration to the PLEXUS starts, all existing files on the SD card will be deleted. If you want to append new Scenes to an existing Configuration, please download the Configuration, append the desired *.dxd files, and then upload the updated Configuration again. You can see the upload status at the lower left.
MADRIX will inform you when the upload process has been completed.
|
8. |
Repeat step 7. But now select the second PLEXUS and the corresponding Configuration for this device.
|

Congratulations! You have learned how you can copy stand-alone files to MADRIX PLEXUS.