This tutorial shows you how you can connect Art-Net nodes manually.
Date: 09/2014
MADRIX Version: 3.3 (Created with)
For this tutorial we want to add an 8 port Sample Node.
Note: An Art-Net node can have up to 4 DMX ports as per official specifications. If your Art-Net device has more than 4 ports, you have to add the node several times with the same IP address. For example, the "Sample Node" has 8 DMX ports, so we have to add 2 Art-Net nodes. The first node will be used for ports 1-4 and the second node is used for the ports 5-8.
1. |
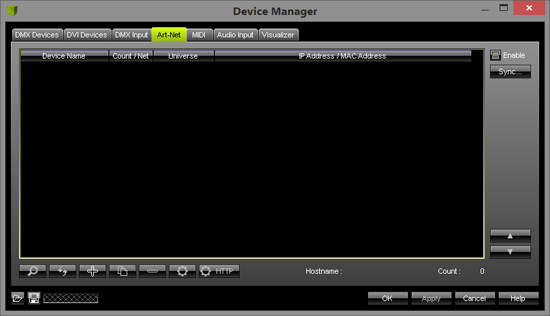
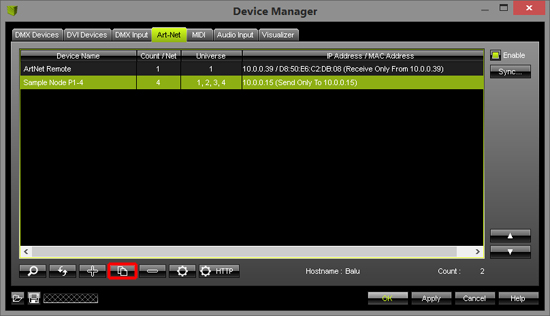
Start MADRIX, go to Preferences > Device Manager or press the F4 key, and then select the Art-Net tab.
|
||||||||||||
2. |
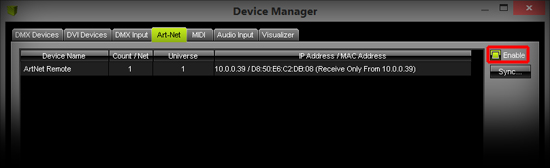
Enable the Art-Net checkbox.
After a few seconds, you can see the device ArtNet Remote. That is your own PC. |
||||||||||||
3. |
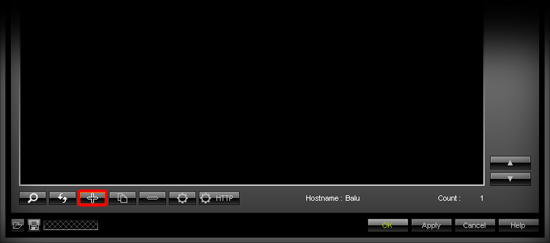
Now, click Add button on the bottom of the Device Manager.
The Create New Device window will be opened. In this example we want to add 1 Device with 4 ports.
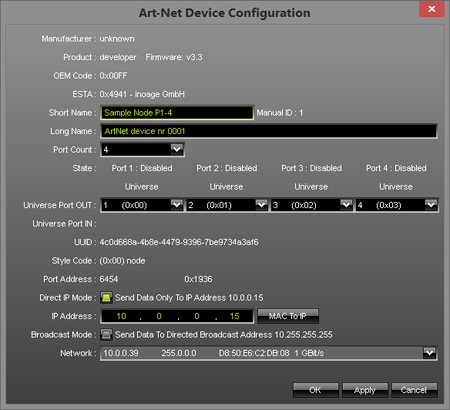
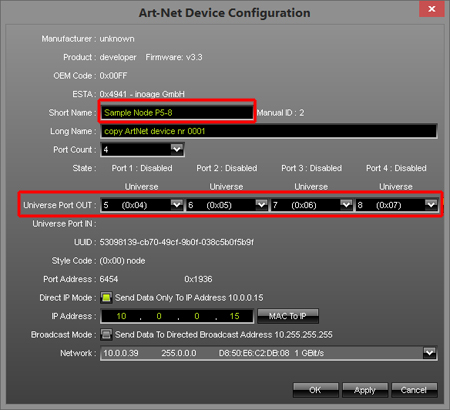
Click OK. Select the newly added Art-Net node and perform a double-click on it with the left mouse button. A new window will be opened and we have to configure the new Art-Net Node.
Click OK |
||||||||||||
4. |
So far, we have added one Art-Net node with 4 ports. But the Sample Node has 8 ports. That means we have to add another Art-Net node in MADRIX with the same IP address, but using port 5-8.
A new Art-Net node will be created. Please select the copied entry (it is the entry wit the name copy Sample Node). Perform a double-click with the left mouse button to open the Art-Net Device Configuration window.
Click OK |
||||||||||||
5. |
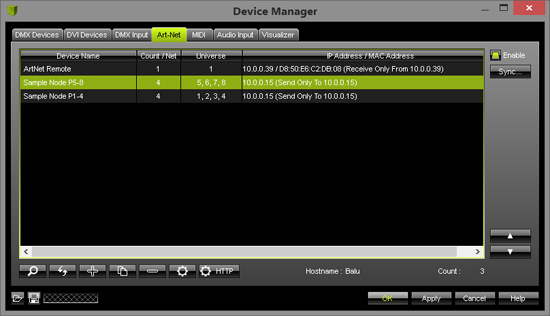
The Sample Node with 8 ports has now been added.
|
||||||||||||
6. |
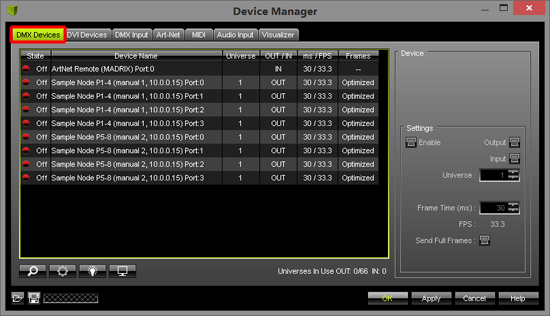
Change to the DMX Devices tab in the Device Manager.
You can see one DMX universe for every port of the Art-Net nodes. All universes are Off |
||||||||||||
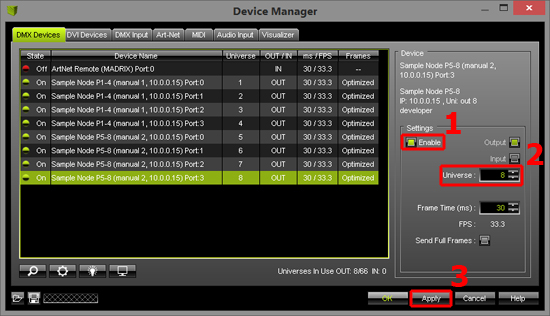
7. |
Now, we have to enable the DMX universes and to set the desired virtual Universe. Select one universe and go to the Settings section of the Device Manager. Please click Enable, set up a desired Universe and click Apply. Repeat this for all DMX universes.
You can use the Art-Net nodes and DMX universes just like they were connected to your PC via USB. |

Congratulations! You have manually created new Art-Net nodes in MADRIX.