Learn how to create a Cue List and trigger this Cue List via MIDI Time Code. You can use a Cue List for automatic playback in MADRIX.
Date: 12/2014
MADRIX Version: 3.3 (Created with)
1. |
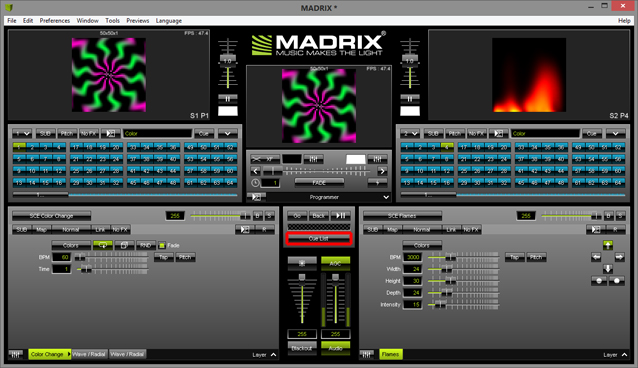
Please start MADRIX.
|
||||||
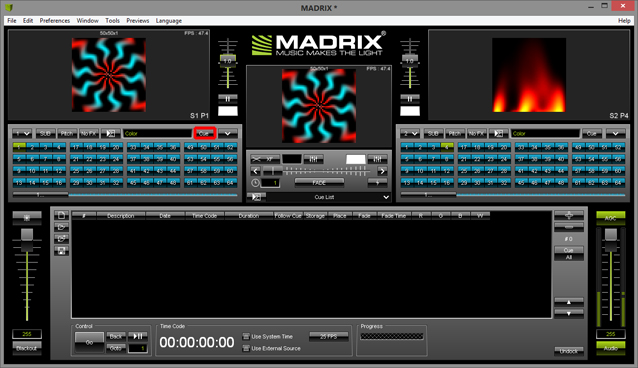
2. |
MADRIX will switch to the Cue List view. If you have not added a Cue to the Cue List yet, the list will be empty.
|
||||||
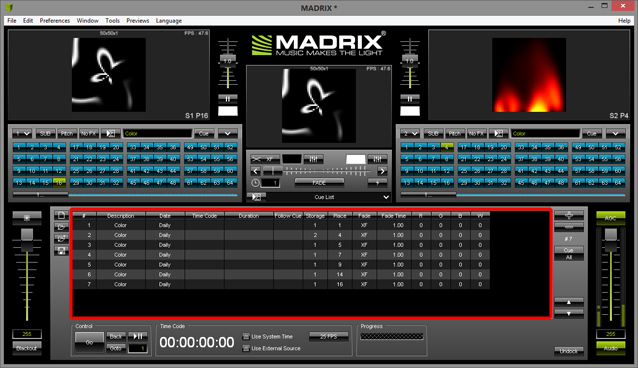
3. |
We have added 7 Cues in this example.
|
||||||
4. |
If you now start the playback of the Cue List, you will see that the Cues will not be changed automatically. You can choose to change Cues manually by clicking the Go or Goto buttons.
Note: When you want to create an automatic Cue List, you have to trigger it by using Time Code or Duration
|
||||||
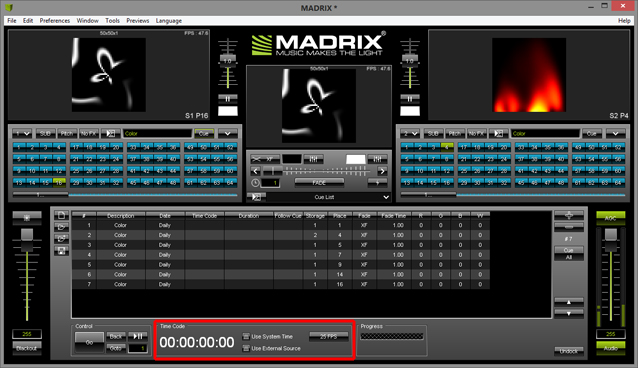
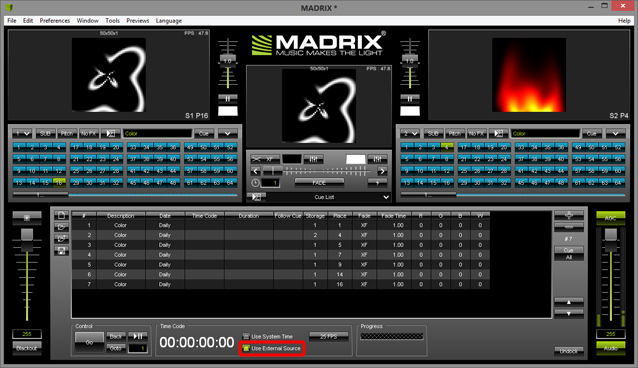
5. |
In this example, we want to control the Cue List via Time Code and Duration Please enable Use External Source because we want to receive MIDI Time Code (MTC).
|
||||||
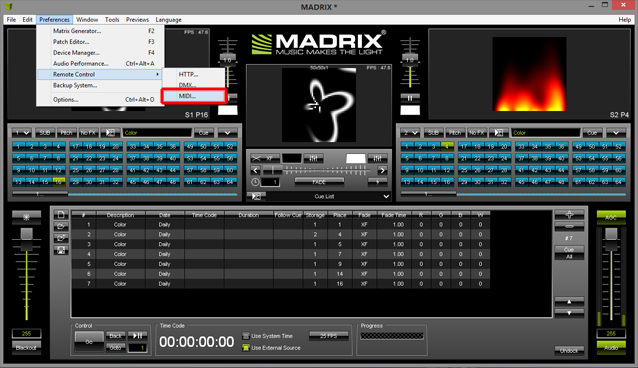
6. |
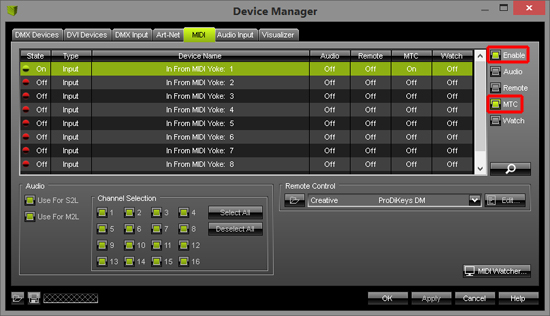
When we want to use the MTC for triggering the Cue List, we have to enable the MIDI interface which receives the time code. Therefore, please open the MIDI tab of the Device Manager or go to Preferences > Remote Control > MIDI...
In the MIDI tab of the Device Manager, please select the desired device and activate the Enable and MTC checkboxes to enable the reception of the time code. Afterwards, please click OK
|
||||||
7. |
If the MIDI device receives MTC, you can see the received time code in the Time Code section of the Cue List
|
||||||
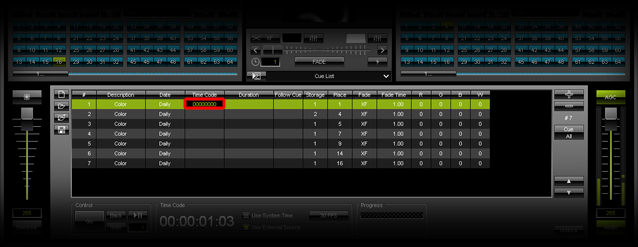
8. |
In this step, we want to create the time code trigger for the first Cue. The first Cue should be activated when MADRIX receives the time code 00:00:00:00
|
||||||
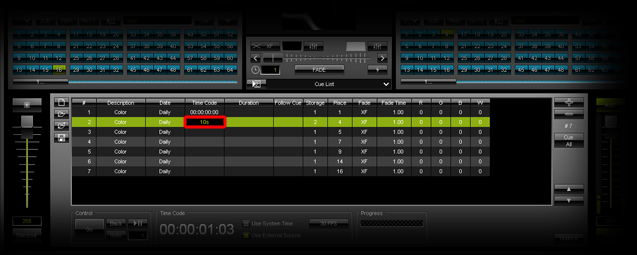
9. |
The next Cue should start at 00:00:10:00
|
||||||
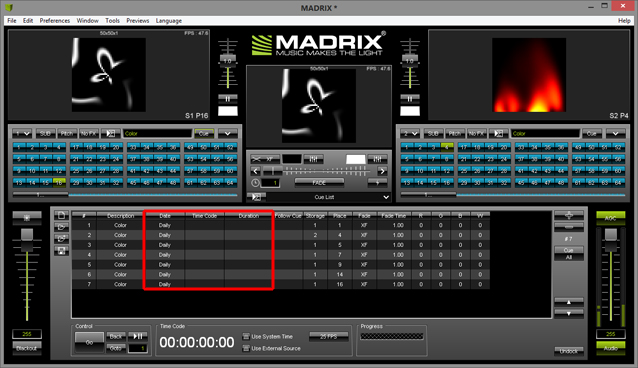
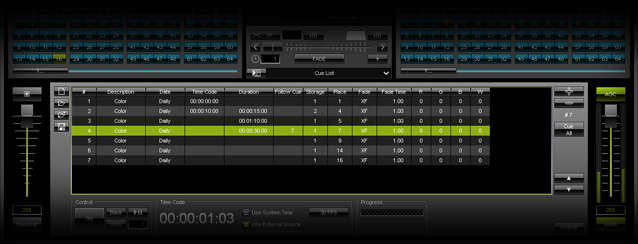
10. |
We will switch the triggering now. The next Cues are going to be triggered by their duration. In the below image, you will see that the Follow Cue column of the fourth Cue is not empty. In this example, we have set the Follow Cue of this Cue to 7. That means that the Cue List will continue with Cue 7; after Cue 4 has ended.
|
||||||
11. |
We will change the Duration for the remaining Cues. The duration of Cue number 5 will be set to 12 seconds and 22 frames (00:00:12:22), the duration of Cue number 6 will be set to 30 seconds and 4 frames (00:00:30:04), and the duration of Cue number 7 will be set to 5 minutes and 32 seconds in this example (00:05:32:00). In Addition, Cue number 7 gets its Follow Cue set to 5. That means after Cue 7 has ended, the Cue List will continue with Cue number 5. This will happen in a loop until you stop the Cue List or MADRIX receives the time code 00:00:00:00 or 00:00:10:00
|


Congratulations! You have learned how to set up a Cue List with time code and duration triggering.