In this tutorial, you will learn how you can control MADRIX remotely via Art-Net as well as receiving thumbnails of Storage Places via CITP.
Date: 09/2014
MADRIX Version: 3.3 (Created with)
Requirements: Make sure that only one network card is enabled in Windows.
1. |
Set up an Art-Net compatible IP address/subnet mask in Windows for your network card. In this example, we are using the network address 10.0.0.39 for the PC on which MADRIX will run (being controlled remotely) and the network address 10.0.0.23 for the console which should send the data to MADRIX. The subnet mask is 255.0.0.0 on both devices. |
||||
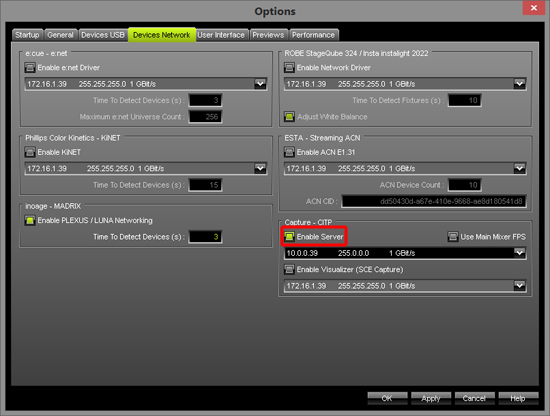
2. |
Start MADRIX and go to Preferences > Options..., select the Devices Network tab, go to the section Capture - CITP and activate Enable Server
Click OK Note: If you have more than one active network card, you need to choose the right network interface. Below the Enable Server checkbox, click on the arrow on the right-hand side of the drop-down menu and select the correct network interface card. |
||||
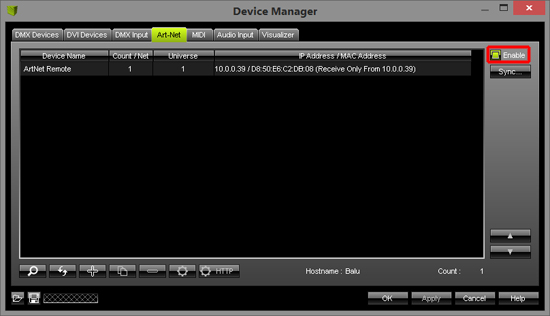
3. |
Now, go to Preferences > Device Manager or press the F4 key and select the Art-Net tab.
|
||||
4. |
Click on the checkbox Enable in the upper right corner to enable Art-Net.
|
||||
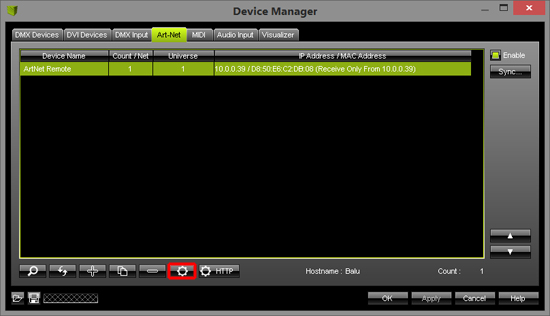
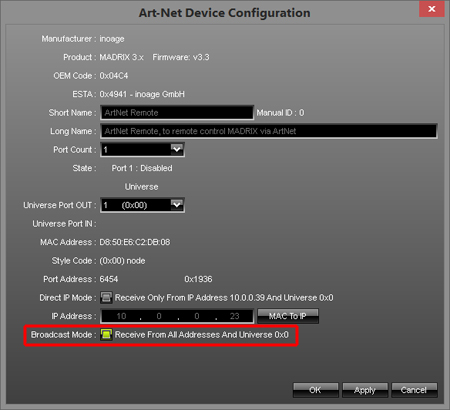
5. |
Select the automatically created ArtNet Remote entry in the list (the list entry will be highlighted in green then) and click the Configuration button on the right side. c |
||||
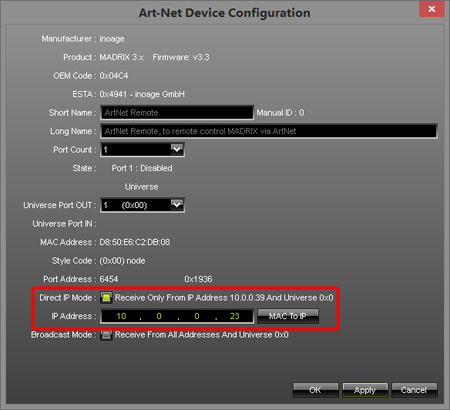
6. |
or
Click OK |
||||
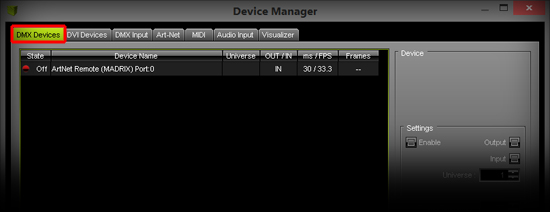
7. |
In the Device Manager, switch to the tab DMX Devices
|
||||
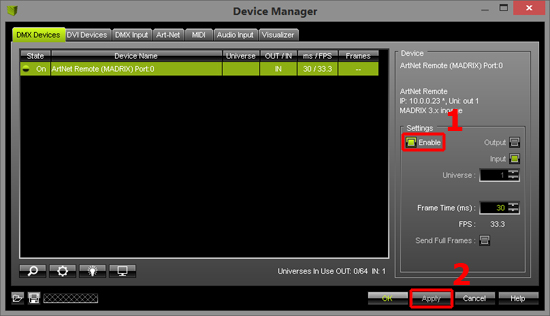
8. |
Select the automatically created ArtNet Remote entry in the list (the list entry will be highlighted in green then), activate Enable to the right, and press Apply
|
||||
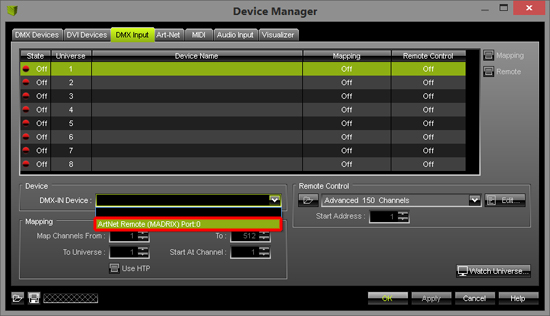
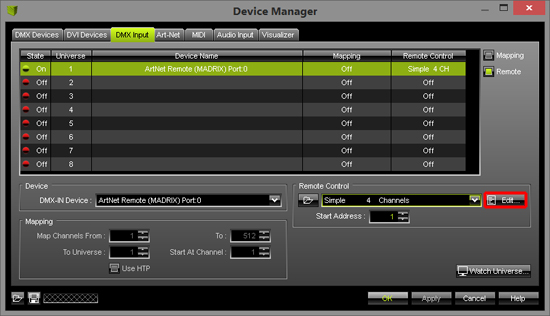
9. |
Now, switch to the DMX Input tab.
|
||||
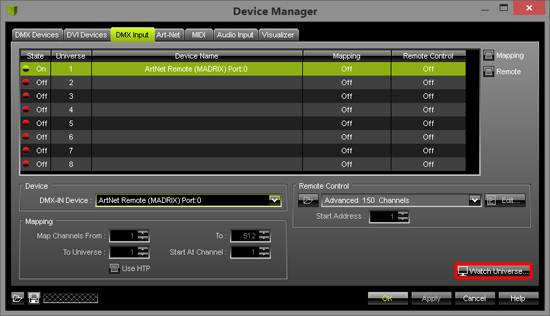
10. |
Select the first entry of the list (Universe 1), which is still empty (the list entry will be highlighted in green then), and select ArtNet Remote at DMX-IN Device in the Device section.
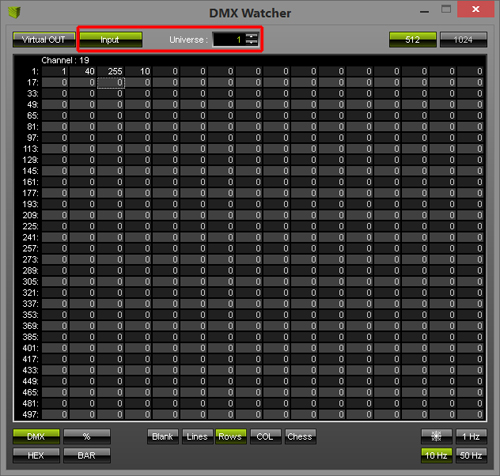
You can check now if you are receiving DMX-IN data via Art-Net. To do so, click Watch Universe... and the DMX Watcher will be opened.
Please make sure that the DMX Watcher is set to Input and DMX Universe 1. If the console is configured correctly and if it sends DMX data, you should see it in the DMX Watcher
|
||||
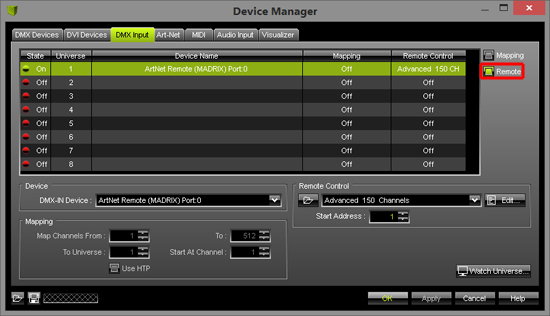
11. |
While still having selected the first list entry in the Device Manager, tab DMX Input, enable Remote in the upper right corner.
|
||||
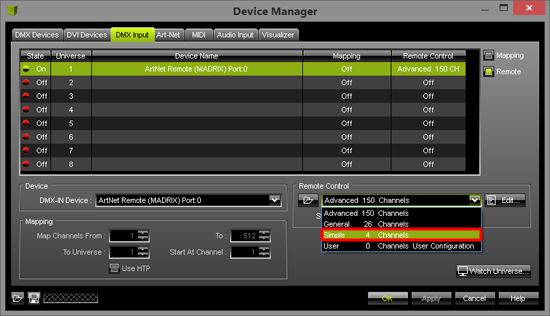
12. |
Now, click on the little arrow in the Remote Control section and choose the Simple protocol. Note: The first list entry must still be selected.
|
||||
13. |
Click Edit... and you can see the preconfigured DMX protocol.
|
||||
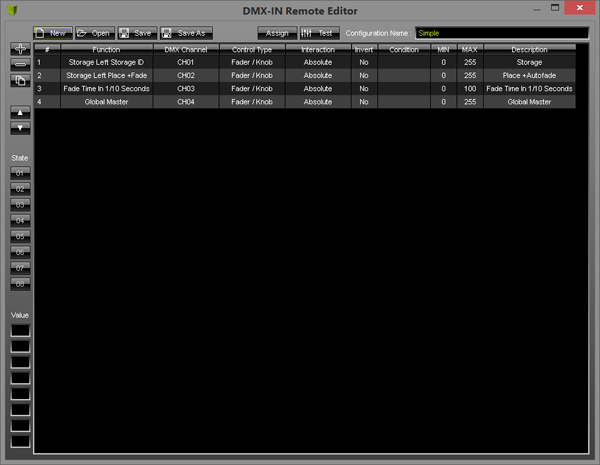
14. |
The Simple DMX protocol is configured as follows: CH01 chooses the Storage, while CH02 chooses the Storage Place with its MADRIX Effect, CH03 regulates the Fade Time of the Crossfader, and CH04 controls the Master Fader.
Note: The Simple protocol will only use and work at the left side of MADRIX. |
||||
15. |
Close the DMX-In Remote Editor, and click OK and the Device Manager will be closed, too. |


Note: You can go to Tools > Logfile to see details of what MADRIX sends or receives via CITP. (To filter the log messages, set the Filter to CITP.)
Congratulations! You can control MADRIX via Art-Net and CITP now.