This tutorial shows you how to create a 3D Patch with different fixtures.
Date: 09/2014
MADRIX Version: 3.3 (Created with)
Note: It is useful to read the tutorial »Creating A Patch With Different Fixtures beforehand.
We want create a patch with one Eurolite - LSD soft display, several of the Litecraft - PowerBars, and several of the Ehrgeiz - FS-60 fixtures.
1. |
Start MADRIX and go to Preferences > Patch Editor or press F3. |
||||||
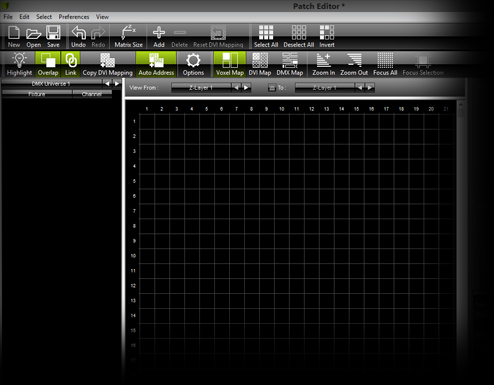
2. |
Create a new, empty patch. To do so, click New on the toolbar and confirm the next dialog. |
||||||
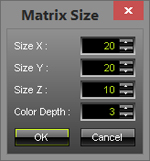
3. |
Now change the size of the patch. Click Matrix Size and set the values to:
Confirm with OK In this way, we have changed the patch size to 20 pixels in X and Y with 10 levels in Z. |
||||||
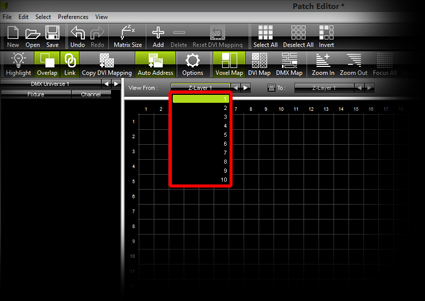
4. |
Right now, you can see only one Z-Level. If you want to navigate through the layers, you have to change the index number of the First Z control.
|
||||||
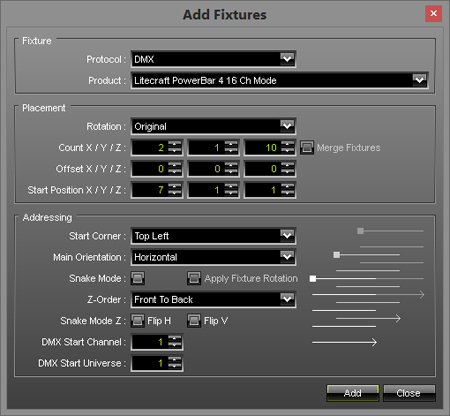
5. |
In the following steps, we want to patch some fixtures. We will start with adding several Litecraft - PowerBars.
Confirm with Add |
||||||
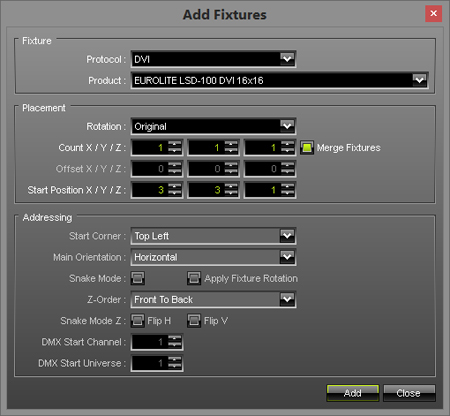
6. |
Click Add again. Now, we want to add the Eurolite - LSD DVI fixture. Please change the settings as shown in the following picture: Click Add |
||||||
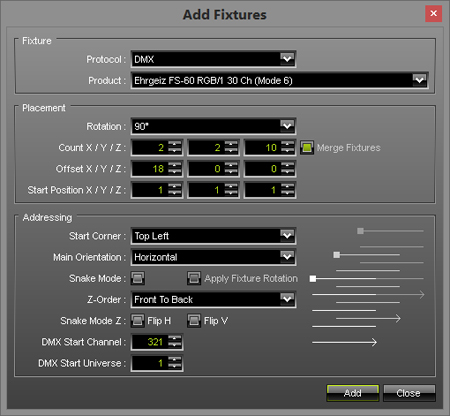
7. |
We will continue to add fixtures. In this step, we will add several Ehrgeiz - FS-60. Change the settings as shown in the following picture:
Click Add |
||||||
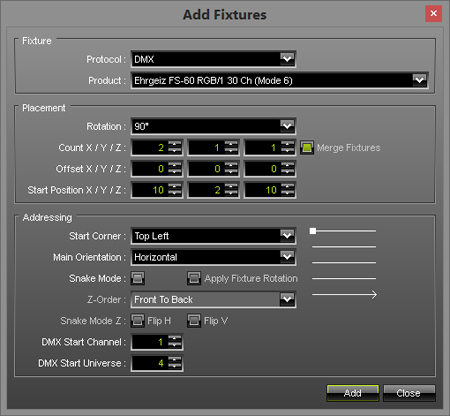
8. |
In this step, we are going to add the last fixtures of this tutorial. We want to patch Ehrgeiz - FS-60 fixtures again. But this time, we want to place only 2 in the middle of Z-Level 10. Change the settings as shown in the following picture:
Click Add and Close |
||||||
9. |
Close the Patch window and the Preview in MADRIX should now look like this:
If you do not see a 3D view in MADRIX, perform a click with the right mouse button on the Preview and change the mode to 3D Mode |
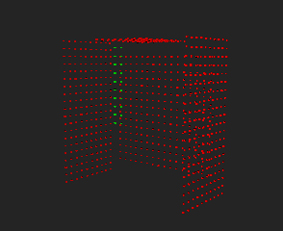
Congratulations! You have created a more complex 3D patch including different fixtures.