This tutorial shows you how to create a 3D Patch with the Matrix Generator and how you can change the view in MADRIX to 3D.
Date: 09/2014
MADRIX Version: 3.3 (Created with)
Note: If you have never worked with the Matrix Generator before, please have a look at the tutorial to »The First Patch
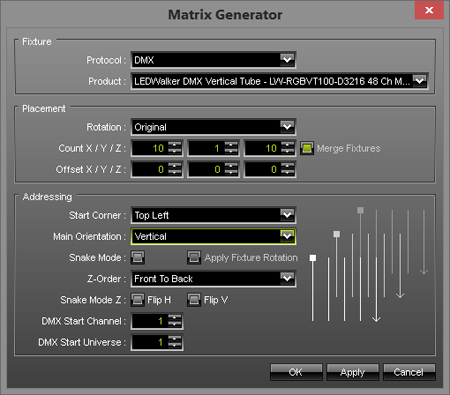
We will now patch 100 LEDWalker LW-RGBVT100-D3216 tubes.
1. |
Start MADRIX and press the F2 key. The Matrix Generator will be opened. |
||||||||||||||||||||||||
2. |
Set up the following settings:
Click OK |
||||||||||||||||||||||||
3. |
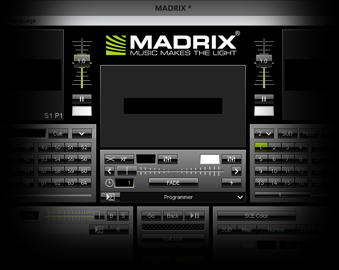
You can see the following Preview in MADRIX:
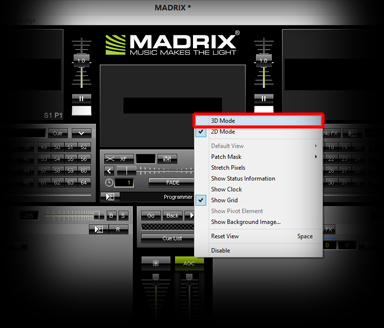
That is no 3D Preview, yet. To change the Preview to 3D, perform a click with the right mouse button on one of the Previews and select 3D Mode in the pop-up menu. |
||||||||||||||||||||||||
4. |
To see the patched matrix better (and in 3D), change the color of the SCE Color Effect.
Navigation in the Preview is very easy. Use the mouse wheel to zoom in and zoom out or hold the left mouse button down and move the mouse to turn the matrix within the Preview. |

Congratulations! You have created a 3D Patch and changed the view to 3D in MADRIX.