In this tutorial, you will learn how to create a patch with 3 different fixtures.
Date: 09/2014
MADRIX Version: 3.3 (Created with)
We will use several #G-Lec Phantom 60 DVI screens, several Elation LED 60 Tri Strip fixtures, and several Martin Stage Bar 2.
1. |
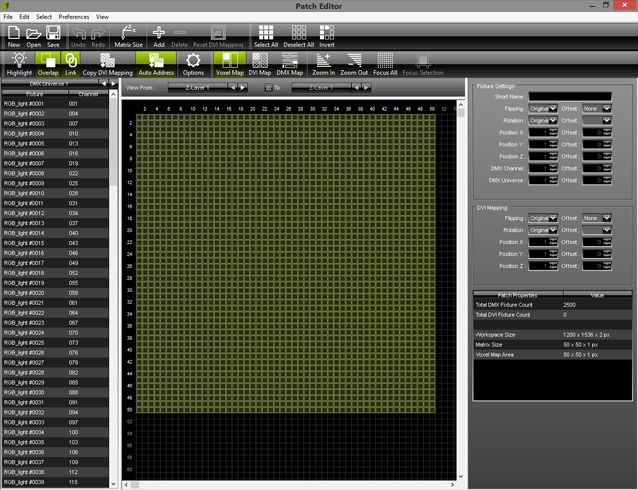
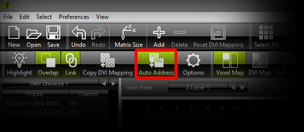
Start MADRIX. Go to Preferences > Patch Editor or press F3. Now the Patch Editor appears:
|
||||||||||||||||||
2. |
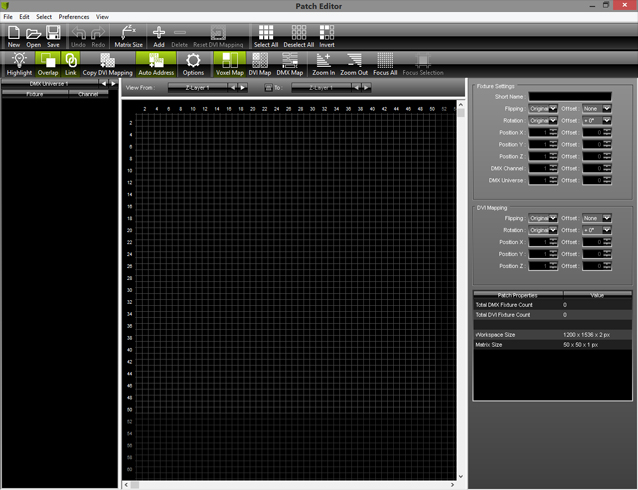
Click New on the toolbar, go to File > New, or press Ctrl+N Click Yes to confirm that all fixtures should be deleted.
Now you will get a new, empty patch.
|
||||||||||||||||||
3. |
Click Matrix Size on the toolbar and enter Sixe X: 100, Size Y: 100, and Size Z: 1. Now there is enough space for all the devices we want to add.
|
||||||||||||||||||
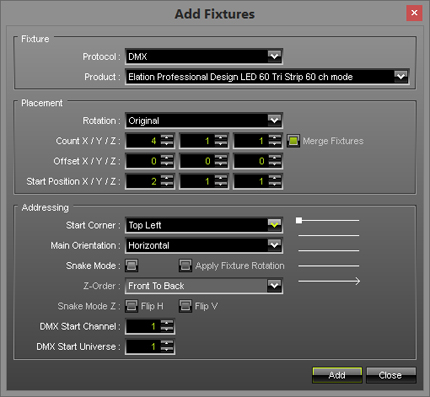
4. |
Click Add and let us add the first 4 Elation Professional Design LED 60 Tri Strip fixtures in horizontal position starting from X: 2, Y: 1, and Z: 1 Set up the following settings in the Add Fixtures window:
Now click Add |
||||||||||||||||||
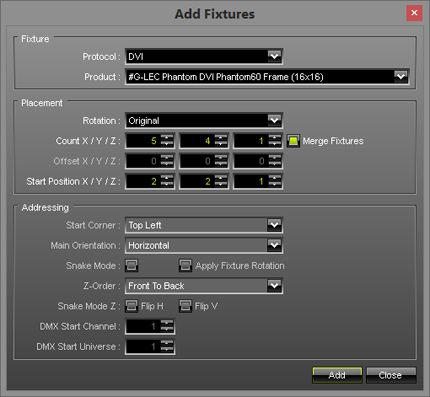
5. |
Click Add on the toolbar again. Now we want to add 20 #G-Lec Phantom DVI Phantom 60 Frame DVI fixtures. The dimensions will be 5 rows with 4 columns.
|
||||||||||||||||||
6. |
In addition, we want to add another 4 fixtures. But this time they should be positioned below the DVI screen.
Now select all Elation Professional Design LED 60 Tri Strip fixtures in the Patch (Press and hold down the Ctrl key and click on every single fixture one after another). Afterwards, hold down the Ctrl key again, click on one of the Elation fixtures, and drag it to the desired position. In our example, the left corner of the left fixture should be at position X = 2 and Y = 66. The advantage of this method is that you do not need calculate the DMX addresses. MADRIX does it automatically for you.
|
||||||||||||||||||
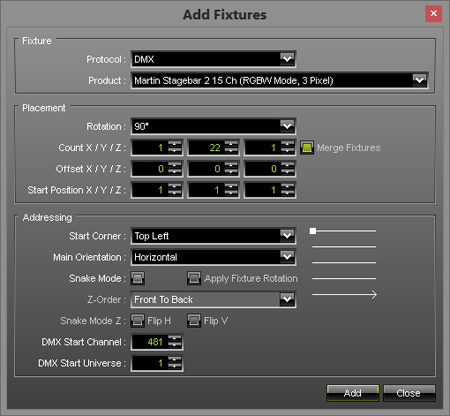
7. |
In this step, we want to add 22 of Martin Stage Bar 2; positioned to the left side of the DVI screen. The fixtures will be rotated by 90°. Click Add on the toolbar and configure up the following settings:
|
||||||||||||||||||
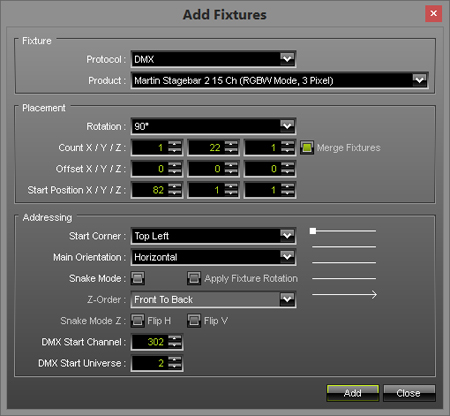
8. |
Let us add the last fixtures of this tutorial. But please change the following settings:
|
||||||||||||||||||
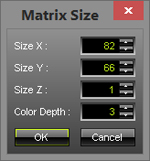
9. |
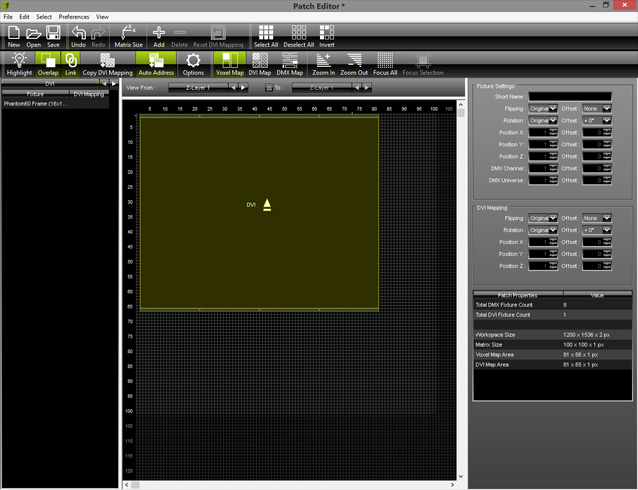
Now, the Patch Size we have set up initially is too large. We will change it to the correct size. Click on Matrix Size on the toolbar and change the dimensions. Set Size X to 82 and set Size Y to 66.
Now, the whole patch should look like this: |


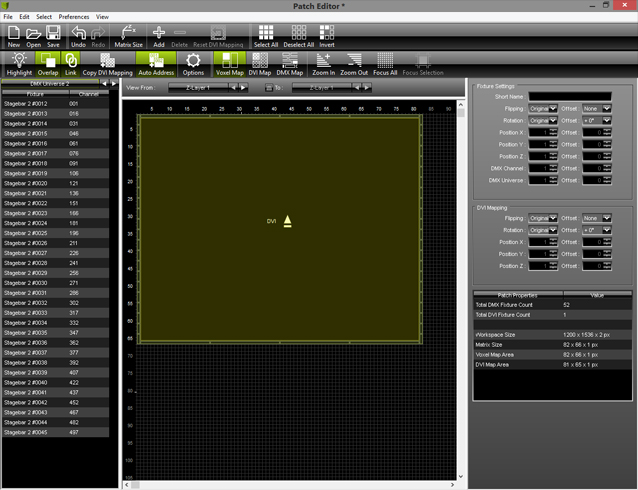
Note: For this patch we need to use 3 DMX universes. If there are no more channels available in the current universe for the next fixture, MADRIX automatically adds the fixture to the next universe.
You can save the Patch if you need it for other Setups. In the Patch, go to File > Save Patch As, choose a directory, type in a file name, and click Save. Close the Patch. MADRIX updates the new patch automatically.
Congratulations! You have created a Patch with 3 different fixture profiles and 53 fixtures.