This topic includes:
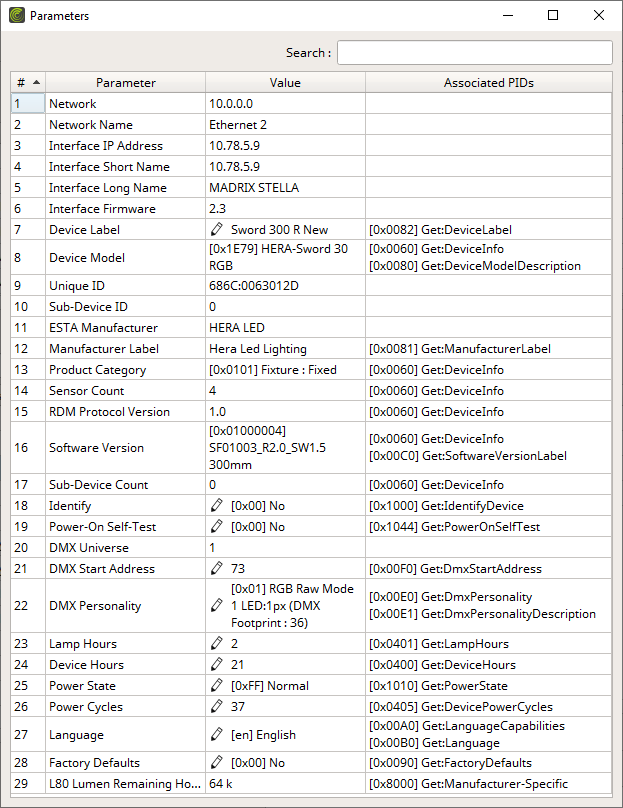
The Parameters view shows all RDM parameters [PIDs including fixed parameter IDs as well as manufacturer-specific IDs] that are supported by the currently selected device [or even currently selected devices].

By default, the following information is provided since the following columns are enabled in the list:
# |
Represents the parameter numbering as index and is especially useful for referencing parameters in the list. |
Parameter |
Shows each specific parameter that is supported. |
Value |
Shows the current value for each parameter. |
Associated PIDs |
Shows the specific PID or PIDs that are assigned to the parameter. |
Overview
▪In general, this overview shows information provided by the RDM device.
▪ In specific cases, the edit icon [that is, a pen] shows that the respective information can be edited by you.
Editing
▪Left Mouse Double-Click - Perform a double-click with your left mouse button on a value in order to edit it.
- Keyboard shortcut: F2
- Confirm with Enter [or click outside of the currently active cell with the mouse]. Abort any changes with Escape.
|
You may be presented with different choices for the specific parameter. |
|
You may be able to directly enter numbers or text as input. |
|
When having selected several devices in the Devices view and their parameters have different values, the software will display this accordingly. When changing a value, the change will be made for all selected RDM devices that support this parameter. |
Valid Values And Limits
The valid values for each parameter are defined by the RDM device and its set of features [such as DMX Personality], the RDM standard [such as Identify], or a different standard [such as DMX Start Address for DMX512].
Visual Feedback For Edits
The software will show you if any changes you have made are set successfully or not. This status is shown for a couple of seconds after each change.
|
Green - The RDM device reported back that the changes were successfully set. |
|
Yellow - The request is currently pending. |
|
Red - The RDM device could not successfully set the new value or the request timed out. Learn more »Missing Responses From RDM Devices |
|
If you are editing several devices, the list cell can split in the according number of selected devices and show each status individually. |
▪Right Mouse Click - Perform a click with your right mouse button on a device.

Edit |
Allows you to change the entry [if it can be edited]. [Keyboard shortcut: F2] |
Request Parameters (Get:ParameterId) |
Sends a new request to the device in order to obtain the latest parameter values, which includes all personalities and their corresponding descriptions. [Corresponds to the Get-command of the specific PID if available.] |
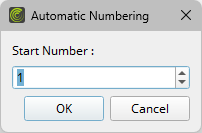
Toggle Automatic Numbering (Set:DeviceLabel)cv |
Is only available for the Device Label Allows you to let the software number devices automatically. This will change the Device Label of the devices and add numbers to the end of the current labels, such as Fixture RGB > Fixture RGB 1.
You can toggle this functionality to turn it on, and off again.
|
Copy Cell To Clipboard |
Copies the currently selected cell [that is, single information] into the clipboard/temporary memory. [Keyboard shortcut: Ctrl + C] |
Copy Rows To Clipboard |
Copies the currently selected row or rows [that is, all parameter information] into the clipboard/temporary memory. [Keyboard shortcut: Ctrl + Shift + C] |
Export List... |
Saves the entire, currently shown list/view/table as a preformatted text file. |

▪Search - Enter any text in order to search all parameters in the list.
- Any device/line that includes the search term will be shown. All others are temporarily filtered out.
- Terms can be case-insensitive. You don't have to use capital letters.
- Feel free to use terms that are incomplete. For example, mad will include results for MADRIX.
- You may specify certain columns by using a colon [:].
- For example: val:MAD shows all lines where MADRIX might be included in a product description for example by referencing the column Value, for example.
You can set up specific settings for Parameters in the Options.
Learn more »Timing
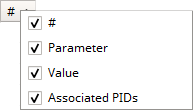
MADRIX RADAR allows you to choose which columns are presented in this view. You can decide which columns are hidden or shown.
▪Right Mouse Click - Perform a click with your right mouse button anywhere on the header of the list.

|
Shown - A checkmark means that columns are shown. |
|
Hidden - No checkmark means that columns are hidden. |
# |
Shows or hides the Index column. |
Parameter |
Shows or hides the Parameter column. |
Value |
Shows or hides the Value column. |
Associated PIDs |
Shows or hides the Associated PIDs column. |
Resize All Columns To Content |
Automatically adjusts the width of all columns to be wider or smaller to comfortably fit all list entries as well as column headers. [This often means that the size of columns is reduced and more information can be displayed in the given space.] |


 - Automatic Numbering is disabled.
 - Automatic Numbering is enabled.
