This topic includes:
▪Using The MADRIX USB Flash Drive
▪Downloading The Software Online
▪Please note regarding Purchased Products, Demo Mode, and Updates:
- The MADRIX 5 Software can be downloaded from »www.madrix.com. Regular updates of the software are also available online. If no MADRIX KEY is connected, the software will run in demo mode.
- Learn more »MADRIX KEY [Software License]
▪It is highly recommended to always use the latest software update.
Using The MADRIX USB Flash Drive
When using a MADRIX USB flash drive for the installation process, please connect the drive to a free USB port of your operational computer. The MADRIX 5 setup will start automatically using an Auto Installer. Please wait until the setup has fully loaded. Then, proceed with the Setup Process as described below. When the Auto Installer does not launch, please navigate to the drive in Windows and manually start the setup process by performing a double-click on MADRIX_64Bit_Install.exe
Downloading The Software Online
▪Download MADRIX_Full_Install.exe from »www.madrix.com
▪After downloading the installer, please double-click with your mouse on this file in order to start the setup process.
▪ Please wait while the Auto Installer is loading the setup.
▪Afterwards, proceed with the Setup Process as described below.
Please make sure to:
1] Log into Windows as administrator [Admin].
2] Let the computer process the setup. This may take some minutes depending on the speed of your computer.
3] Allow Windows to install all drivers. Windows may ask for your permission to install drivers and expects your confirmation. Please search for such pop-up windows; they might have opened in the background and might be covered by other windows.
4] Connect your MADRIX KEY before you start a software update [not during the first installation]. In this way, the MADRIX KEY firmware can automatically be updated if required.
Please install the MADRIX 5 Software before you connect a MADRIX KEY or a MADRIX hardware interface.
|
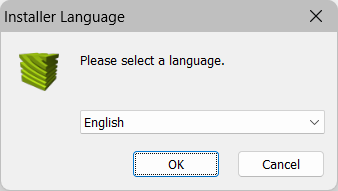
Step 1] ▪Select your preferred language. ▪You can always quit the setup by clicking Cancel |
|
Step 2] ▪Click Next to start the installation. ▪Click Back in order to return to a previous step during the setup process. |
|
Step 3] ▪The License Agreement will appear. It outlines the terms you are agreeing to by installing the software. You must accept these terms in order to continue. ▪Please click I Agree |
|
▪This window allows you to select which components and which drivers you want to install. A description is given for each item. ▪MADRIX 5 - Is a required component. It refers to the MADRIX 5 Software and all additional software tools. ▪Desktop Shortcut - Select if you wish to create a shortcut to the MADRIX 5 Software on your Windows desktop. ▪Quick Launch Shortcut - Select if you wish to create a shortcut to the MADRIX 5 Software in your Windows taskbar. ▪MADRIX KEY Driver - Is a required component. Installs the MADRIX KEY driver. The USB software protection dongle activates the license [MADRIX 5 KEY preprogrammer/ start/ entry/ basic/ professional/ ultimate/ maximum]. ▪MADRIX KEY Firmware Update - Installs the latest firmware on connected USB protection dongles. ▪Interface Drivers - Is a required component. Copies the drivers for MADRIX hardware interfaces to the installation directory and installs them for USB ONE, PLEXUS, NEO, LUNA 4/8/16, NEBULA, STELLA, ORION, USB SMPTE. ▪WinPcap Driver - Select if you wish to use the DVI device types Colorlight 5A, Colorlight A8, Colorlight T9, EuroLite T9, or ColourSmart Link. ▪Examples - Select if you wish to install examples including setups, effects, scripts, etc. Learn more »Examples ▪Next - Click Next after choosing the components in order to continue. |
|
Step 5] ▪Choose an installation directory on your harddisk where the software will be installed. A default Destination Folder will automatically be provided by the setup. ▪Browse... - Click to change the folder. ▪Install - Click to start the installation process. |
|
Step 6] ▪The installation process may take a few minutes. ▪Installation Complete - Click Next when this message shown. |
|
Step 7] ▪Run MADRIX 5 - Deselect if you do not wish to start the software now. ▪Finish - Click to quit the setup.
▪When starting MADRIX 5 for the first time, please make sure to learn more about working with Windows. |


|
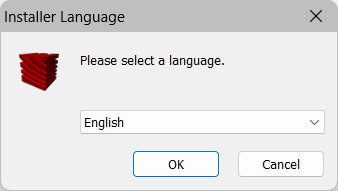
Step 1] ▪Please select your preferred language and confirm with OK ▪You can always quit the uninstaller by choosing Cancel ▪Click Back in order to return to a previous step during the process. |
|
Step 1] ▪Click Next to start the uninstallation. |
|
Step 2] ▪This window allows you to select which components and which drivers you want to uninstall. A description is given for each item. ▪MADRIX 5 - Is a required component. It refers to the MADRIX 5 Software. ▪Log Files - Select if you wish to remove all files saved for logging. By default, the component is selected. ▪Documents - Select if you wish to remove the Documents folder specific to this software from the My Documents directory; except log files. By default, the component is not selected. ▪MADRIX KEY Driver - Select if you wish to uninstall the drivers of the MADRIX KEY. By default, the component is not selected. ▪Interface Drivers - Select if you wish to uninstall the drivers of the MADRIX hardware interfaces. By default, the component is not selected. ▪WinPcap Driver - Select if you wish to uninstall the WinPcap driver. By default, the component is not selected. ▪Uninstall - Click Uninstall after choosing the components in order to continue. |
|
Step 3] ▪The uninstallation process may take a short while. ▪Uninstallation Complete - Click Close when this message shown. |


Checking For New Software Versions
It is always recommended to run the latest software version. MADRIX 5 can search for new software updates.
▪Select the menu Help > Check For Software Updates...
Or you can let MADRIX 5 automatically search for updates.
▪To do so, select the menu Preferences > Options... > Startup > Check For Software Updates
▪Choose Skip Update if you would like to skip a particular version.
▪View Release Notes - Is a link that will open your default web browser and launch the MADRIX website to show all changes and improvements of MADRIX 5 Software updates.
▪Download - Is a direct link to quickly download the latest MADRIX 5 Software version.

Installing New Software Versions
When a new software version has been released, please update your current MADRIX 5 installation to the newest version.
▪Check and download the latest MADRIX 5 Software directly as described above.
▪You can also directly download it from »www.madrix.com
▪It is not required to deinstall MADRIX 5 before you install a new software version.
▪Instead, follow the process described under Downloading The Software Online
▪The installer will ask you if you would like to update your current MADRIX 5 Software installation. Confirm with Yes

| MADRIX 5.7. |
| [Ctrl & +/-] = Zoom In/Out | [Ctrl & 0] = 100% |
|
Previous Next
|
|
Enable Automatic Translation | Activer La Traduction Automatique | 启用自动翻译 |