Topics of this chapter:
| ▪ | Go to Window > Touch... [Keyboard shortcut: F8] |
| ▪ | Or when enabled in the settings, you can open/close the touch screen window by clicking on the MADRIX logo. |
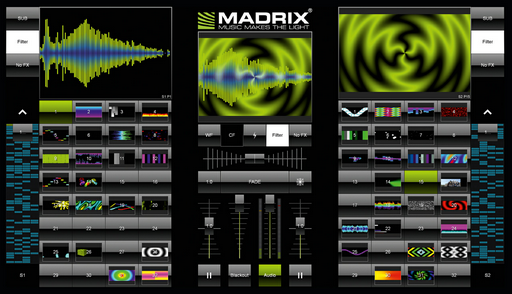
The touch screen interface was especially designed to provide you with an intuitive and easy to use interface. It was designed for touch screen panels, but can also be used with the help of the mouse.

|
Submaster Left/Right - Regulates the overall intensity of an entire Storage. Learn more »Controls [Left/Right] |
|
Color Filter Left/Right - Applies a color filter to the entire Storage. Learn more »Controls [Left/Right] |
|
Filter [FX] Left/Right - Applies a special filter to the entire Storage. Learn more »Controls [Left/Right] |
|
Close/Open Preview - Opens or closes Preview Left or Preview Right. |
|
Storage Place Scroll - Scrolls through the 256 Storage Places of a single Storage. |
|
Storage Selection - Allows you to select the Storage. |
| ▪ | All 3 Previews of the main MADRIX user interface will be disabled, when the Touch Screen is activated and has the focus. This ensures high performance. However, they will be activated again when the user interface has the focus again [click on the user interface to get the focus]. |
| ▪ | The Cue List is not available, when using the Touch Screen. / The Touch Screen is not available when the Cue List is running. |
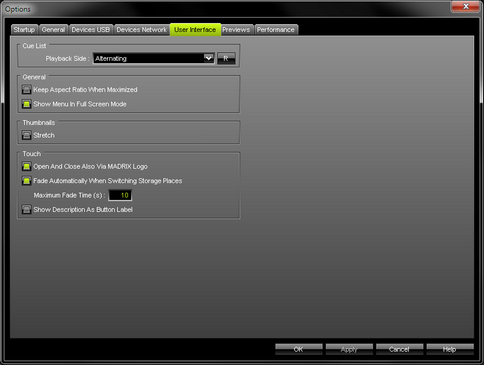
| ▪ | Go to Preferences > Options... > User Interface |

| ▪ | Touch: |
| ▪ | Open And Close Also Via MADRIX Logo - Allows you to open or close the Touch Screen Window by clicking on the MADRIX logo. |
| ▪ | Fade Automatically When Switching Storage Places - Activate this option if the Crossfader should make an automatic crossfade when you select a new Storage Place on the opposite Storage [e.g., from S1 P1 to S2 P1]. |
| ▪ | Maximum Fade Time (s) - Defines the maximum Fade Time in seconds you can set up in the Touch Screen for the automatic fade of the Crossfader. |
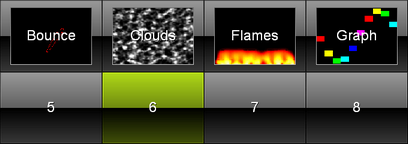
| ▪ | Show Description As Button Label - Will show the individual Description of a Storage Places on the Touch Screen interface instead of the standard numbering [1, 2, 3, etc]. If the Storage Place has the standard Description Color, the standard numbering will be shown. |

Moving The Touch Screen To A Different Monitor
![]() Tab - Use the Tabulator key on your keyboard [repeatedly] to move the Touch Screen interface to your first, second, third, etc. computer monitor or display.
Tab - Use the Tabulator key on your keyboard [repeatedly] to move the Touch Screen interface to your first, second, third, etc. computer monitor or display.


