In this tutorial, you will learn how you can create a repeated and rotated effect with advanced mapping in MADRIX.
Date: 10/2014
MADRIX Version: 3.3 (Created with)
Note: The Map Effect window is useful for creating various variations of an effect. For more information, please read the tutorials »Map - Effects For Fixtures With Space Inbetween and »Map - Mirroring
1. |
Select an empty Storage Place. In this example, it is Storage 1 and Place 1. |
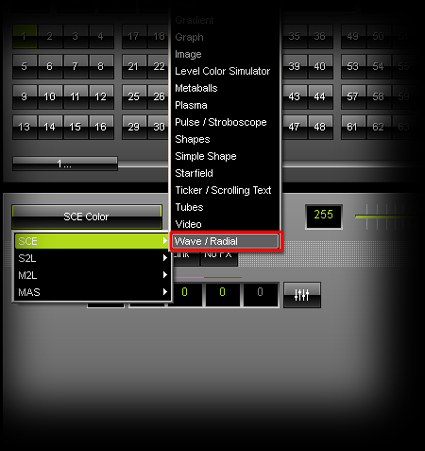
2. |
Now, select SCE Radial / Wave from the drop-down list of effects.
|
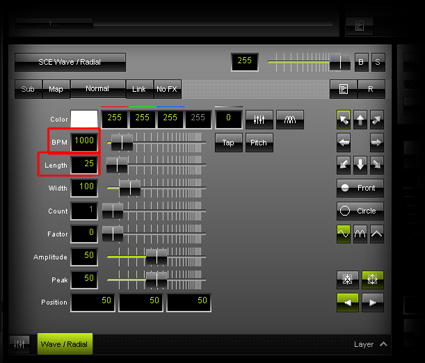
3. |
Change BPM to 1000 and Length to 25
|
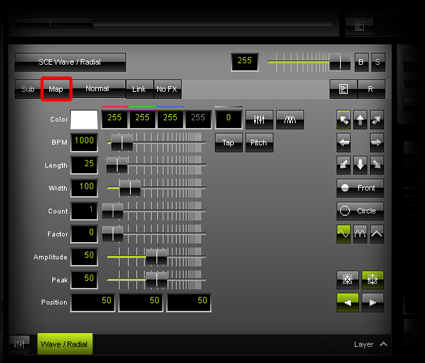
4. |
Click Map button on top of the Effect Section
|
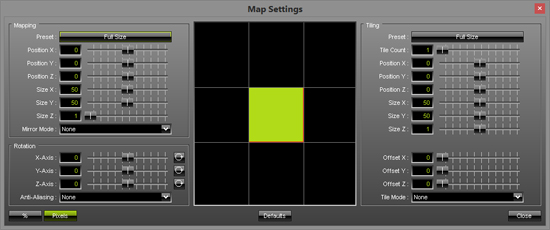
5. |
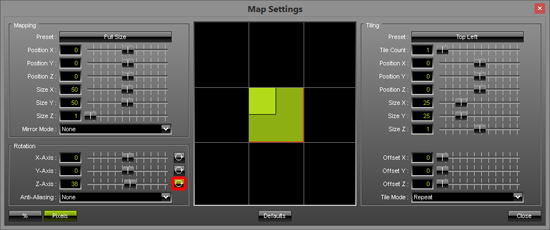
A new window, the Map Settings, will be opened.
|
6. |
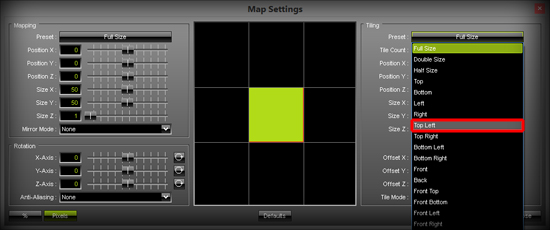
Now, please click the Preset button in the Tiling section on the right-hand side and select Top Left from the drop-down list.
Have a look at the Previews of MADRIX. You can see that the SCE Radial effect is located in the upper left corner and the rest of the LED matrix is black.
|
7. |
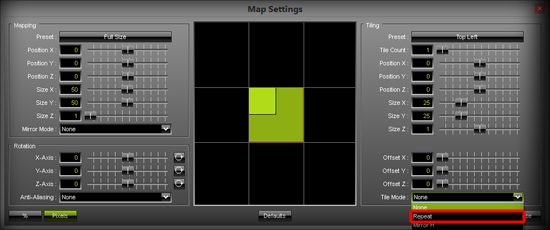
Go back to the Map Settings window. Change the Tile Mode to Repeat.
Take a look at the Previews again. You can see the SCE Radial effect of the upper left corner is now repeated on the whole matrix.
|
8. |
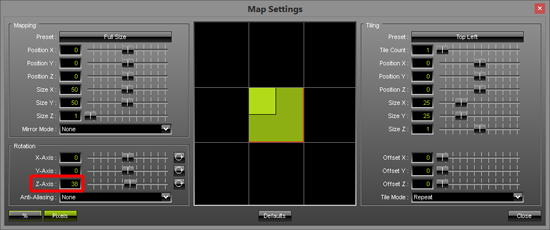
We want to go ahead and rotate the effect around the Z-Axis. Go to the Rotate section of the Map Settings window and change Z to 38. You can do this by simply writing 38 in the text box or by moving the slider to the right side.
|
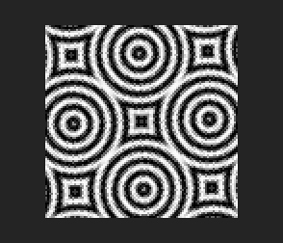
9. |
If you press the Animation button at the right-hand side of the slider, the effect will be rotated continuously. Move the slider again to change the speed.
|
10. |
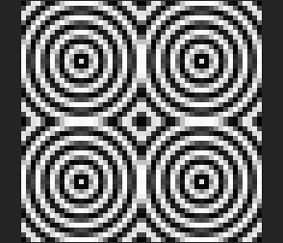
Have another look at the Previews and you can see how the SCE Radial / Wave effect has changed again.
|

Congratulations! You have learned how you can repeat and rotate effects.