In this tutorial you will learn how to merge two patches in MADRIX 5.
Date: 09/2019
MADRIX Version: 5.1b (Created with)
Corresponding Video Tutorial: »Merge Patches
Note:
This tutorial is using the patches of the tutorial »2D Patch With The Patch Editor For DMX Output and »2D Patch With The Patch Editor For DVI Output. It is recommended to work through this two tutorials first and save the patches.
Task:
In this example we want to combine the results of two patches. After the merge the DMX fixtures should be arranged on the top and in the middle of the DVI fixtures.
1. |
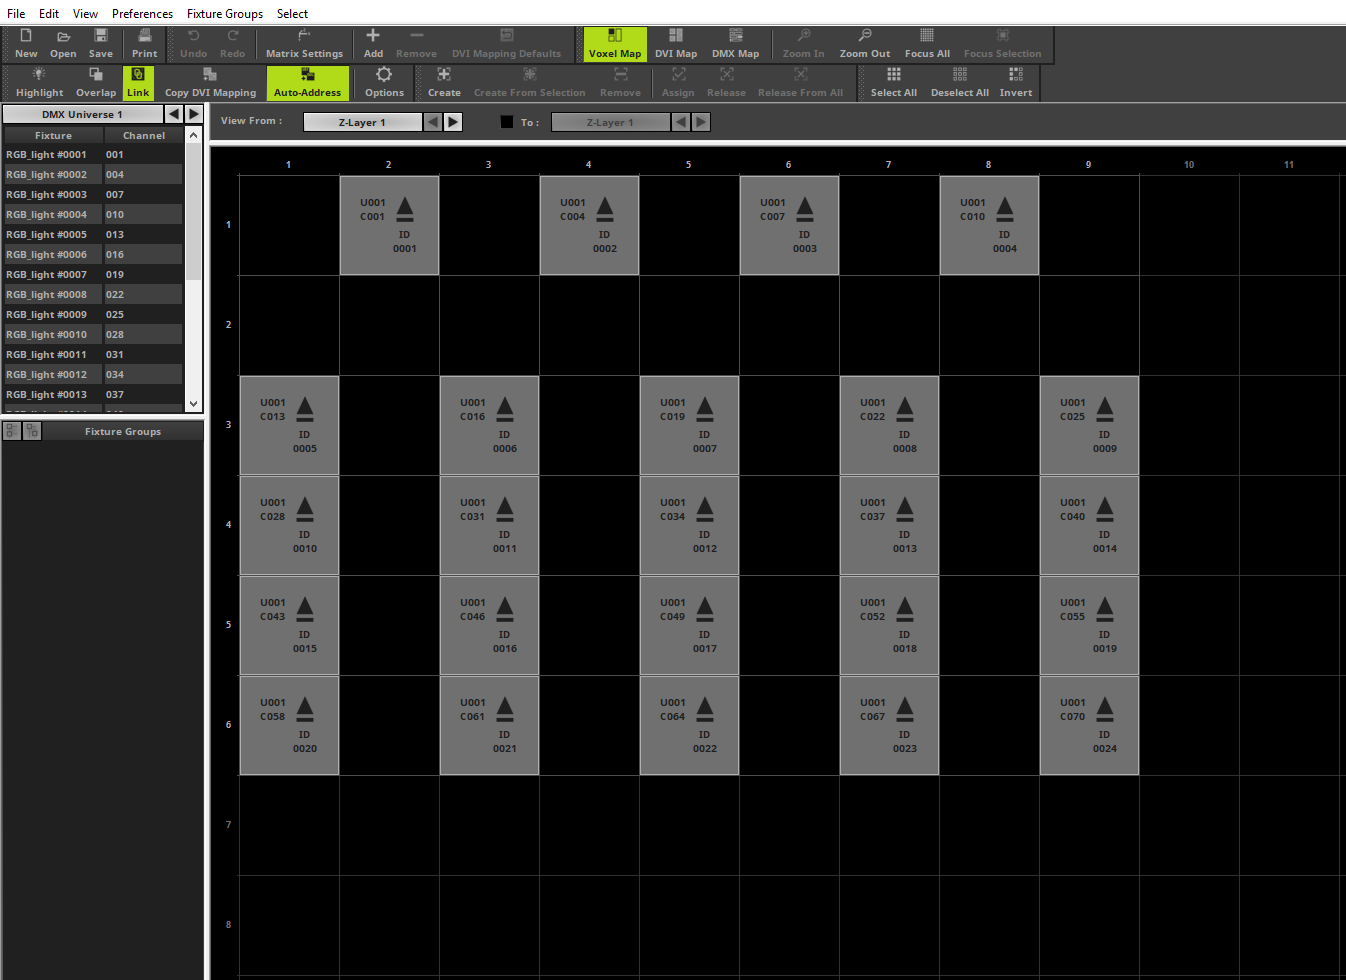
The result of the »2D Patch With The Patch Editor For DMX Output consists of four RGB PAR cans and five 4 Pixel RGB Batten.
|
2. |
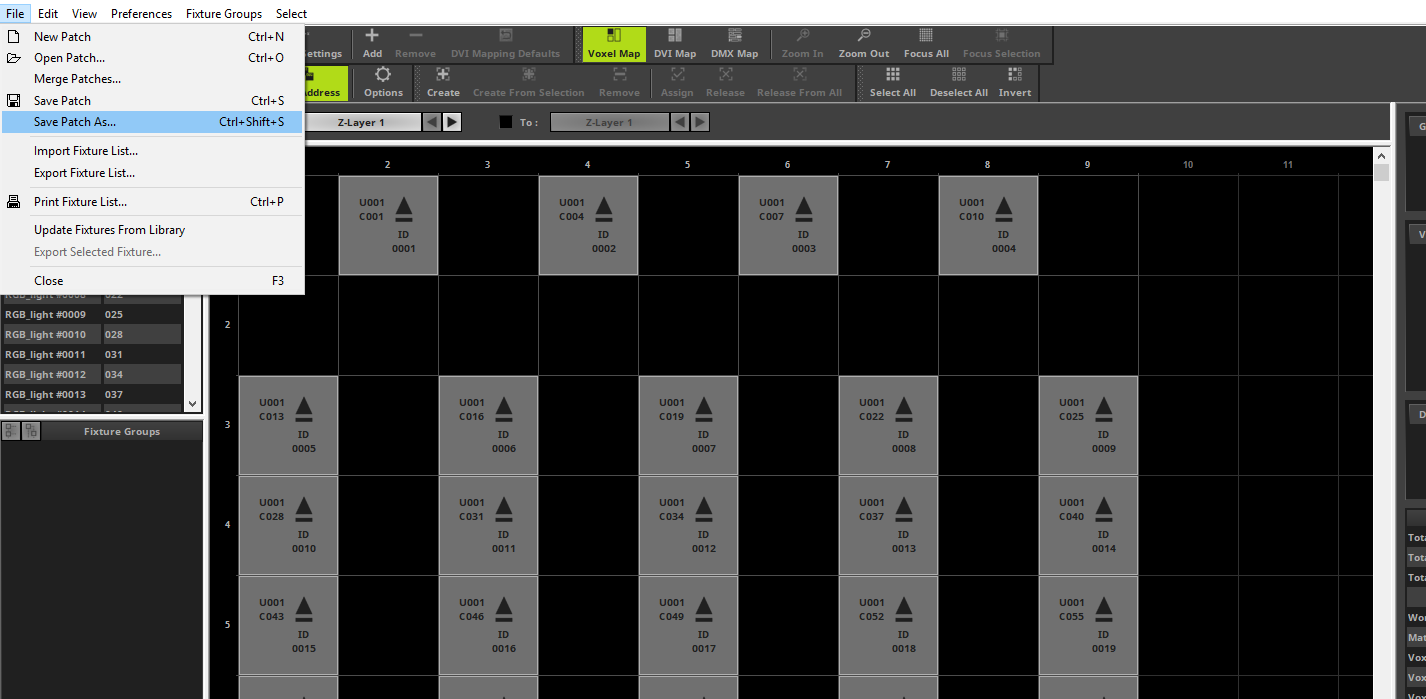
If you haven't saved the result of the »2D Patch With The Patch Editor For DMX Output tutorial, in the Patch Editor please navigate to File > Save Patch As [Keyboard Shortcut Ctrl+Shift+S] and save the patch at a desired directory.
|
3. |
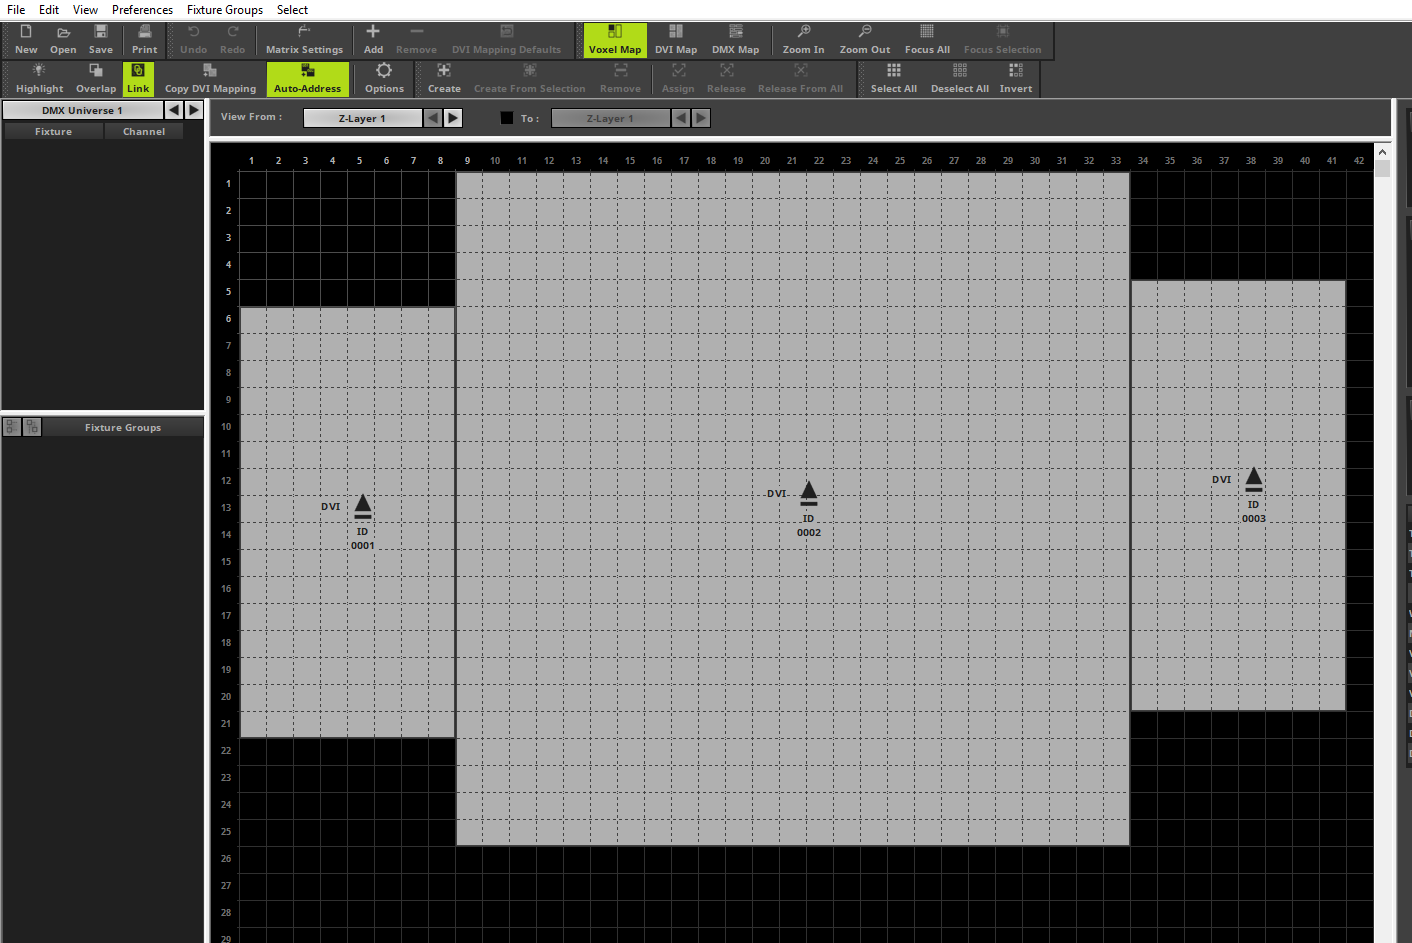
Now we will load or create the patch of the »2D Patch With The Patch Editor For DVI Output tutorial.
|
4. |
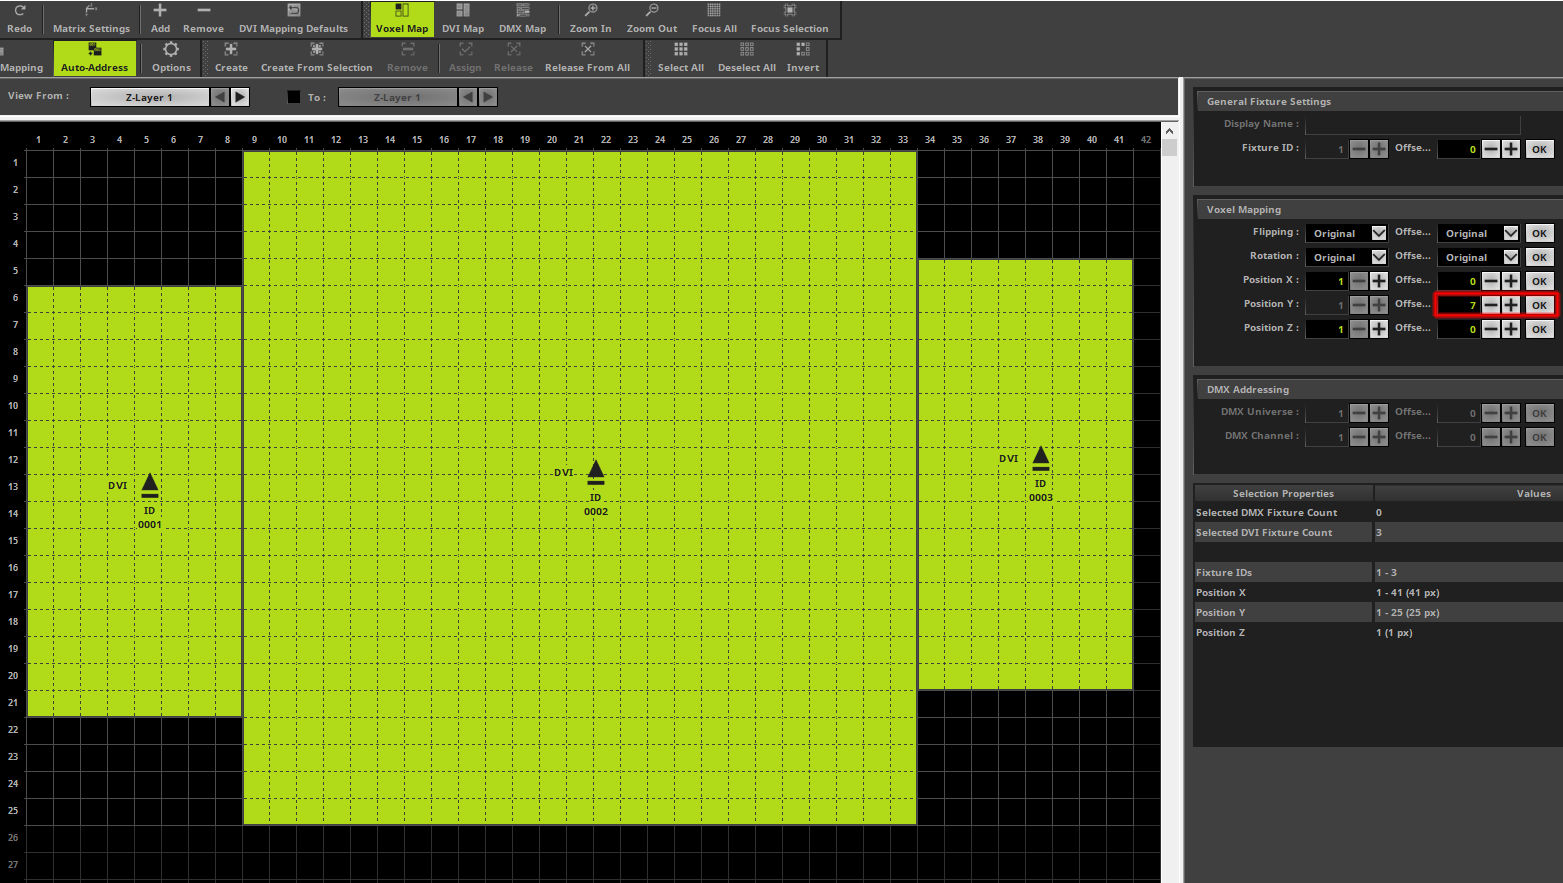
According to our task the DVI fixtures should be arranged below the DMX fixtures after the merge. We know the DMX fixtures are covering 6 pixel in the vertical direction. So we want to move all DVI fixtures by 7 pixels in the vertical direction. Therefore please select all DVI fixtures in this patch, set an Offset of 7 pixels in the Voxel Mapping section and click OK.
|
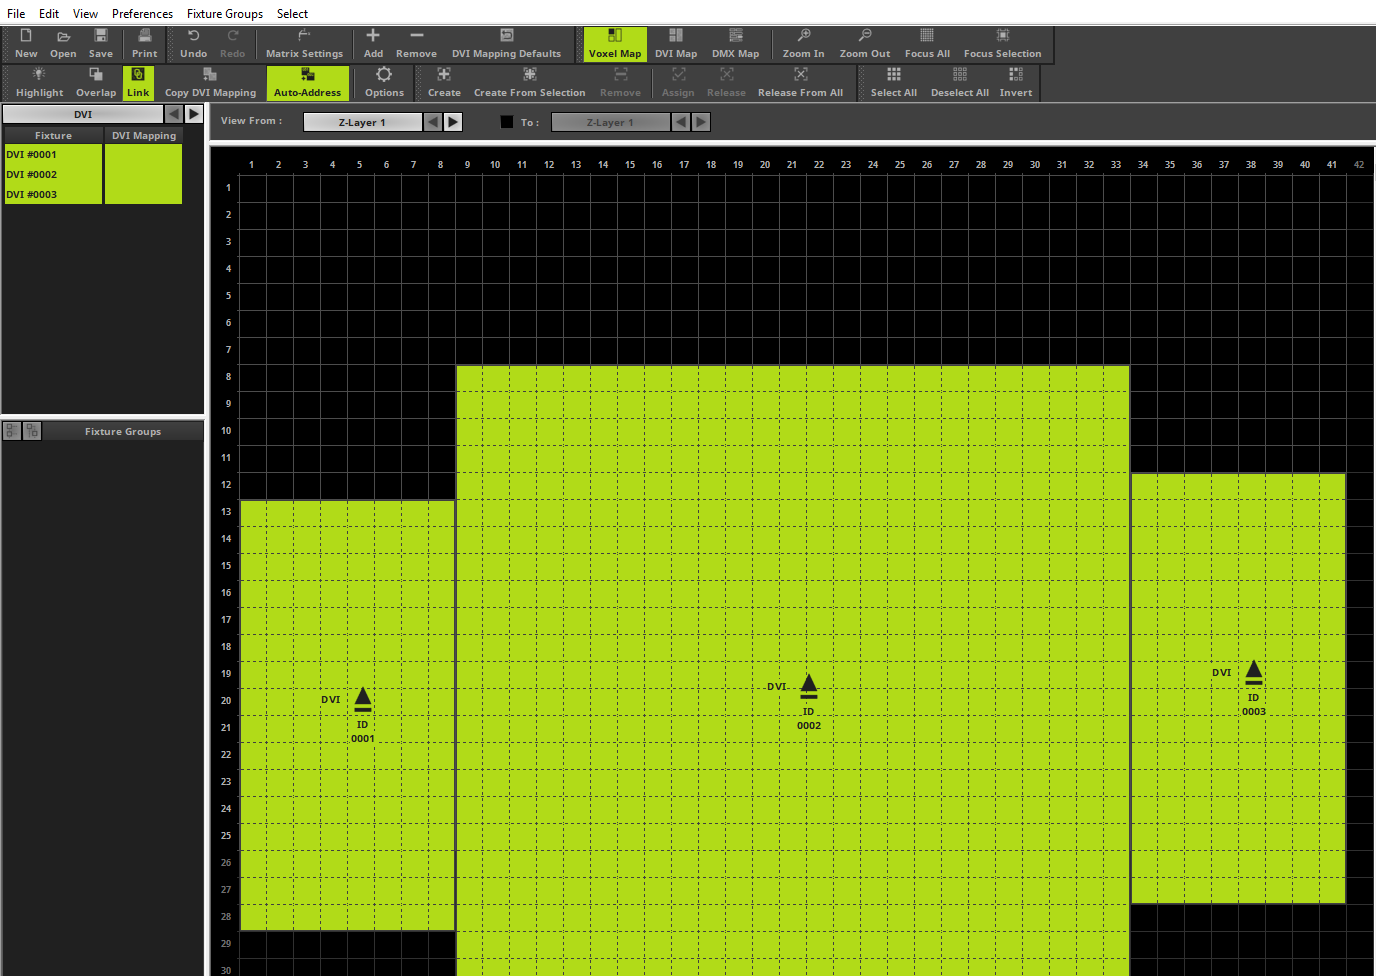
5. |
Now you can see the fixtures are moved and in the patch there are 6 pixels space on top.
|
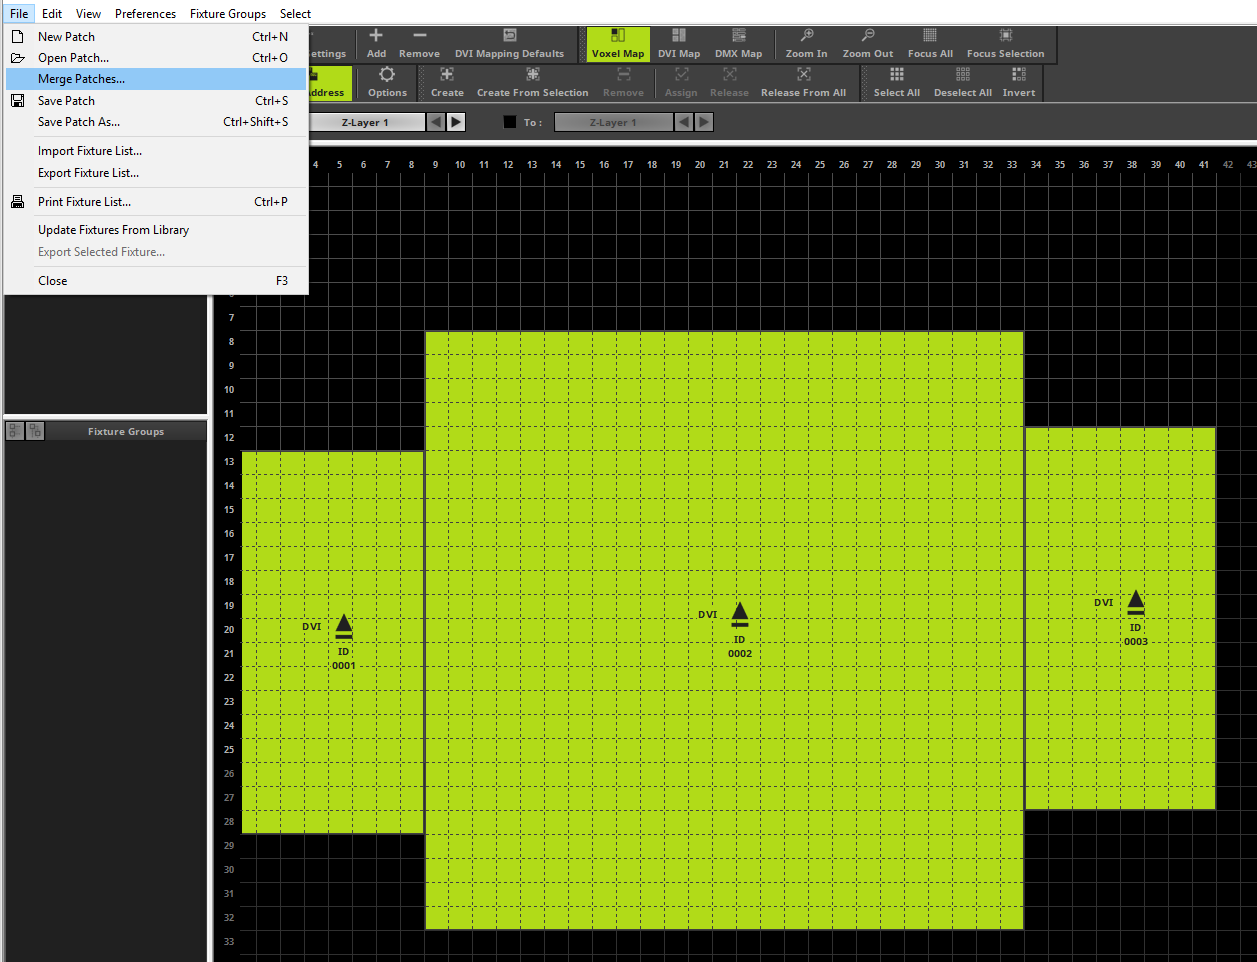
6. |
In the following step we want to start the merge process of two patches. Therefor please go in the Patch Editor to File > Merge Patches...,select the saved patch of the »2D Patch With The Patch Editor For DMX Output tutorial and click Open.
|
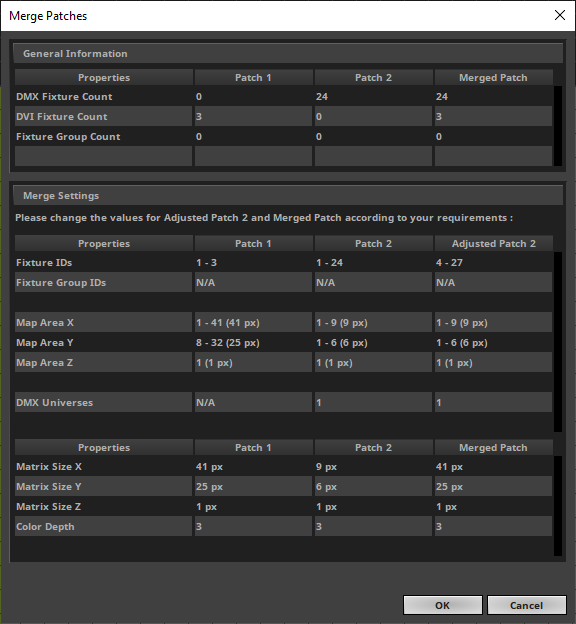
7. |
Now the Merge Patches window opens and we can change some settings of the Merge Settings section.
|
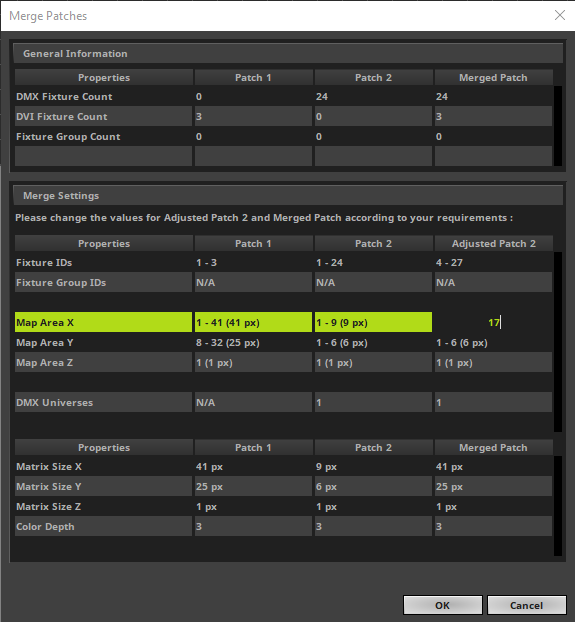
8. |
Because the imported/merged DMX fixtures should be set to the top middle position we need to change the settings in the Adjusted Patch 2 column of the Map Area X line to 17.
|
9. |
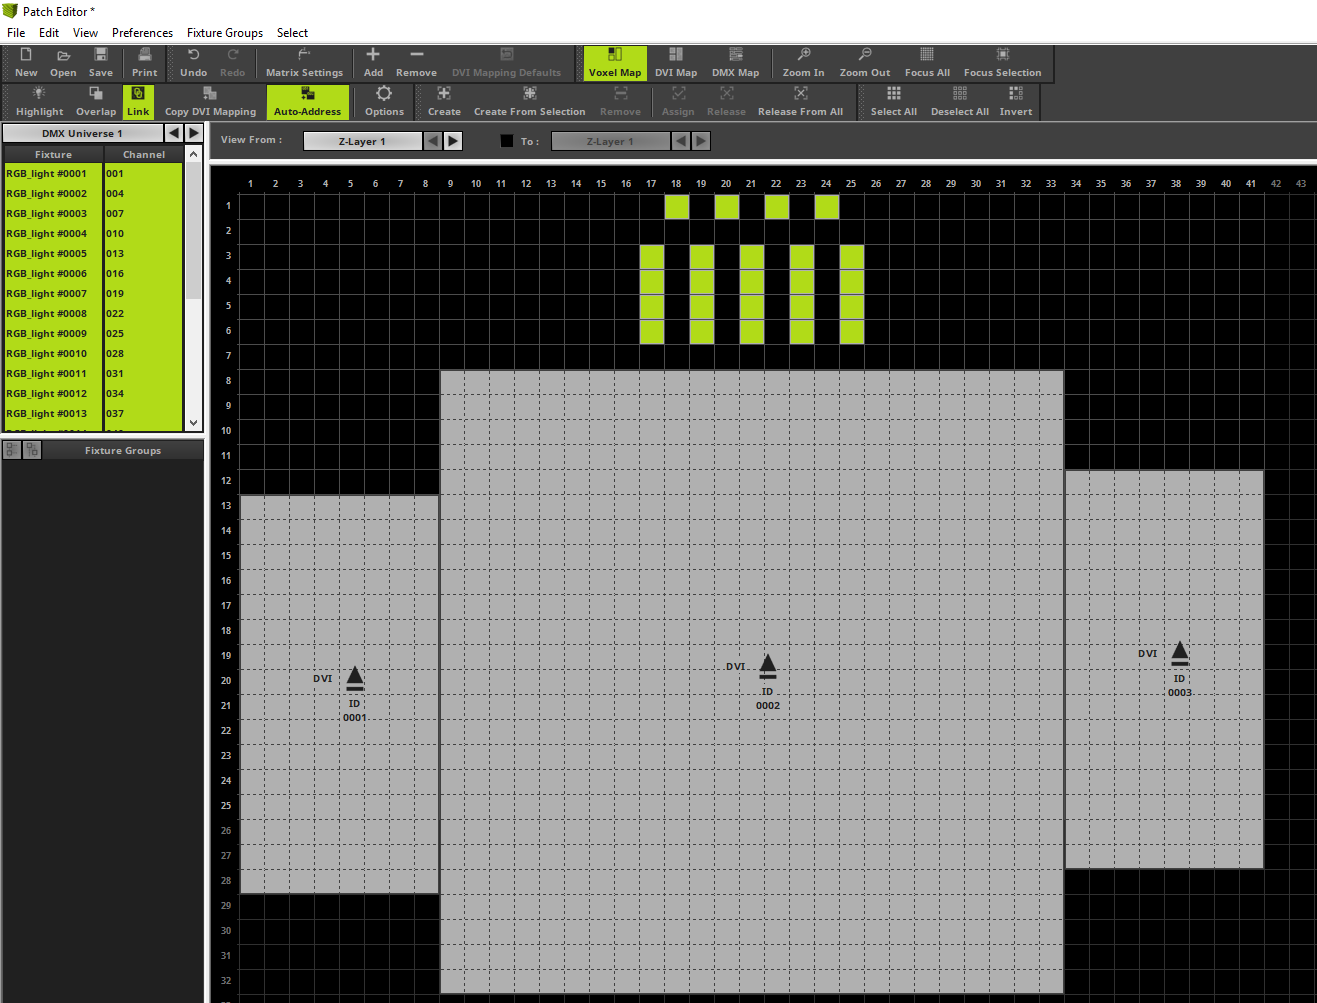
Now the DMX fixtures are merged to the DVI patch a the top center position.
|
10. |
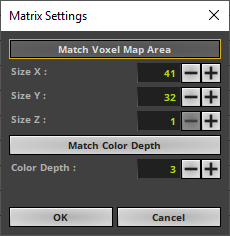
In the last step of this tutorial we have to change the Voxel Map Area to the correct size. Therefor please open the Matrix Settings of the Patch Editor and click the button Match Voxel Map Area for an automatic calculation of the correct size and adopt your settings by clicking OK.
|
11. |
Now we can close the Patch Editor and we can see the new patch which is the result of the merge of two patches.
|

Congratulations! You have successfully learned how to merge two patches in the MADRIX 5 Patch Editor.