In this tutorial you will learn how to use the Fixture Groups as Presets to map Effect Layers in MADRIX 5.
Date: 06/2021
MADRIX Version: 5.4b (Created with)
Corresponding Video Tutorial: »Mapping Of Effect Layers By Using Fixture Groups
Note:
•In this tutorial we will work with the previous created MADRIX patch of the tutorial: »Create Fixture Groups.
•The result of this tutorial will be used in the tutorials: »Group Control For Live Control, »Group Control Using Presets and »Group Control Using Group Value Chaser.
Task:
We have to assign an Effect Layer with a SCE Color Change effect to the Fixture Group PAR and a second Effect Layer with a SCE Plasma to the Fixture Group Bar
1. |
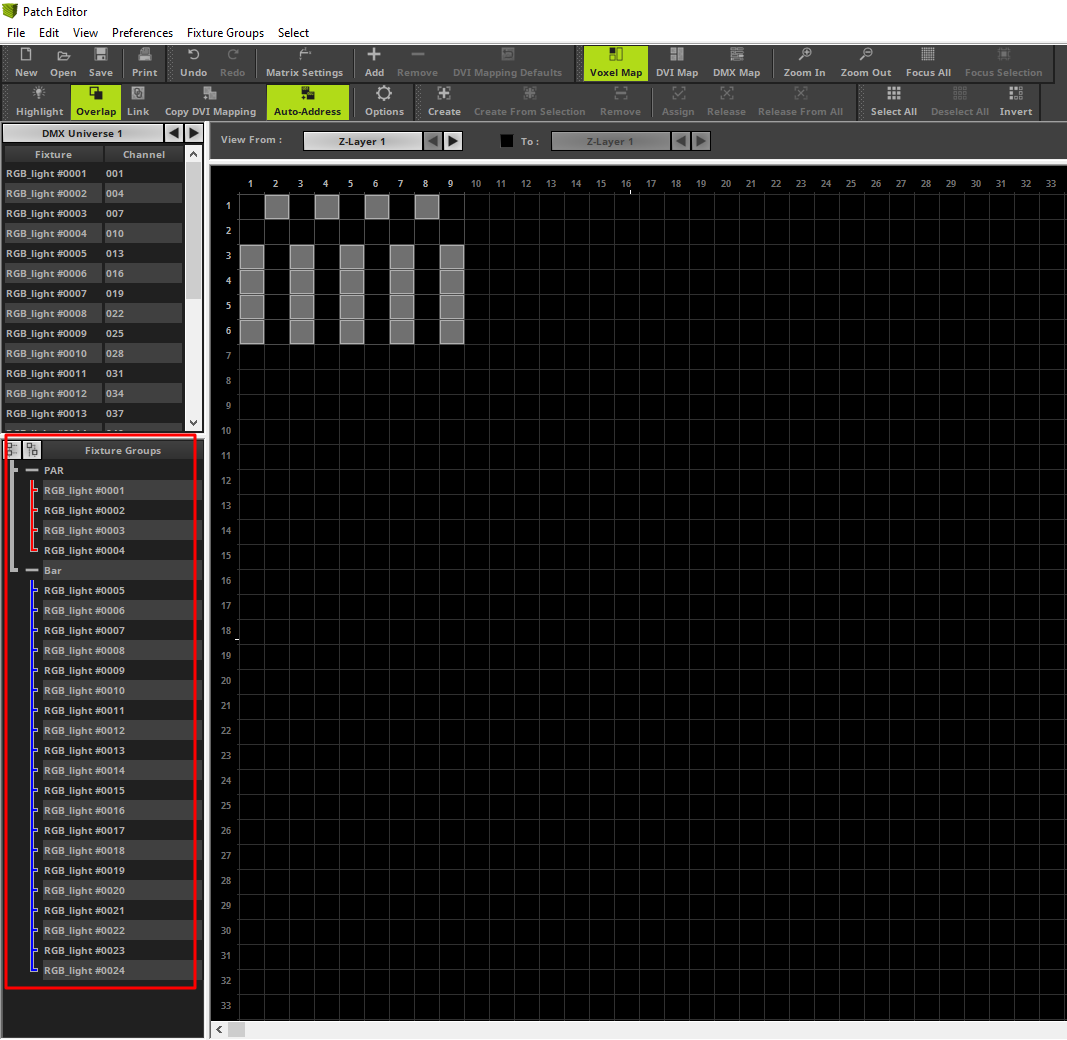
In the first step we get an overview of the created patch of the tutorial »Create Fixture Groups. We open the Patch Editor via Preferences > Patch Editor [Keyboard Shortcut F3]. Now we can find the created patch and on the bottom left side the Section Fixture Groups which displays the 2 created groups.
|
2. |
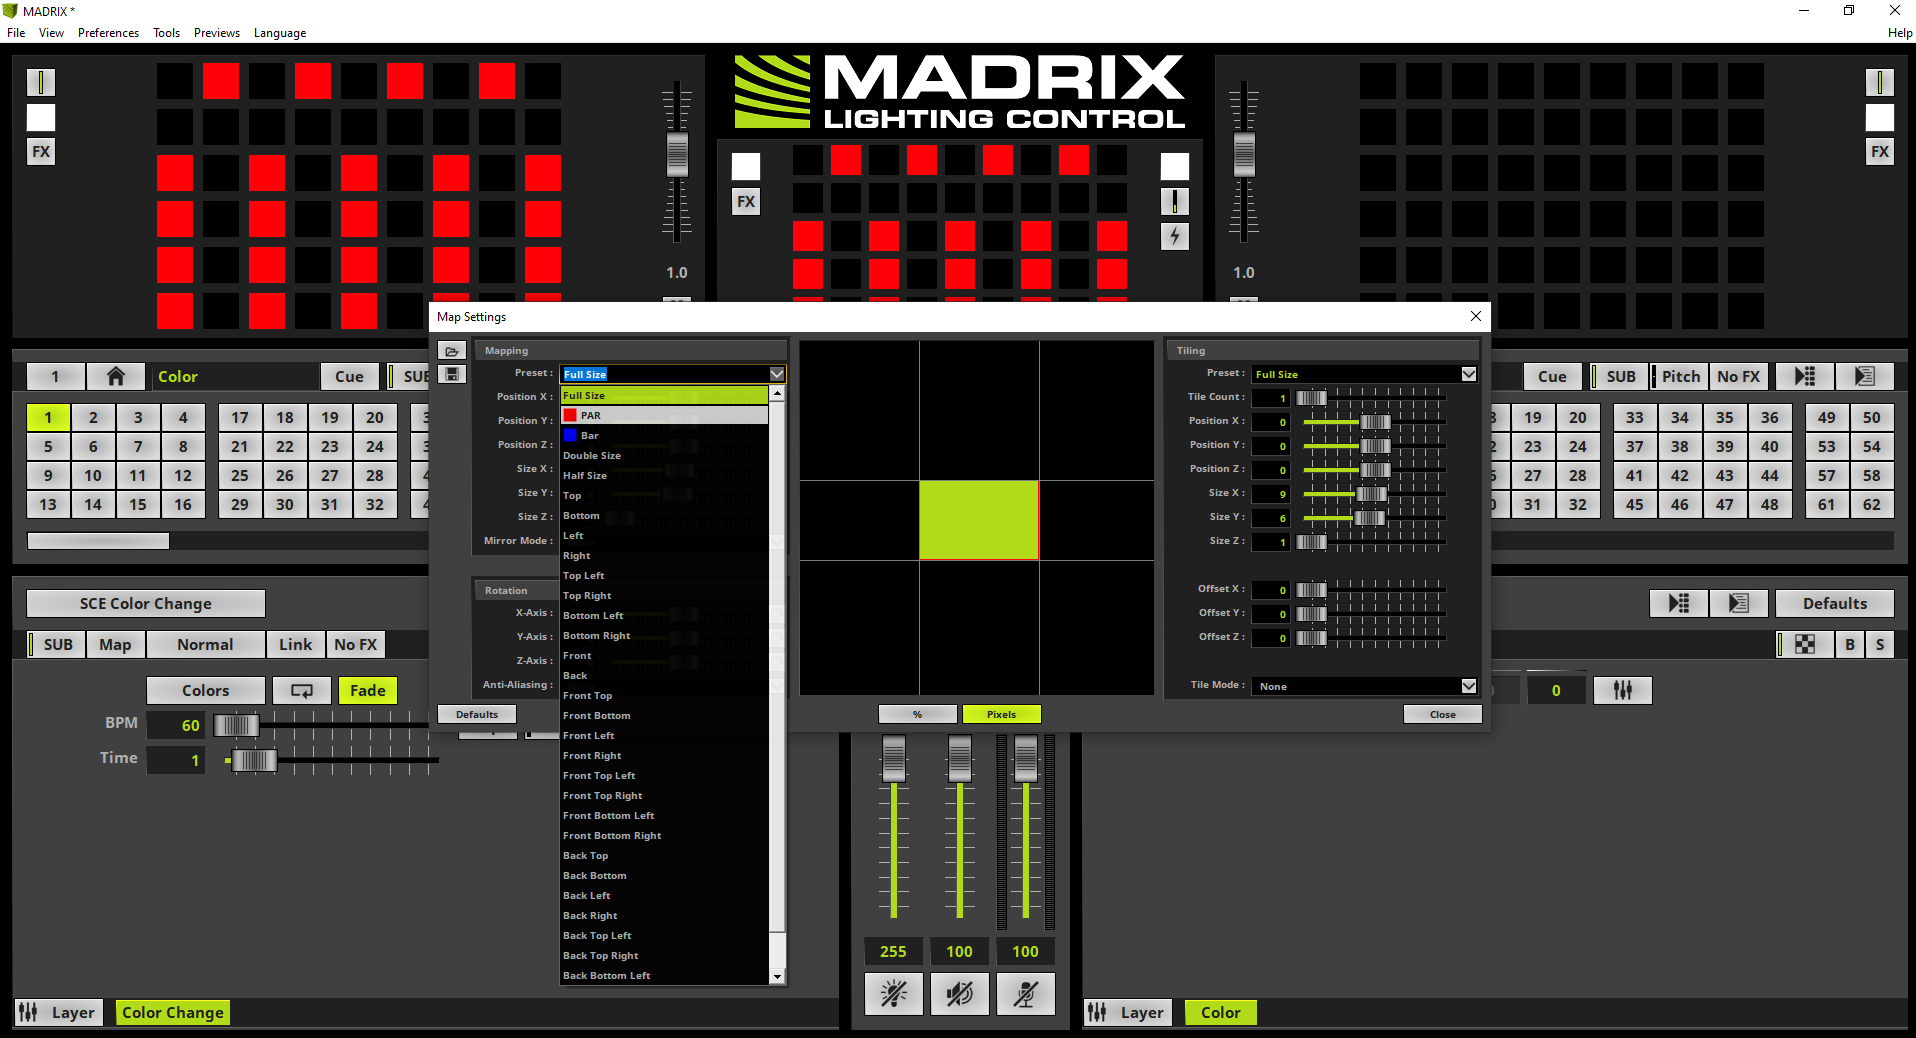
Now let us start to map the Effect Layers according to the task. Therefor we close the Patch Editor. In the MADRIX software we activate an empty Storage Place. In this example Storage Place 1 at Storage 1 is activated. For the first Effect Layer we select SCE > Color Change. After the effect was selected we open the Map Settings window and choose the group PAR as Preset of the Mapping section. If you don't know how to open the Map Settings window, please have a look at the tutorial: »Layer Mapping.
Note: On top of the Preset drop down menu you will find all create Fixture Groups including the assigned Display Color as icon.
|
3. |
After choosing the desired Fixture Group the selected Effect Layer is running only at the assigned fixtures of this group. In this example the SCE Color Change effect is running only at the assigned fixtures of the PAR Fixture Group.
Note: You are able to double check the new size of the Effect Layer also in the Map Settings Preview in the middle of the Map Settings window.
|
4. |
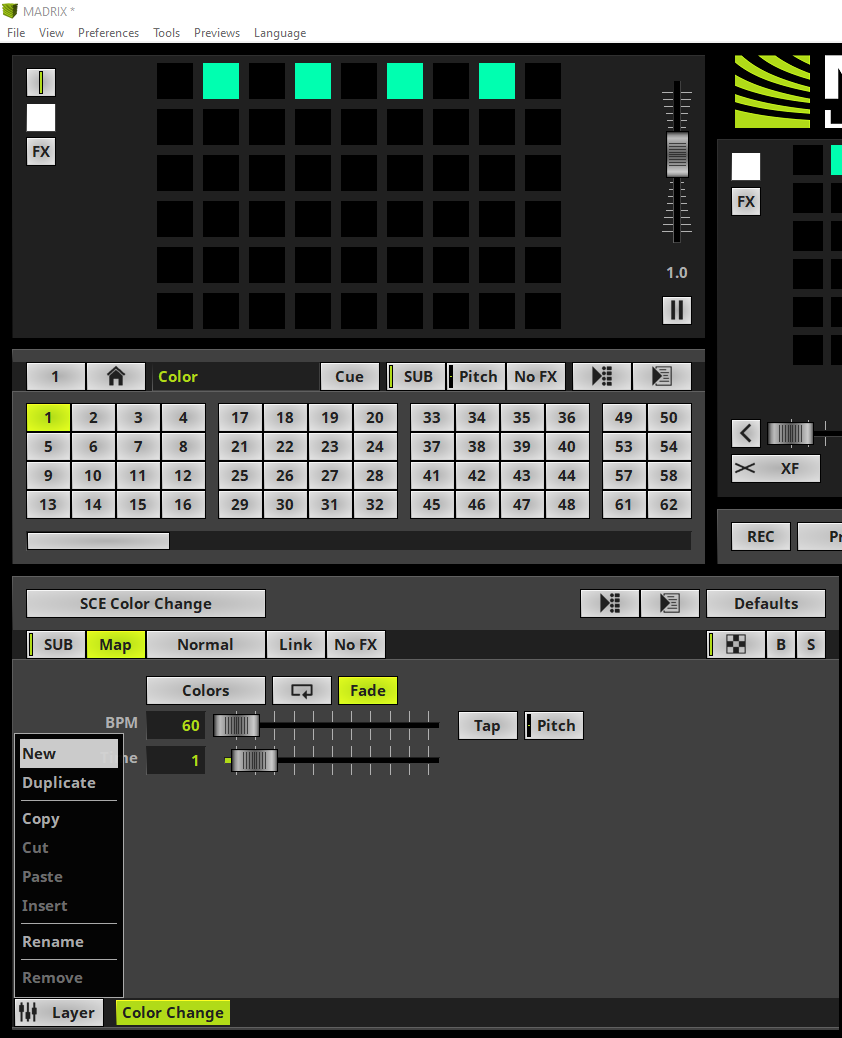
In this step we add a new Effect Layer. Therefor we perform a right click the the Layer button and select New in the context menu.
|
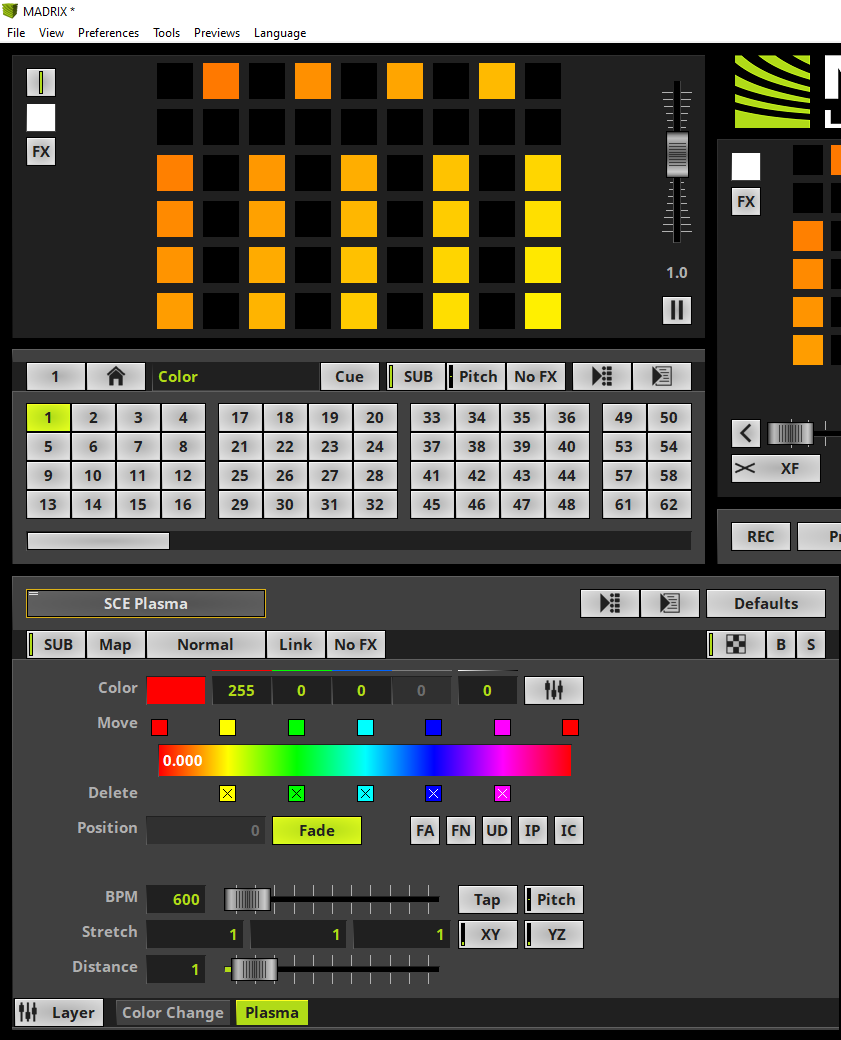
5. |
A new layer will be added. This layer will be placed on the right side of the Color Change layer. That means this layer will be placed in the foreground. Furthermore the new added Effect Layer won't be mapped by default. According to our task we assign the SCE Plasma effect to this Effect Layer. The SCE Plasma Effect will be activated via SCE > Plasma.
|
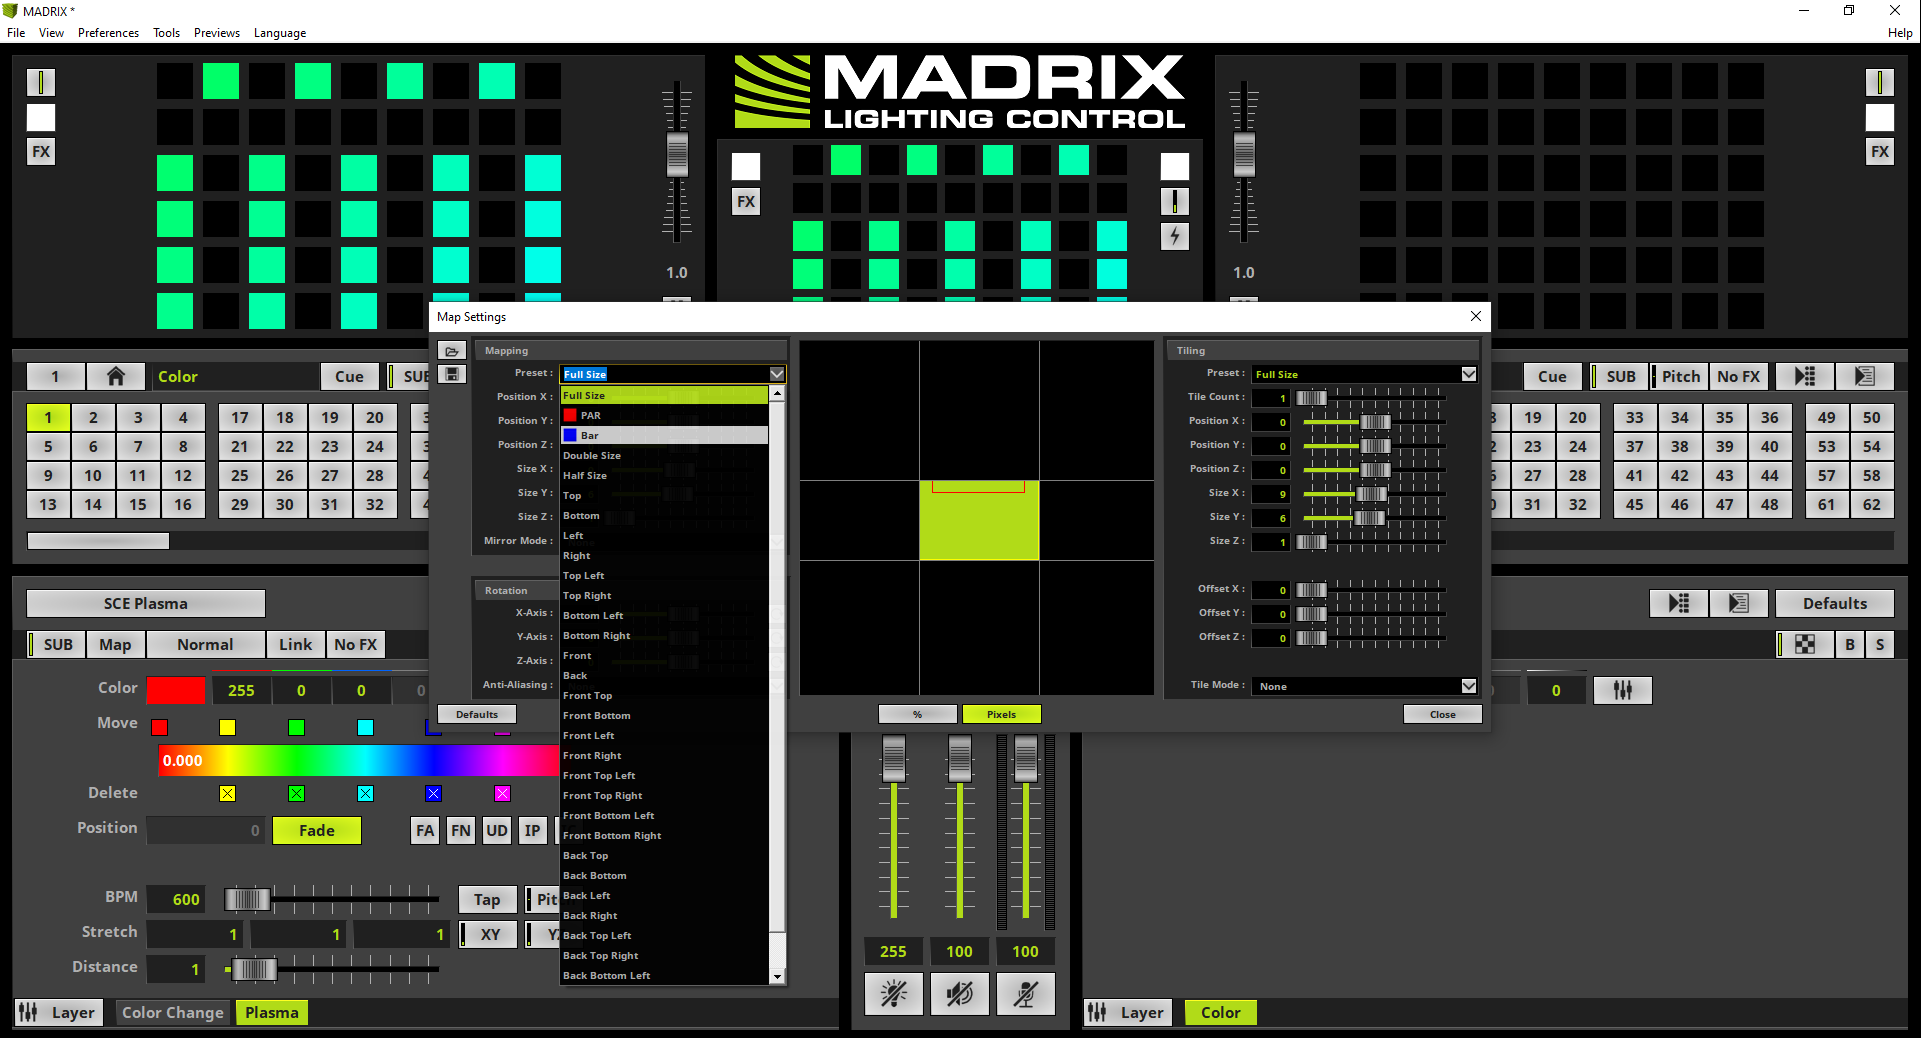
6. |
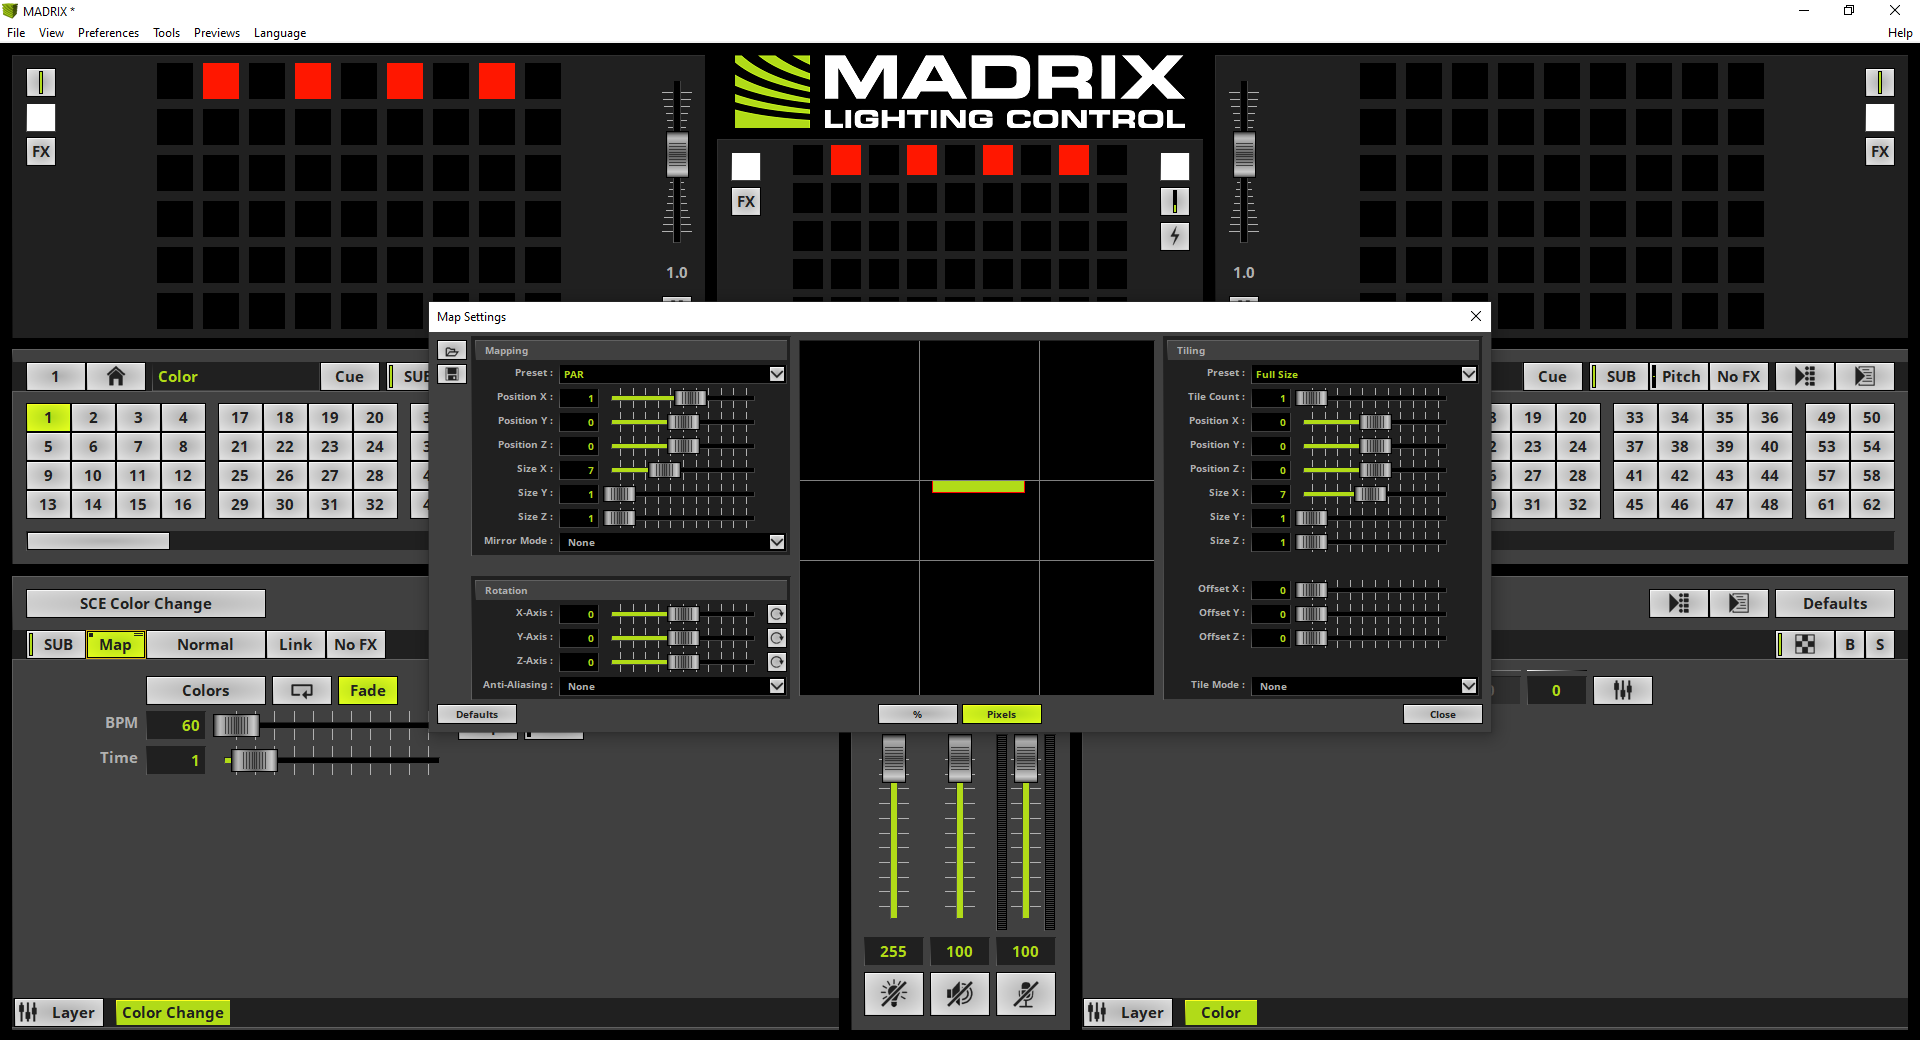
According to our task we have to place the Plasma effect to the Fixture Group Bar. We open the Map Settings window again and select Bar in the drop down menu of the Mapping Preset. Note: Mapping of effects via a Fixture Group Preset is working according to a bounding box. That means fixtures which are not in the Fixture Group but in the bounding box will also be influenced by the desired effect layer.
|
7. |
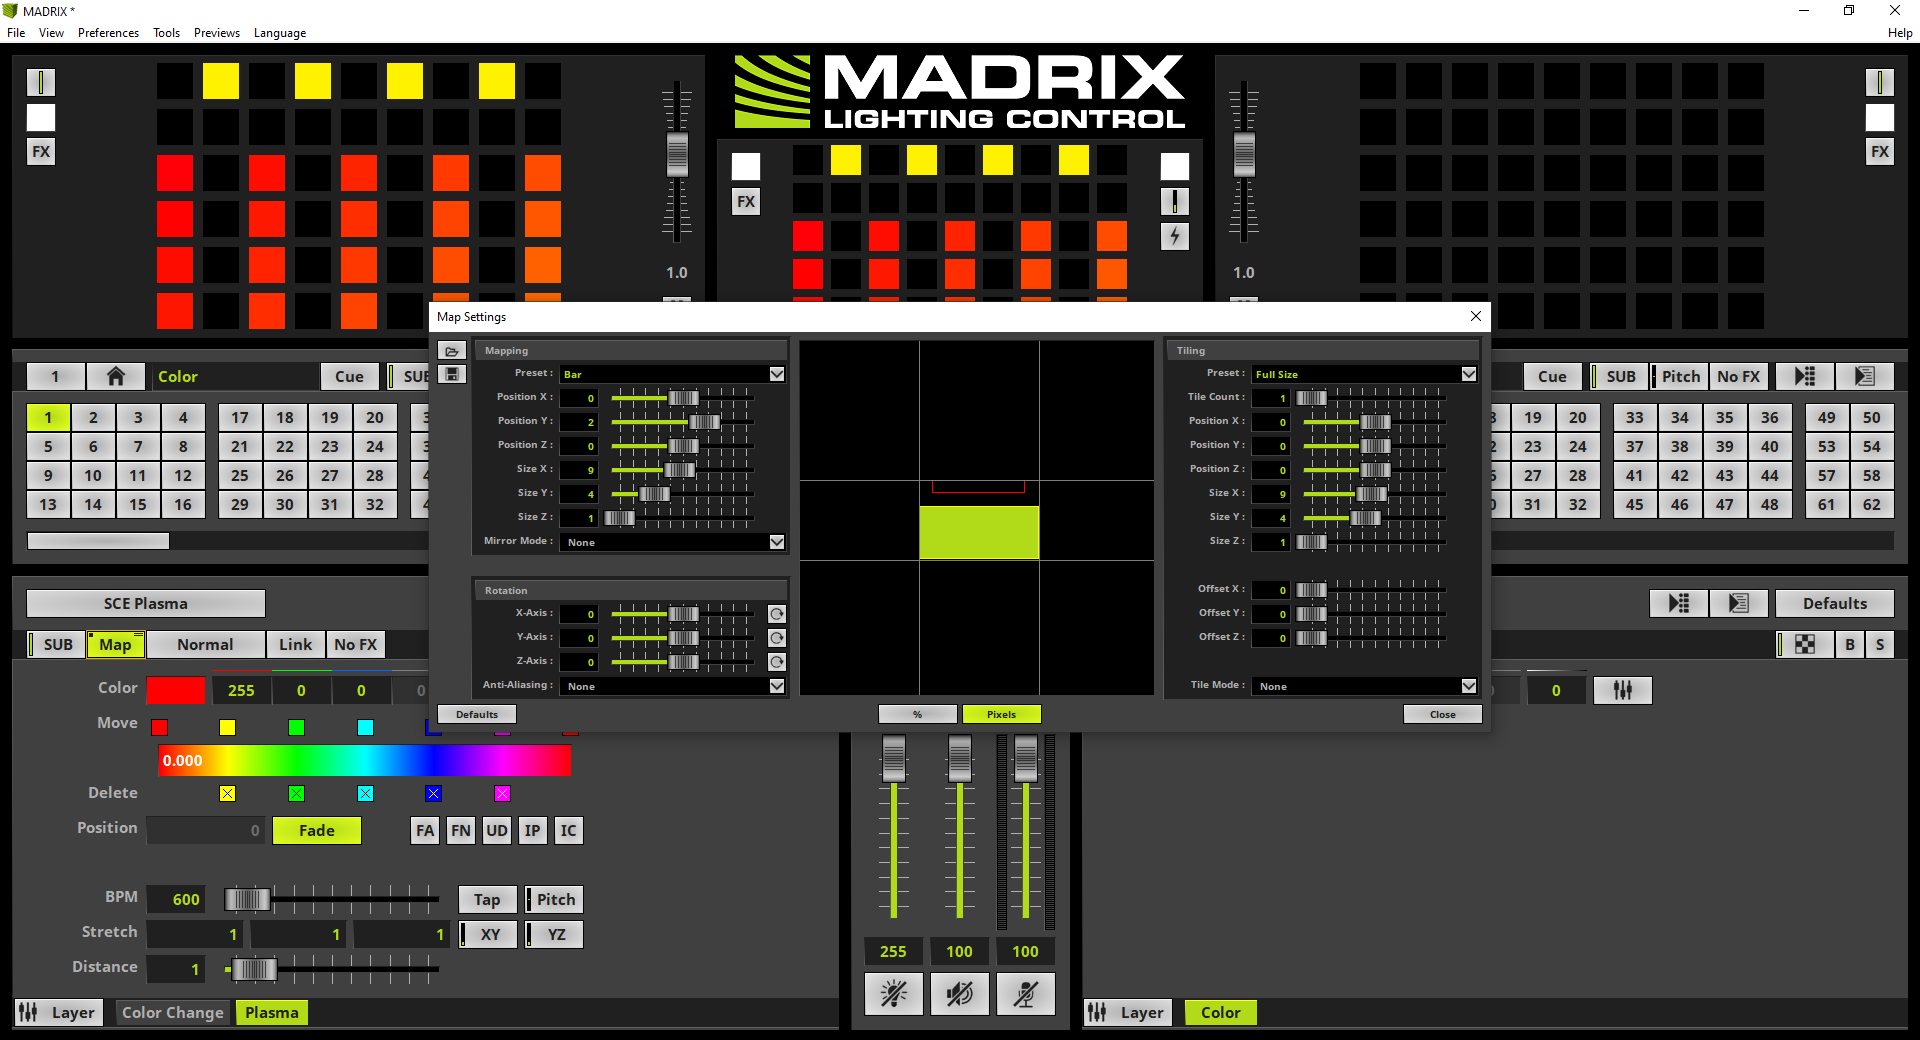
Now also the SCE Plasma Effect Layer is mapped to the required position of our task and we can close the Map Settings window.
|
Congratulations! You have successfully learned how to map Effect Layers with the help of Fixture Groups in MADRIX 5.