In this tutorial you can learn how to change the mapping of a predefined MIDI controller in MADRIX 5.
Date: 06/2022
MADRIX Version: 5.2 (Created with)
Note:
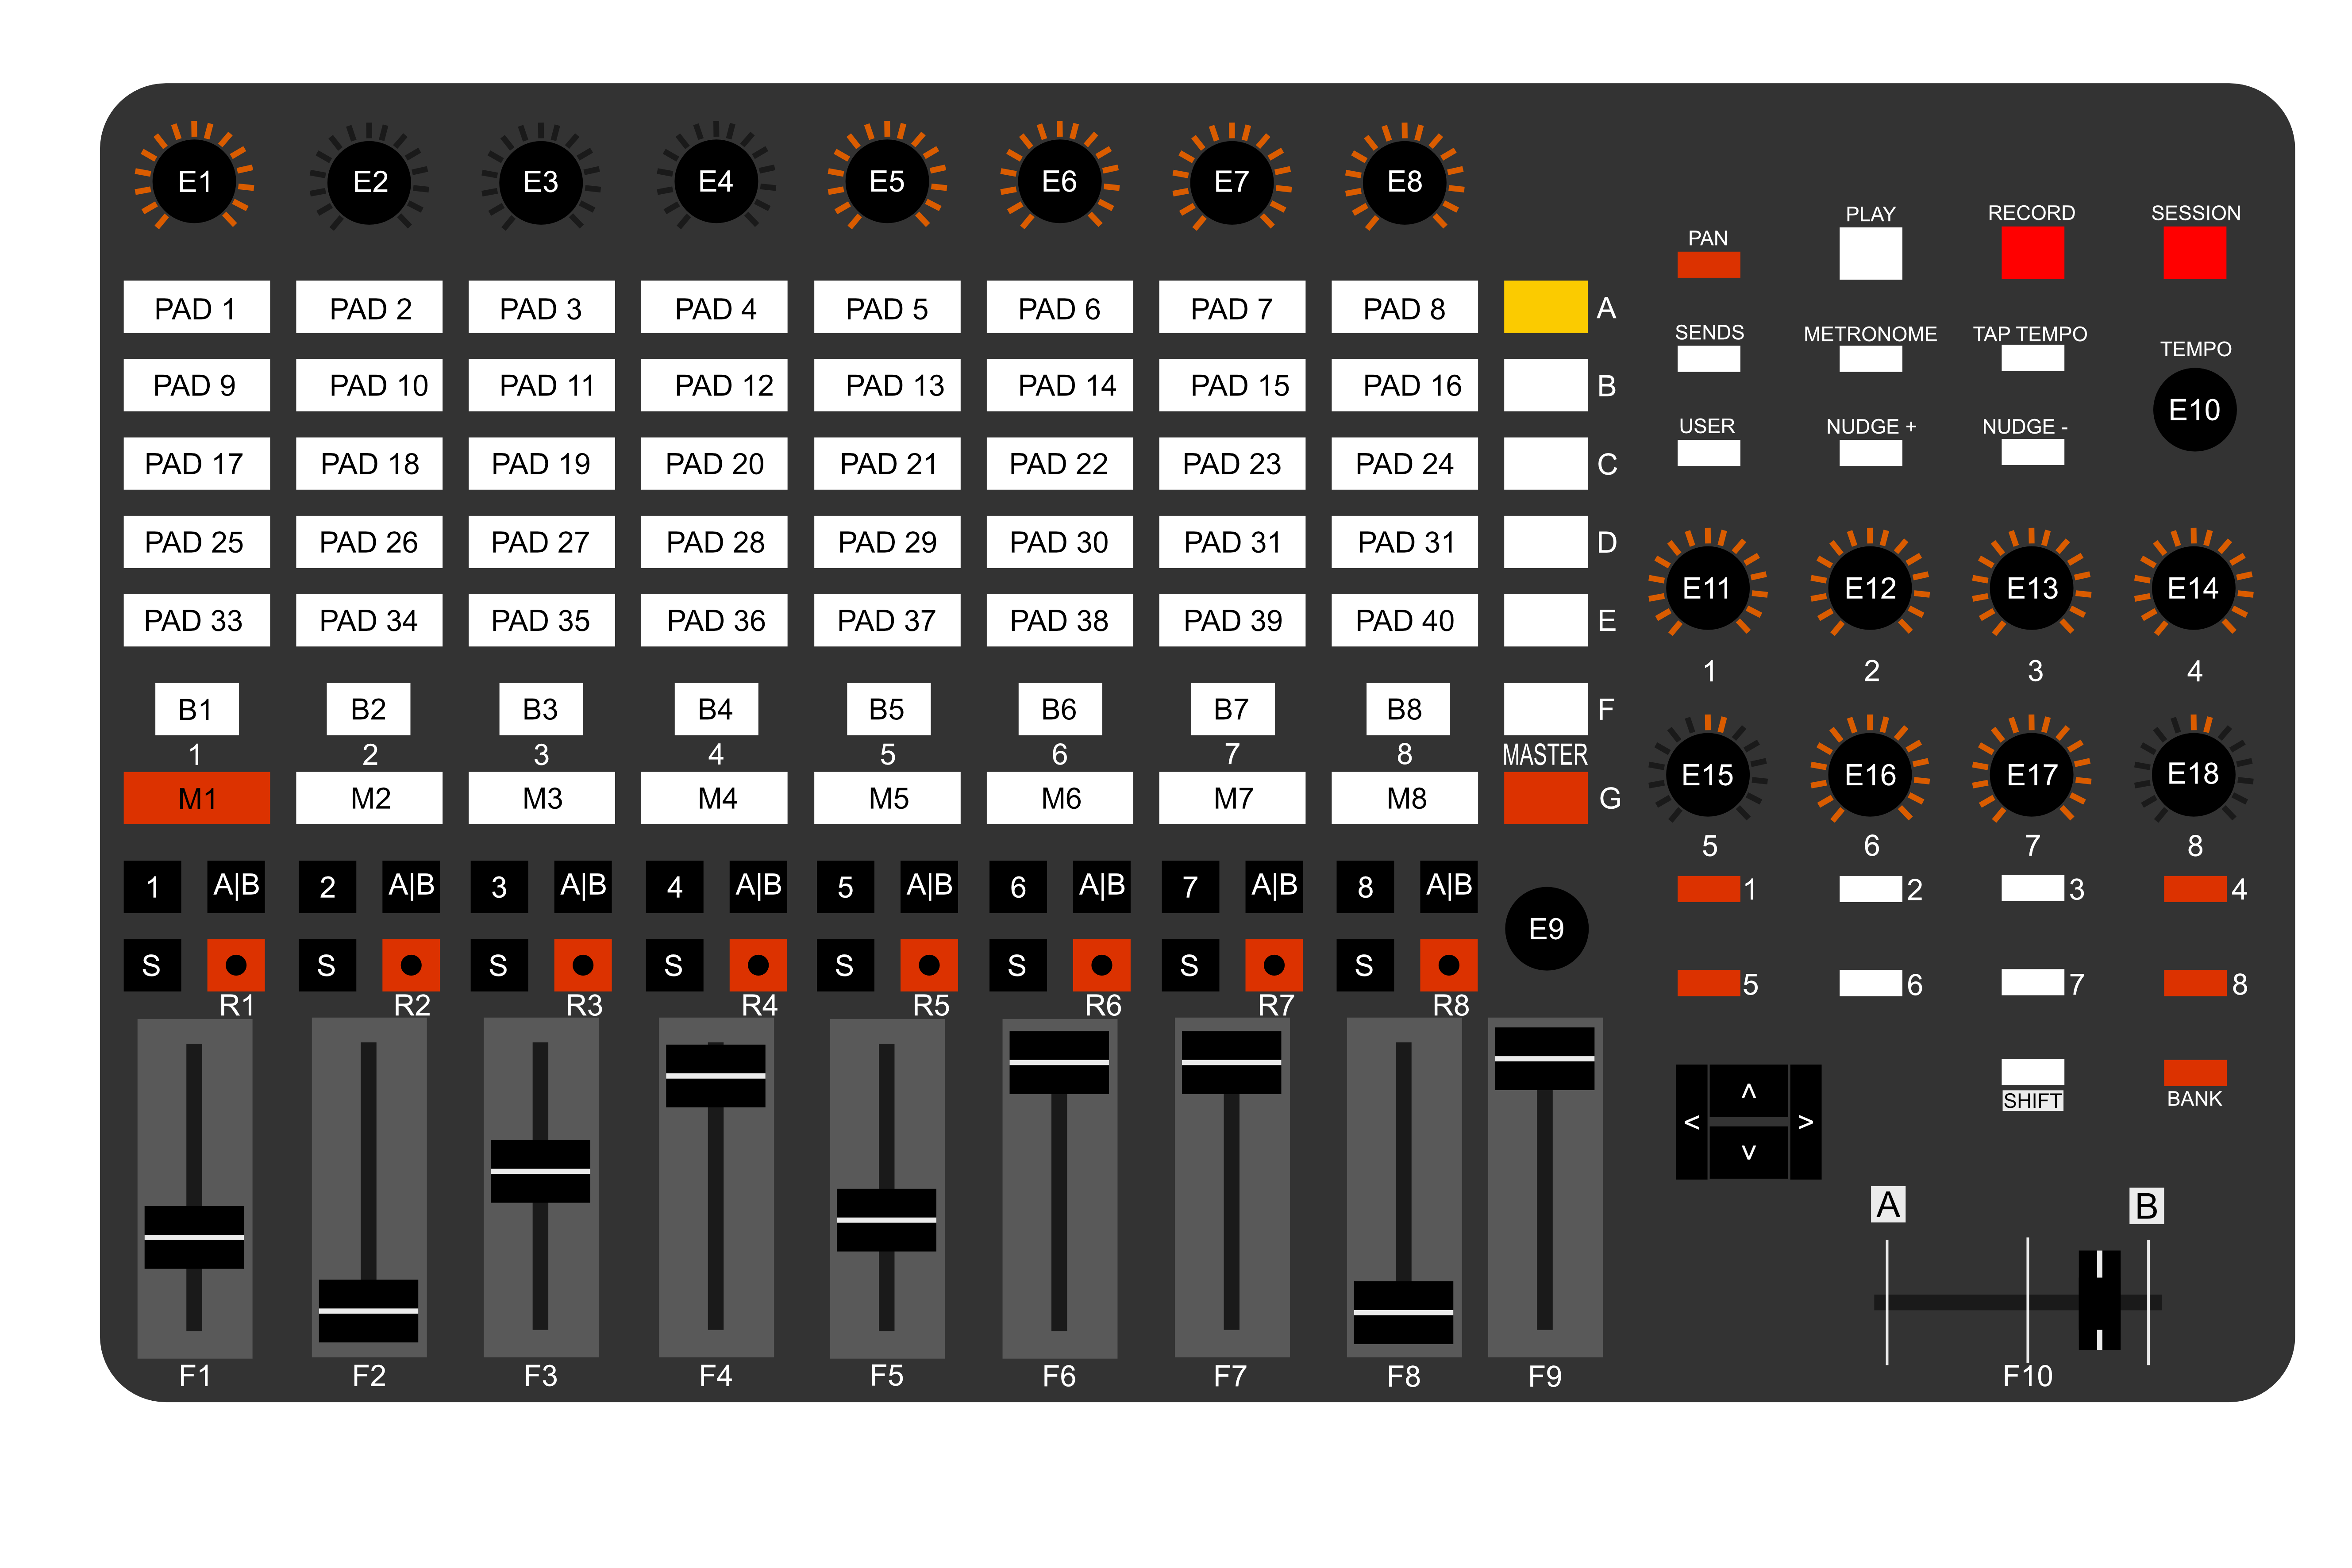
•We are using an "AKAI Professional - APC 40 MKII" for this tutorial. But MADRIX 5 supports all MIDI controllers which are working according to the MIDI standard.
•To connect a MIDI controller in MADRIX please have a look to the tutorial »Remote Control Via MIDI.
Task:
In this tutorial we want to change the predefined MIDI mapping of the connected "AKAI Professional - APC 40 MKII".
In the new MIDI mapping we will reduce the assigned MIDI commands according to the following image and table:
|
|
1. |
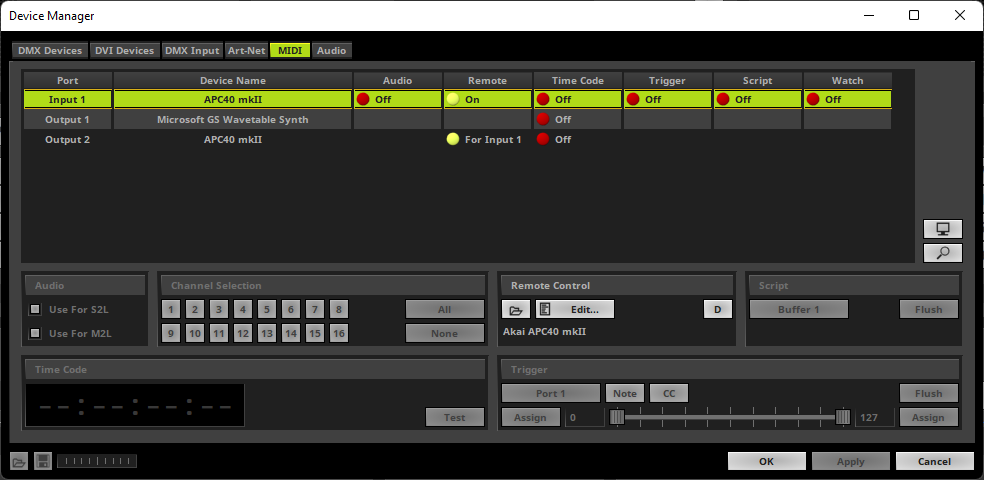
To change the MIDI remote control mapping please open the MIDI tab of the Device Manager, Enable the desired MIDI device and activate Remote. If you don't know how to open the MIDI tab and activate the Remote control in MADRIX, please have a look at the tutorial: »Remote Control Via MIDI.
|
2. |
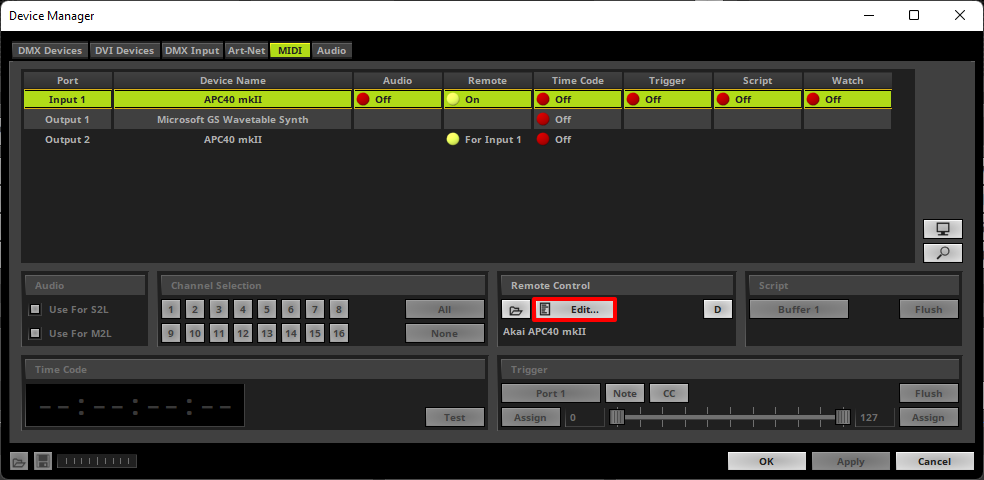
Please select the desired MIDI Device and click the Edit button in the Remote Control section.
|
3. |
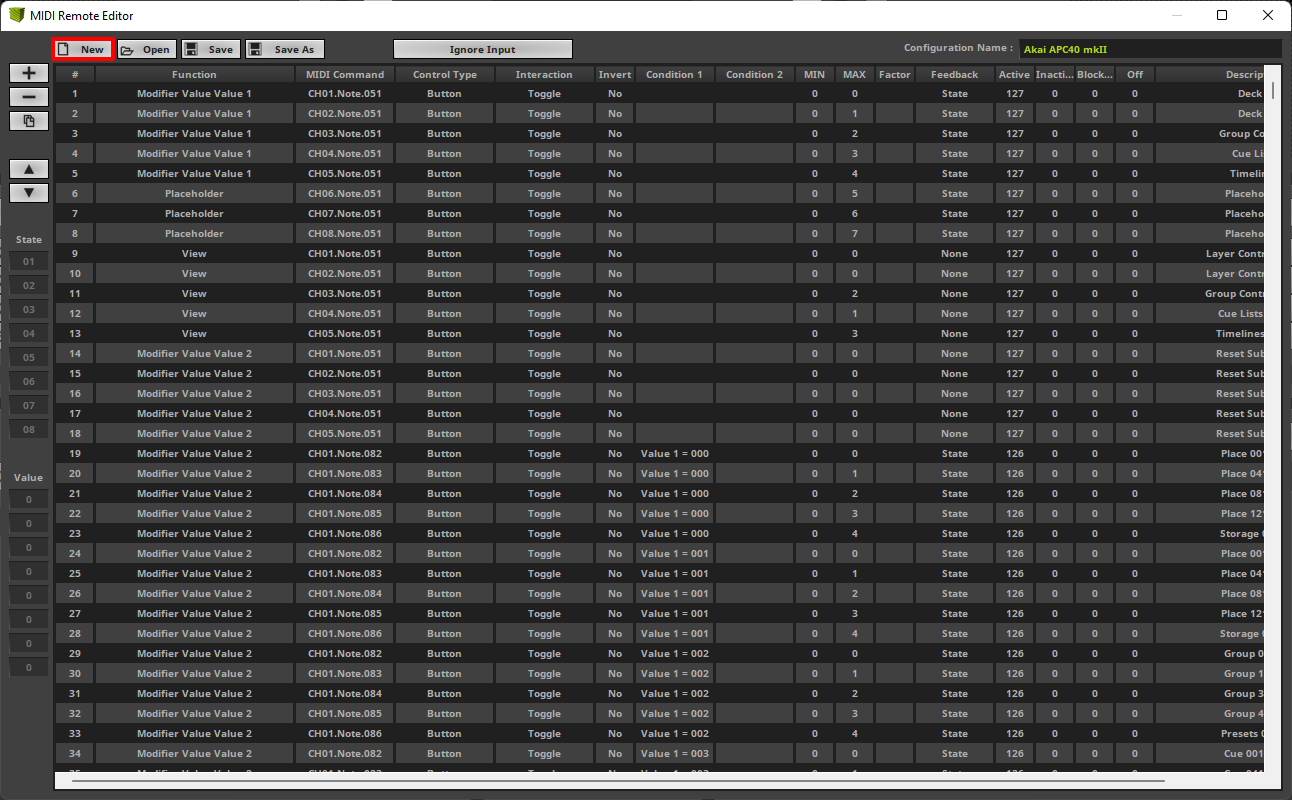
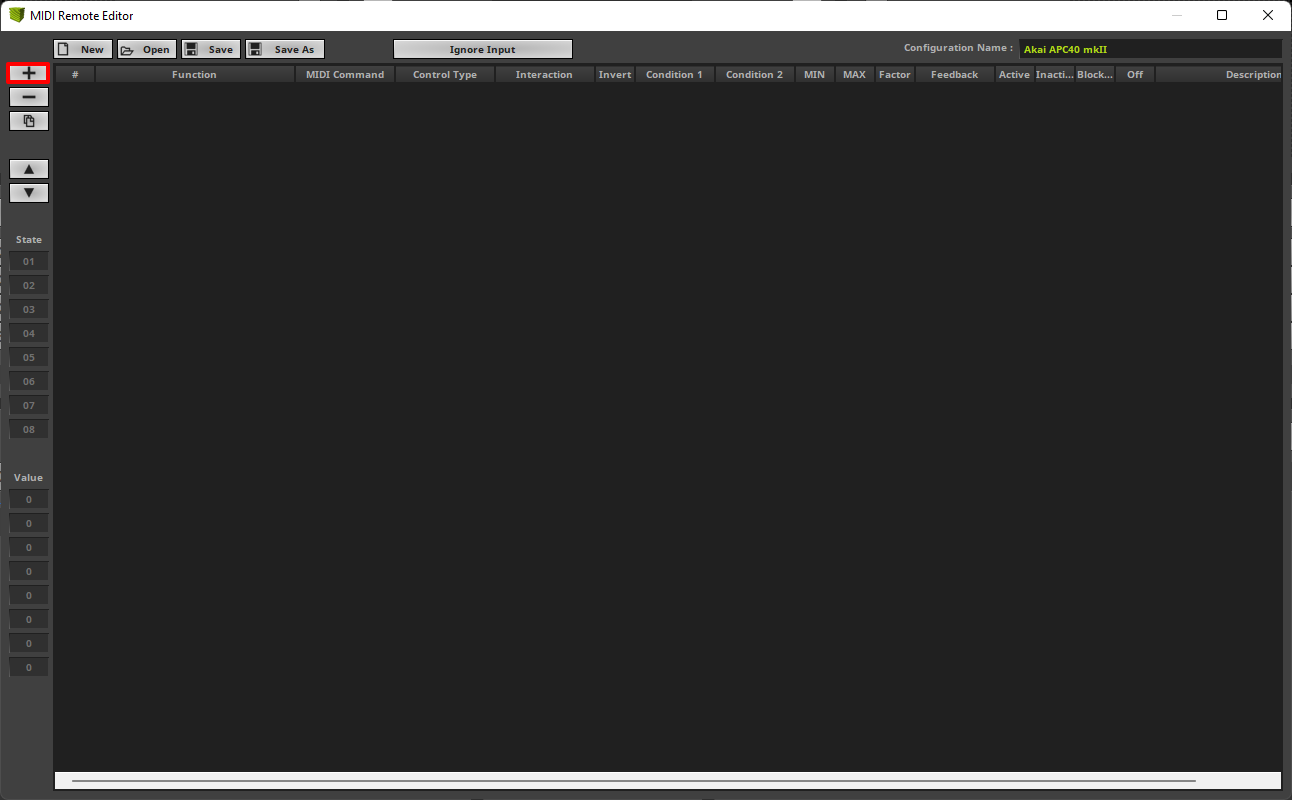
The MIDI Remote Editor opens and we can see the current MIDI mapping for the connected MIDI controller. Note: For every predefined MIDI controller another MIDI mapping will be loaded. To create a new MIDI mapping please click the New button.
|
4. |
All assigned functions will be deleted. To add new functions for the MIDI assignment we click the + button.
|
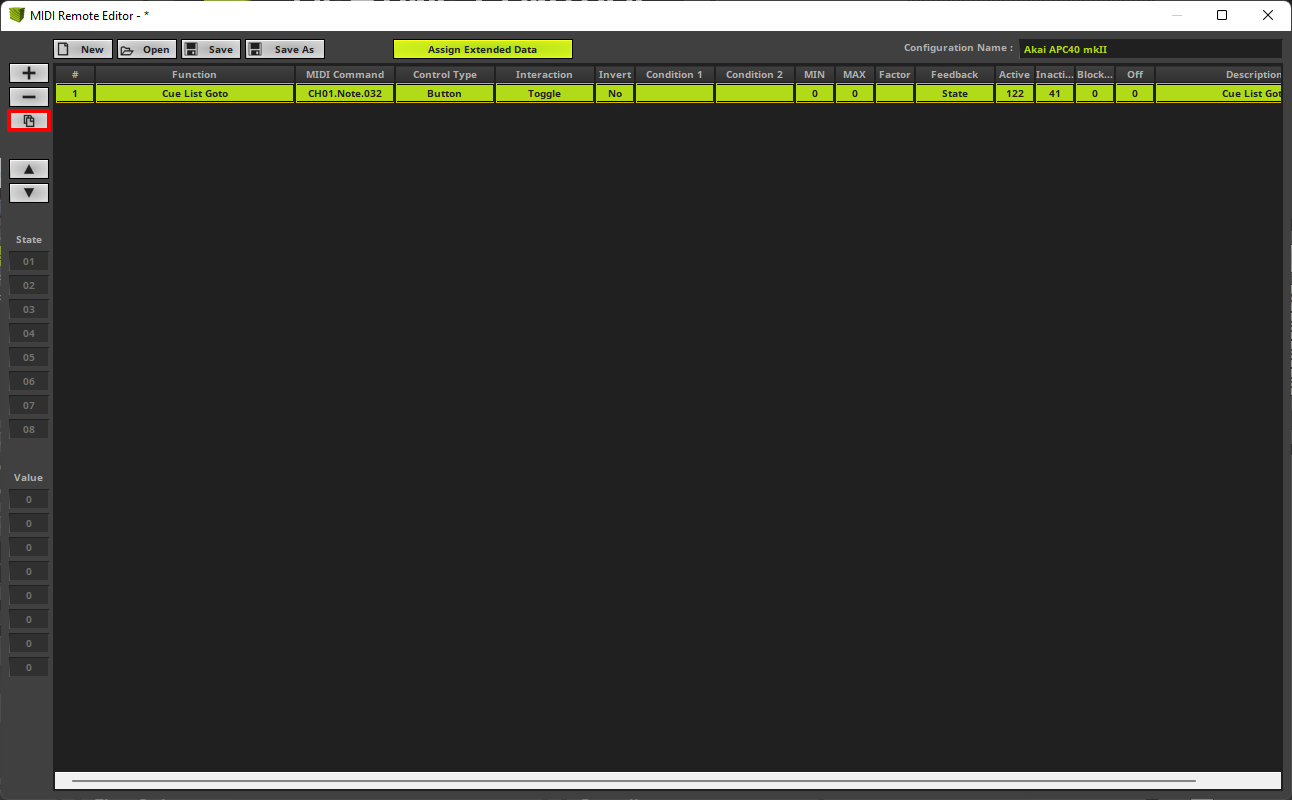
5. |
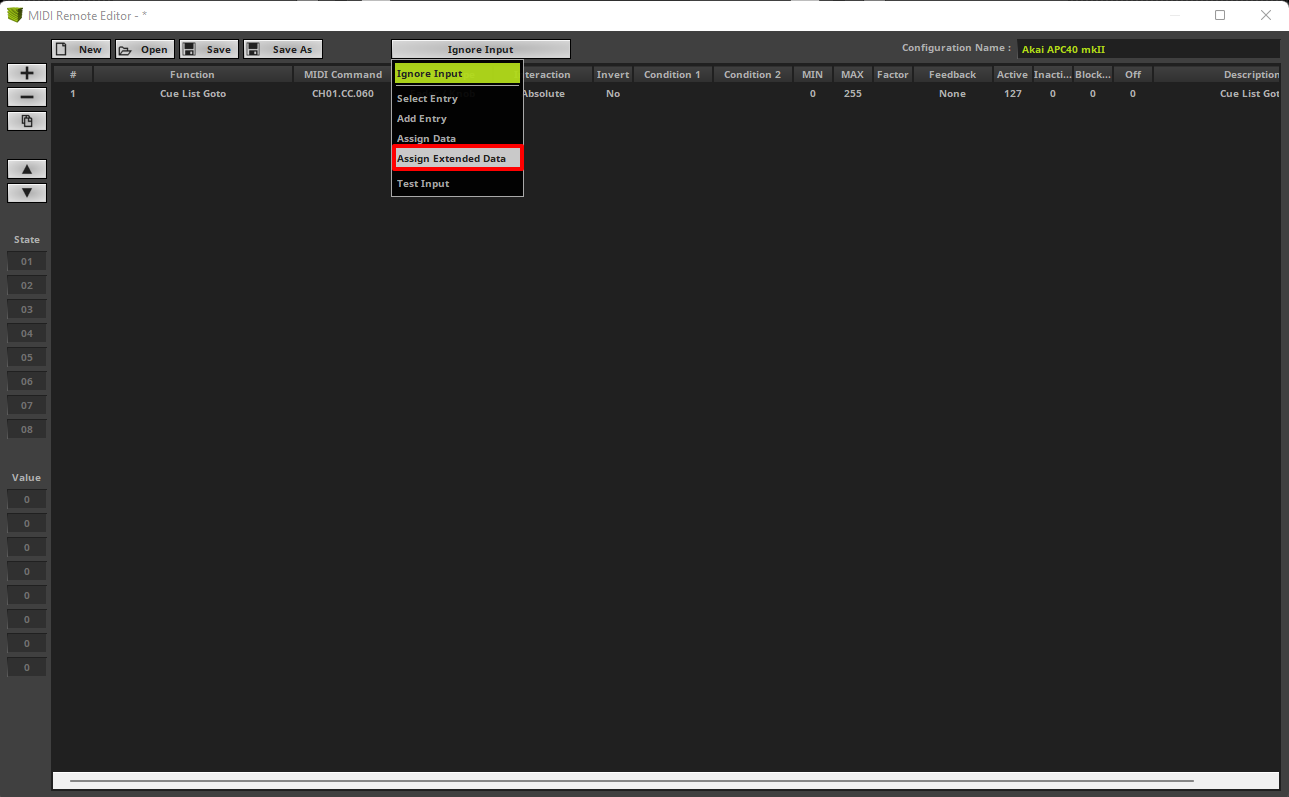
According to our task we have to map the Cue List GoTo functionality to the button 1 to 8 of the "AKAI Professional APC 40 MKII". So we add the first GoTo function via + > Cue List Goto > Goto.
|
6. |
Now a new Function was added and we have to set the correct MIDI command. The easiest way is to assign it directly via pressing the desired button the MIDI controller. Therefor we activate Assign Extended Data.
|
7. |
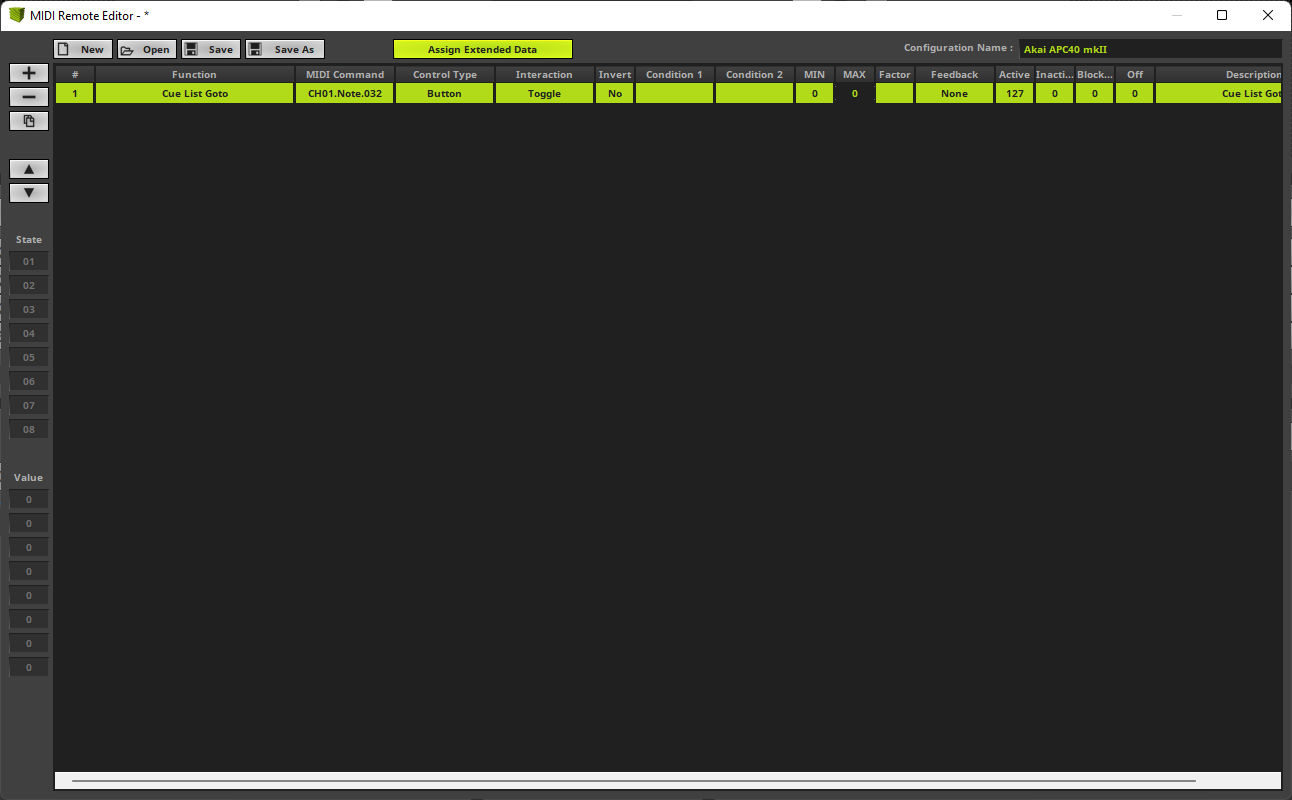
After we activated Assign Extended Data MADRIX will set every received command to the selected functionality in the MIDI Remote Editor. That means we select the Goto function we just add and press [Button 1] of the connected "AKAI Professinal APC 40 MKII". Now the MIDI Command changes to the received one. When we are working with Buttons of a MIDI controller and want to activate a discrete entry in a pool, we have to change the Maximum value for this function. The task requires to activate Cue 1 with the first Button of the MIDI controller. Therefor we set the MAX value of the selected Goto function to 0. To change the value please perform a double-click on the MAX value column of the selected line. Note: The values of a MIDI command starts at 0. So a value of 0 represents the first cue.
|
8. |
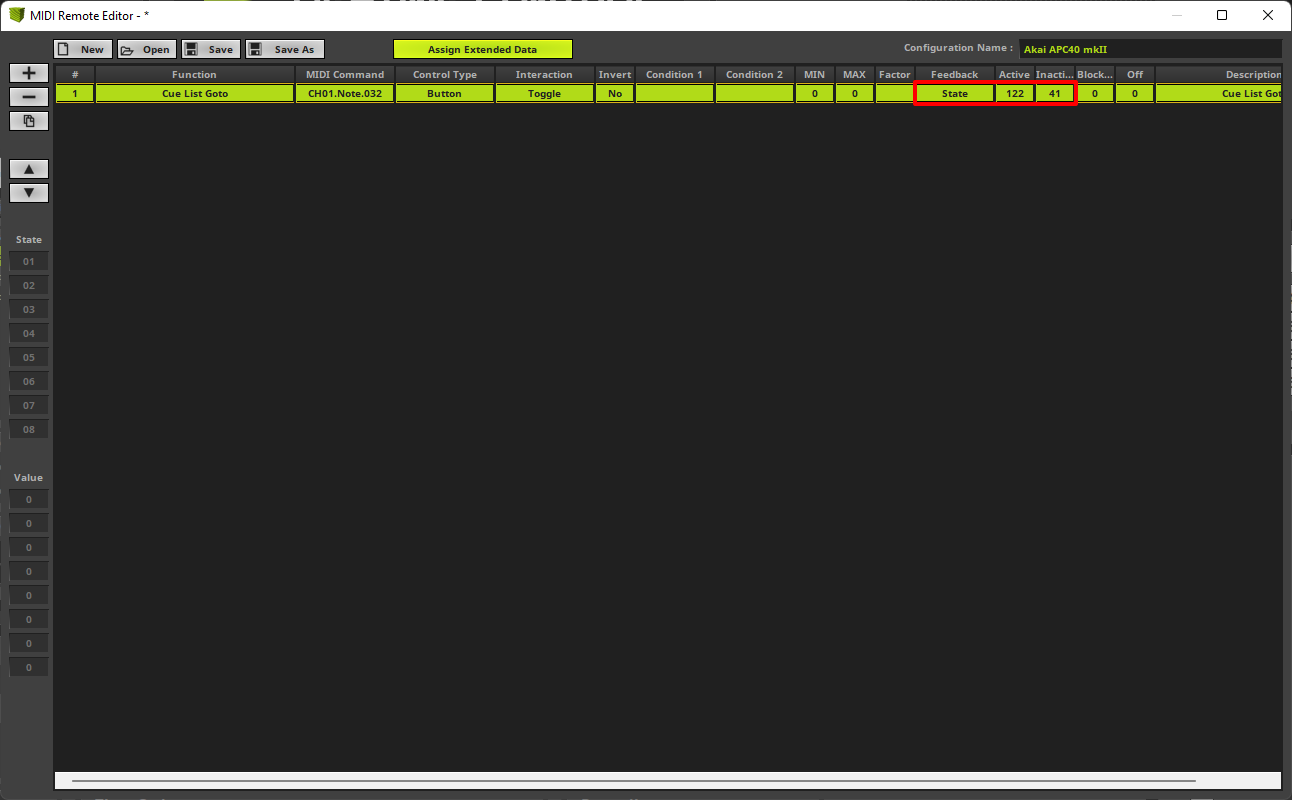
In this step we want to assign the settings for the MIDI Feedback which is provided by the "AKAI Professional - APC 40 MKII". Therefor we have to change the Feedback value to State. Furthermore we need to change the values for Active and Inactive. We want to set a green color if the cue is active and a blue one if it is inactive. According to the "AKAI Professional - APC 40 MKII" manual we set the value 122 for Active and 41 for Inactive.
Note: •Not every MIDI controller supports the MIDI Feedback. If a controller doesn't support it, you can ignore these settings. •Every MIDI controller is working with different value for the different colors. The information about it should be available in the manual of the desired MIDI Device
|
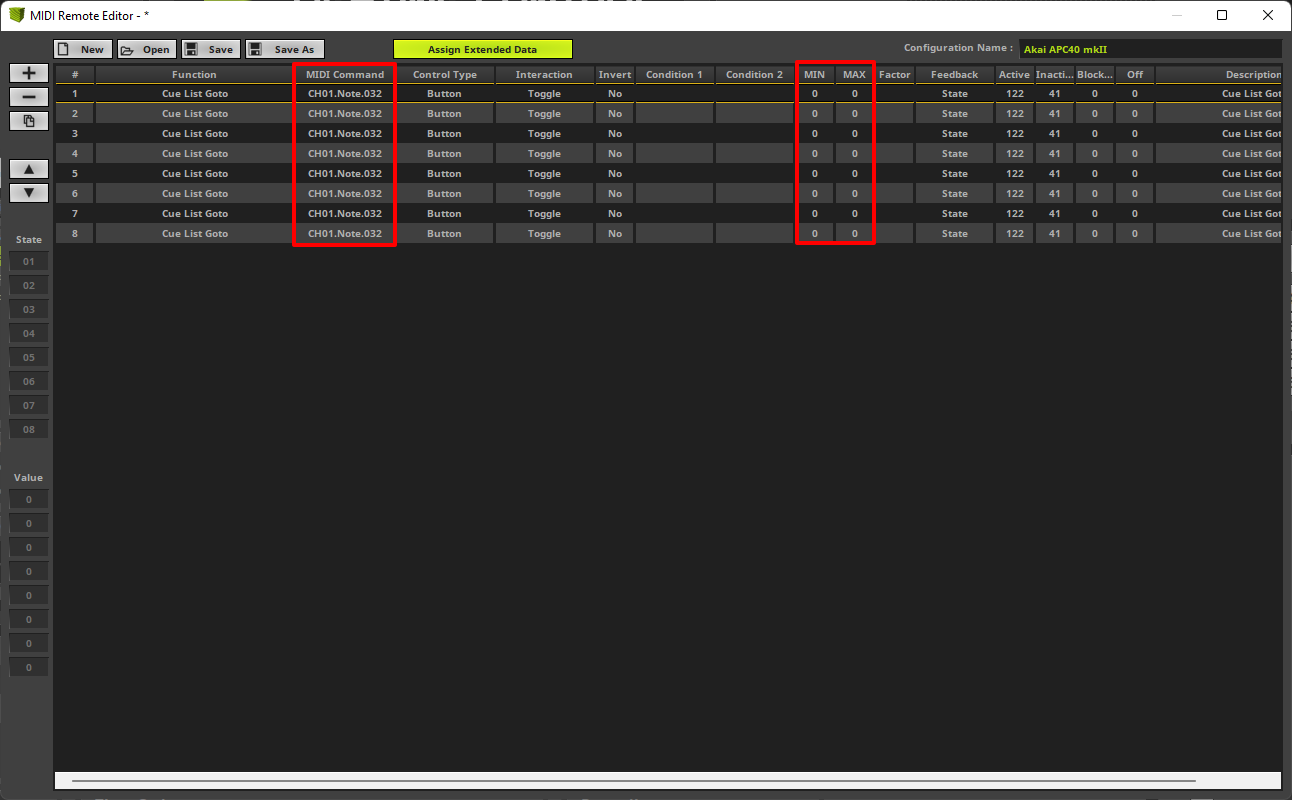
9. |
Now we want to add the Goto function for button 2 to 8. Because that's the same function we can duplicate the function 7 times. To duplicate the Function please select the desired line and click the Duplicate button.
|
10. |
We have learned how to change the MAX value and how to assign the correct MIDI command in step 7.
|
11. |
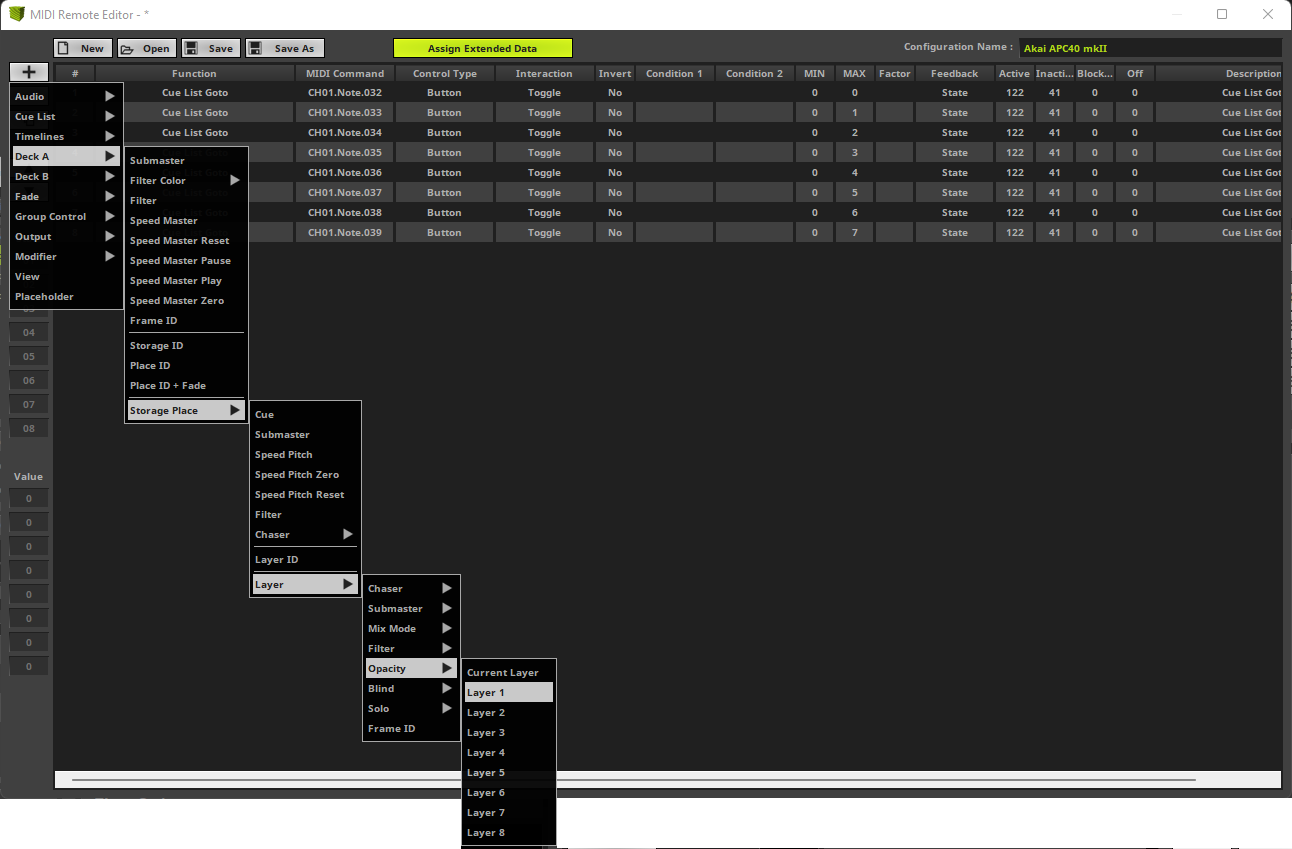
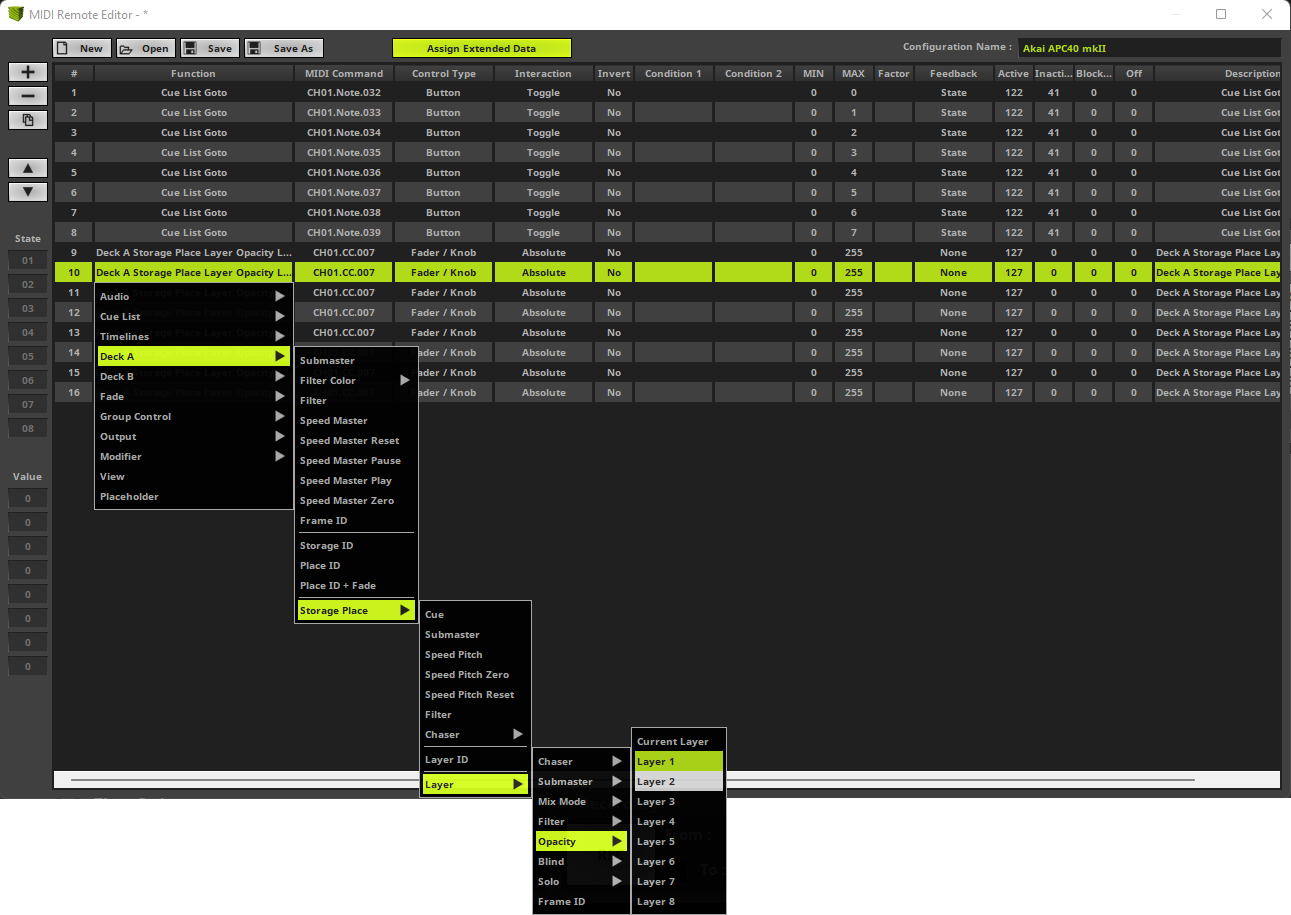
With the connected MIDI controller we also want to add the possibility to control the Opacity of 8 Effect Layers in every Storage Place of Deck A. To add this function for the first effect layer please go to + > Deck A > Storage Place > Layer > Opacity > Layer 1.
|
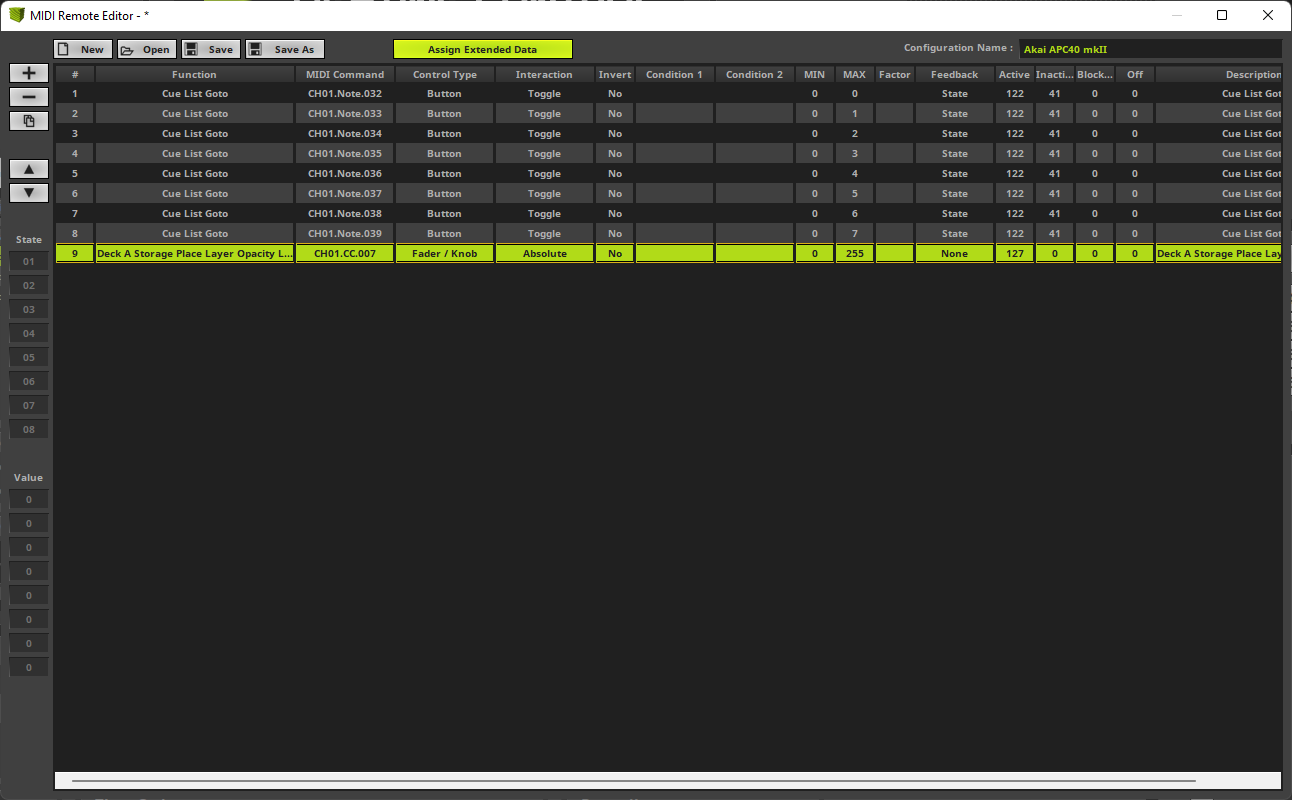
12. |
Of course we also have assign the desired MIDI Command for this function. Therefor please select the previous added line and move the first [fader] of the "APC 40 MKII".
|
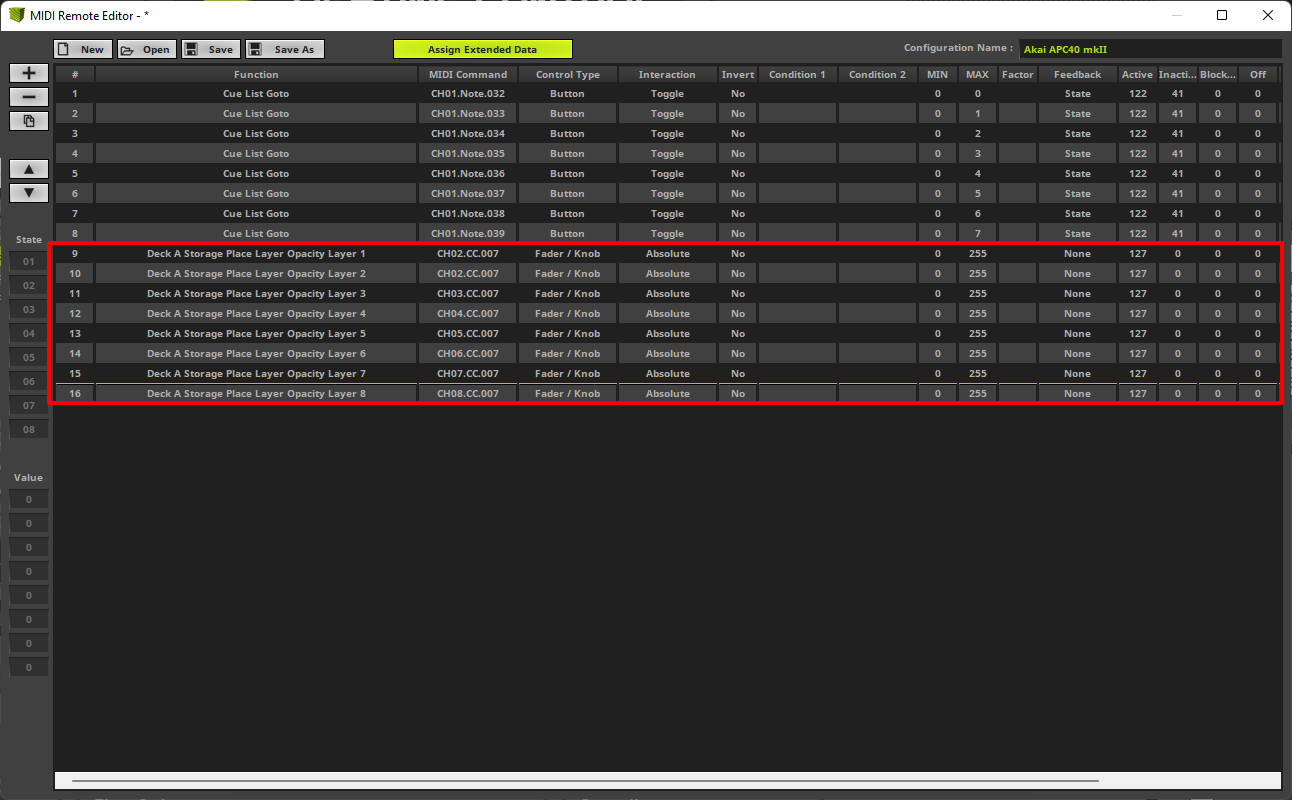
13. |
We also duplicate this function 7 times. But now we have to change the Function for every line to the another layer and assign the desired MIDI command. To change the Function please perform a double-click and go to Deck A > Storage Place > Layer > Opacity and select a unique Layer number for each line.
|
14. |
After we have duplicated and assigned the desired MIDI Command, the MIDI Remote Editor should consits of 16 Functions all assigned to the MIDI controller according to our task.
|
15. |
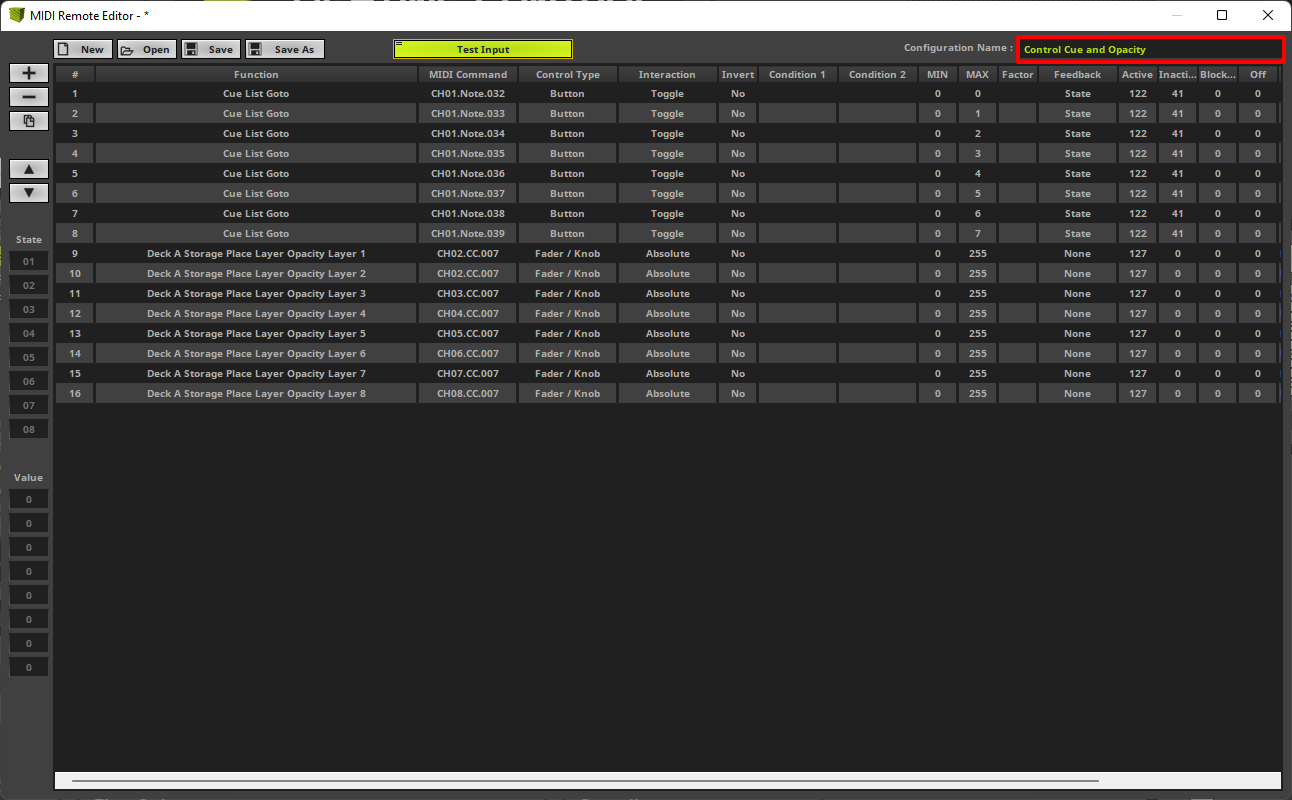
In the last step we want to change the Configuration Name to a desired name and close the MIDI Remote Editor. MADRIX will ask you if you want to save it. You don't need to save the configuration because it is saved as a part of the setup. But if you want to use the same mapping in another setup or on another PC, you should save it.
|

Congratulations! You have successfully learned how to change and create a new MIDI Remote configuration in MADRIX 5.