In this tutorial, you will learn how you can setup MADRIX to control a T9 fixture without using a screen-capture software. In this example, we want to use one EUROLITE - LSD 37.5 curtain.
Date: 08/2013
MADRIX Version: 3.0 (Created with)
Note: It is important that you have already configured the LSD AIO-Network-Control-System. If you have not and do not know how it works, have a look at this tutorial »Setting Up LED Studio For EUROLITE LED Pixel Mesh 64x64
Before we start, make sure that the network interface card you want to use for the connection with the AIO-Network-Control-System is able to send 1000 MBit/s.
1. |
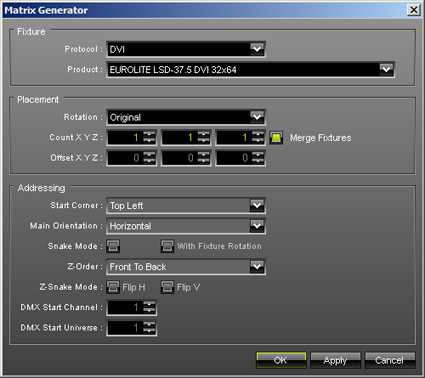
Start MADRIX and press the F2 key. The Matrix Generator will be opened. Change the following settings:
Click OK |
||||||||||
2. |
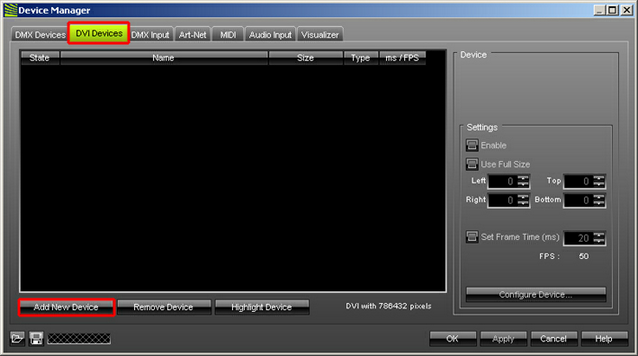
Now, go to Preferences > Device Manager or press the F4 key. Then, go to the DVI Devices tab and click Add New Device
|
||||||||||
3. |
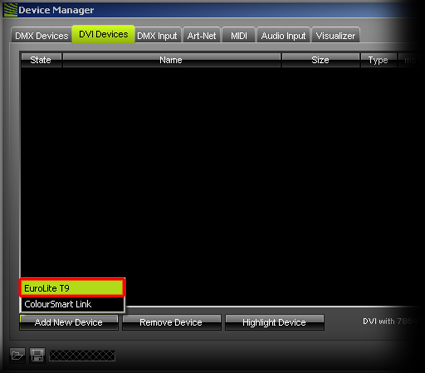
Choose EuroLite T9
|
||||||||||
4. |
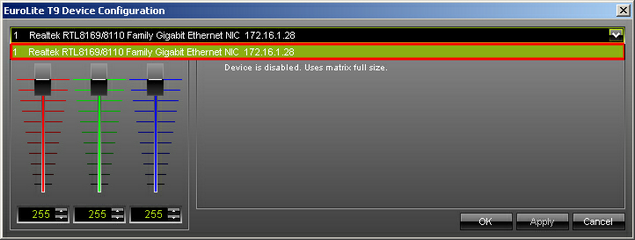
A new window will be opened. Select the corresponding Gigabit Ethernet card and click OK
Note: If you have not installed the WinPcap driver, you can read the following message next to the RGB color slider: Can't find valid network device. Are your network card and the WinPcap driver installed correctly? If you can read this message, please close MADRIX, start the installer of MADRIX again, and install the WinPcap Driver. Click OK |
||||||||||
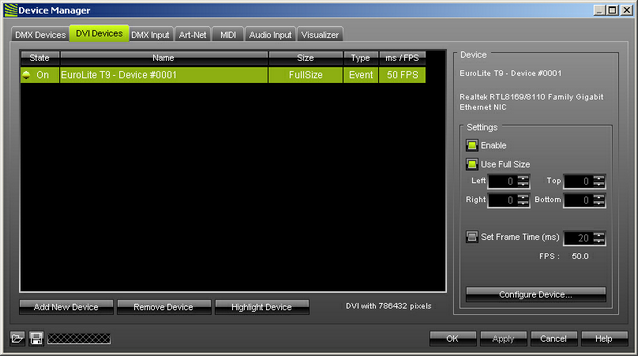
5. |
Now you can see an EuroLite T9 device in the list. The State should be On. If not, please select the device in the list and activate the Enable checkbox in the Settings section on the right-hand side.
Click OK |
Congratulations! You have created a configuration for Eurolite T9 fixtures in MADRIX.