|
In this tutorial you will learn how you can use the MADRIX software to merge DMX data, that is sent with MADRIX and a lighting console, to a designated DMX output port.
Date: 08/2014
MADRIX Version: 3.2 (Created with)
Note: For this tutorial you will need one DMX interface for DMX output, one DMX interface for DMX input, and a lighting console of your choice.
1.
|
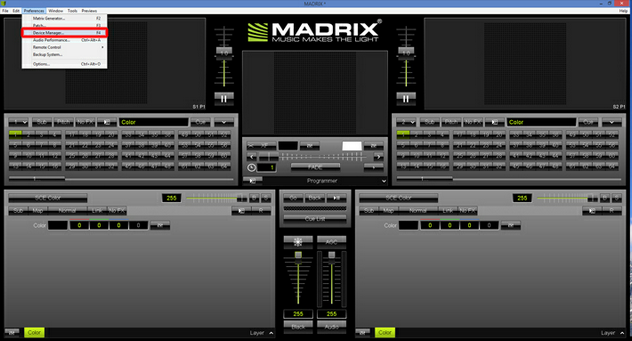
Please start MADRIX and open the Device Manager under Preferences > Device Manager...
|
2.
|
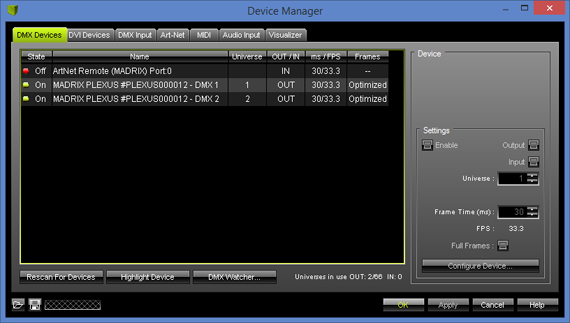
In the DMX Devices tab of the Device Manager you can find all connected DMX interfaces (that have been found by MADRIX).
In this example, a MADRIX PLEXUS unit is connected. The MADRIX PLEXUS provides two physical DMX ports. We will switch one of the ports to receive DMX input.
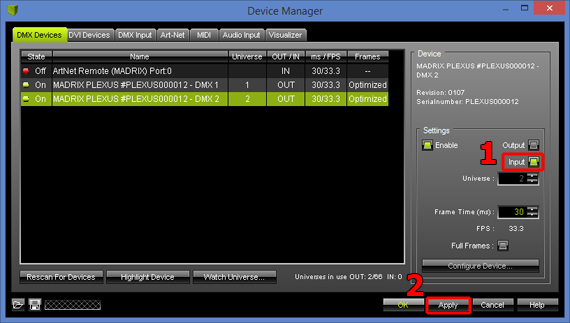
In order to change an output port to an input port in MADRIX, please select the desired port in the list and then activate Enable as well as the Input checkbox in the Settings section.
Confirm the changes by clicking on the Apply button. In this example, we want to use the second port of the connected MADRIX PLEXUS for DMX-IN (DMX 2).
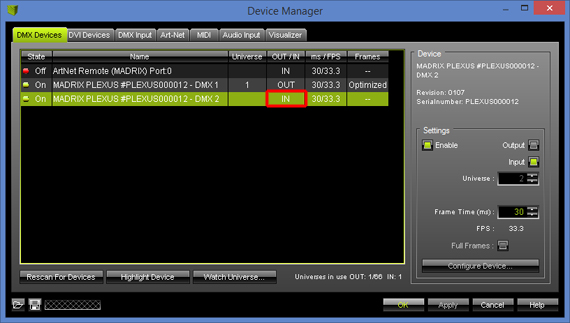
In the list, you can now see in the column OUT / IN that the configuration has been changed to IN
|
3.
|
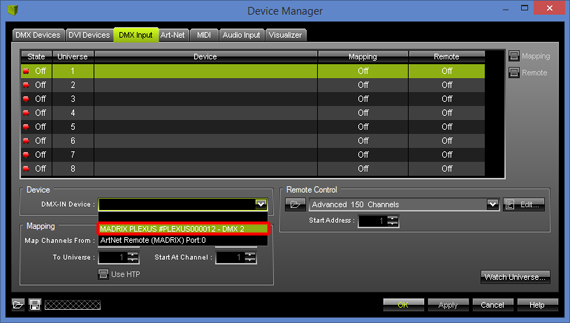
Now, change to the tab DMX Input in the Device Manager.
Please select a desired Universe (1 to 8) in the list (The row should be illuminated in green). In this example it is Universe 1
Next, choose your DMX-IN Device in the Device section by clicking on the little arrow and choosing MADRIX PLEXUS - DMX2, for example.
|
4.
|
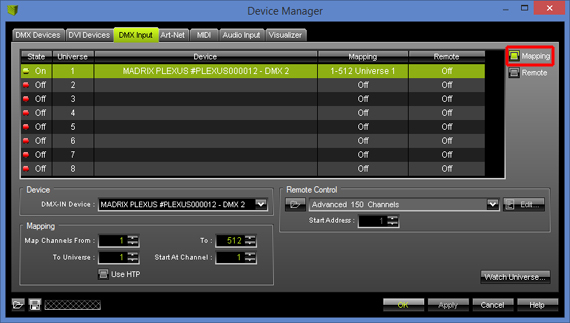
In this step, we are going to activate the DMX merging functionality in MADRIX. Therefore, please select Universe 1 again and enable Mapping
|
5.
|
We can now set up the Mapping section as required:
Map Channels From:
|
Here you can choose the channel from which the mapping should begin. In this example, we want to merge the complete universe. That is why we begin at channel 1
|
To:
|
This setting defines the last channel of the mapping area. In this example, we want to map the complete universe and so we set it to 512
|
To Universe:
|
With this option you can set to which Universe you will map the incoming DMX data. In this example, we want to map it to DMX universe 1
|
Start At Channel:
|
Here you can set the start channel of the mapping area in the DMX universe. In this example, we want to include all 512 channels and so we start at channel 1
|
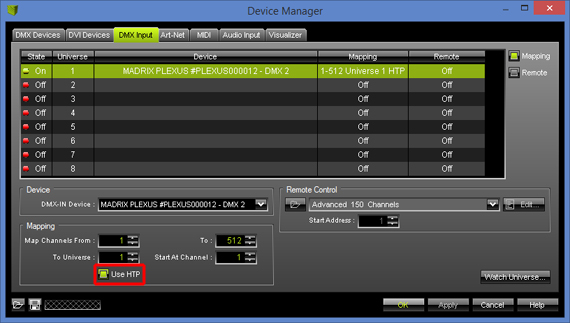
Use HTP
|
With this option you can set if the mapping works in HTP mode (Highest Takes Precedence) or in LTP mode (Latest Take Precedence). In this example, we want to use the HTP mode and therefore we enable the checkbox.
|
|
6.
|
You can now connect the output of the lighting console to the DMX 2 port of the MADRIX PLEXUS.
You will see you have created a data chain: Control data is sent from the connected lighting console to the DMX 2 port of the PLEXUS interface. In MADRIX, this data is mapped onto Universe 1. At the same time, MADRIX can generate control data and it is sending all data for Universe 1 (data from the console as well as data from MADRIX itself) to the DMX 1 port of the PLEXUS using HTP mode.
Note: In order to connect the output of the lighting console to the DMX 2 port of MADRIX PLEXUS, you will need a 5-pin XLR male to 5-pin XLR male gender changer.
|
Congratulations! You have learned how you can merge DMX data in MADRIX.
|