In this tutorial you will learn how to control MADRIX remotely via DMX Input.
Date: 12/2019
MADRIX Version: 5.2 (Created with)
Corresponding Video Tutorial: »Remote Control Via DMX Input
Note:
| • | To receive DMX data in MADRIX you will need to connect a MADRIX DMX interface via USB to the PC. |
| • | In this tutorial a MADRIX USB ONE will be used. The MADRIX USB ONE is able to be used as DMX output and DMX input (often used together with a so called 5 Pin XLR Gender Changer) interface. |
Task:
We have to configure MADRIX that it will be controlled remotely with the "Essential" remote protocol at DMX Start Channel 106.
1. |
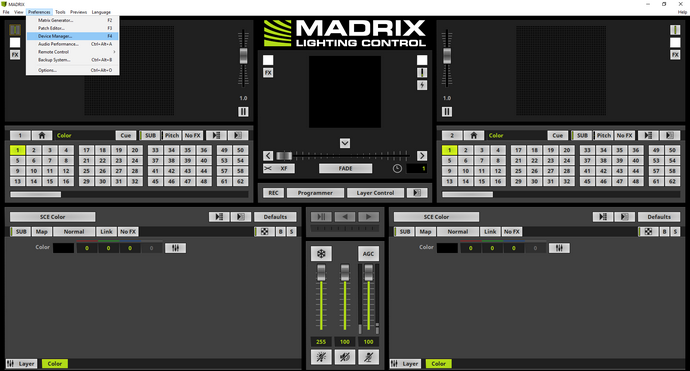
Please open the MADRIX Device Manager. To open the Device Manager please go to Preferences > Device Manager.
|
2. |
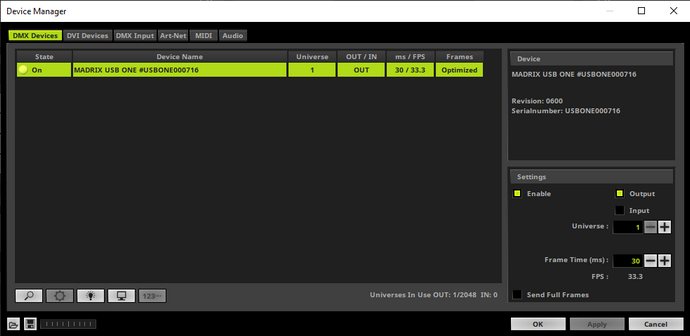
When the MADRIX USB ONE was connected before the start of MADRIX and the driver was installed correctly, MADRIX will find it automatically. If it was connected after the start, please click the Magnifier button below the Device List to find the USB ONE
|
3. |
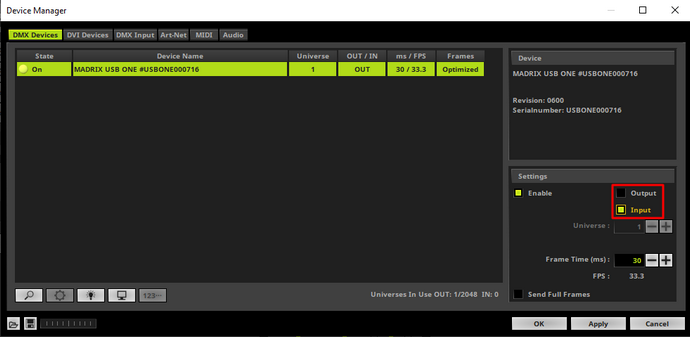
By default the MADRIX USB ONE will be set to send DMX data. If we want to receive DMX data with this interface, we have to change it. To change the data direct we go to the Settings section, activate Input and click Apply.
|
4. |
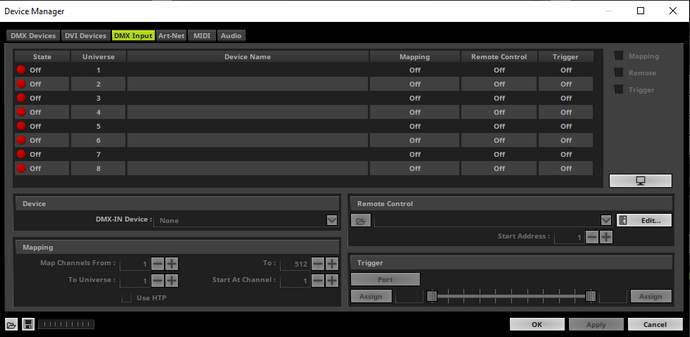
To setup the DMX Input configuration please change the tab of the Device Manager to DMX Input.
|
5. |
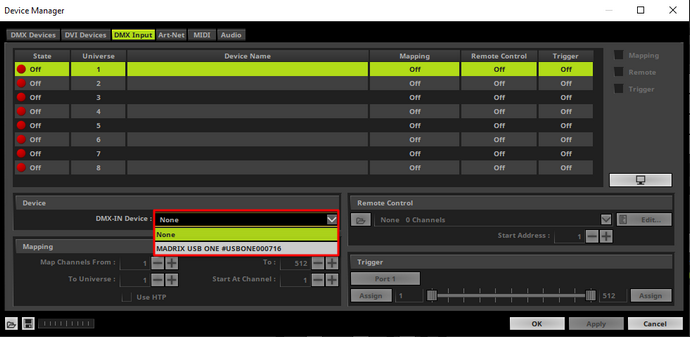
In MADRIX you are able to work with multiple DMX Input Devices. In this tutorial we will use only one and we will configure it as DMX Input Device 1.
Please select the first Universe row and choose the connected MADRIX USBE ONE as DMX-IN Device.
|
6. |
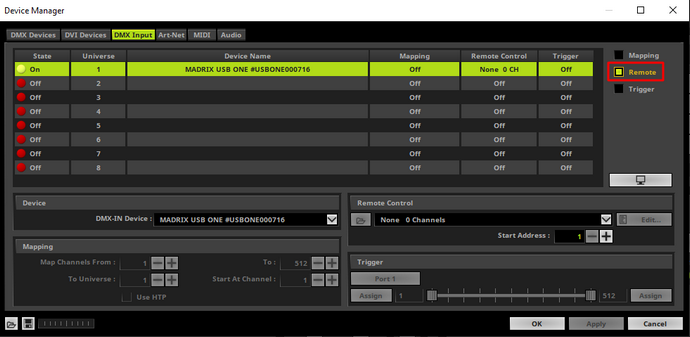
After the USB ONE was assigned to DMX Input Universe 1 we have to activate the Remote option for this interface.
|
7. |
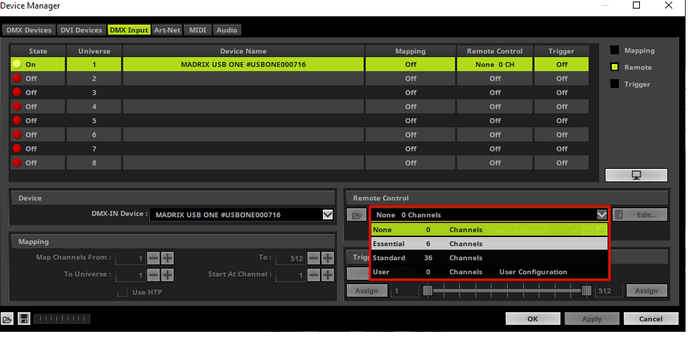
In this step we choose the desired Remote Control protocol. According to our task we want to use the predefined Essential protocol. Please open the combo box in the Remote Control section and select Essential. You will find the description and DMX chart of the predefined Essential DMX Input configuration in the MADRIX 5 manual chapter: »DMX-IN[Essential Protocol].
|
8. |
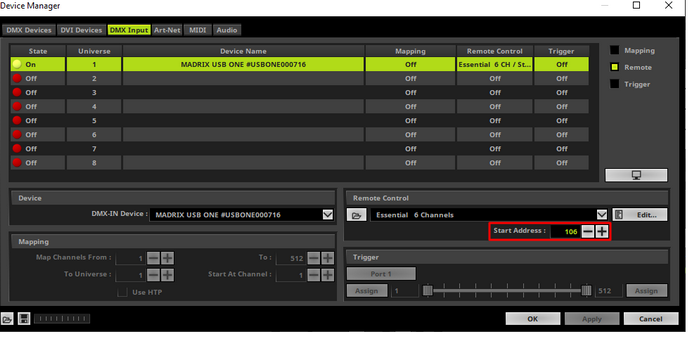
In the last step we have to change the DMX Start Address. In this tutorial we set it to 106. After we have changed all this settings we click OK. Now we can control MADRIX remotely with 6 DMX channels starting from DMX channel 106.
|
Congratulations! You have successfully learned how to create a DMX Input configuration with a predefined DMX Input protocol in MADRIX 5.
