This tutorial shows you how a fixture list can be imported in the MADRIX Patch Editor.
Date: 09/2019
MADRIX Version: 5.1b (Created with)
Corresponding Video Tutorial: »Import A Fixture List
Note:
•The MADRIX 5 Patch Editor is able to import fixture list in the CSV file format.
•The result of this tutorial will be used in the tutorial »Highlight Fixtures.
Task:
In this tutorial a fixture list which was generated in a third party software (like 3D visualizer or CAD software) shall be imported in the MADRIX software. The project we have to import looks like the following image.

Download:
The CSV fixture list for this example you can download under the following link: CircleAndDiamondImport.csv
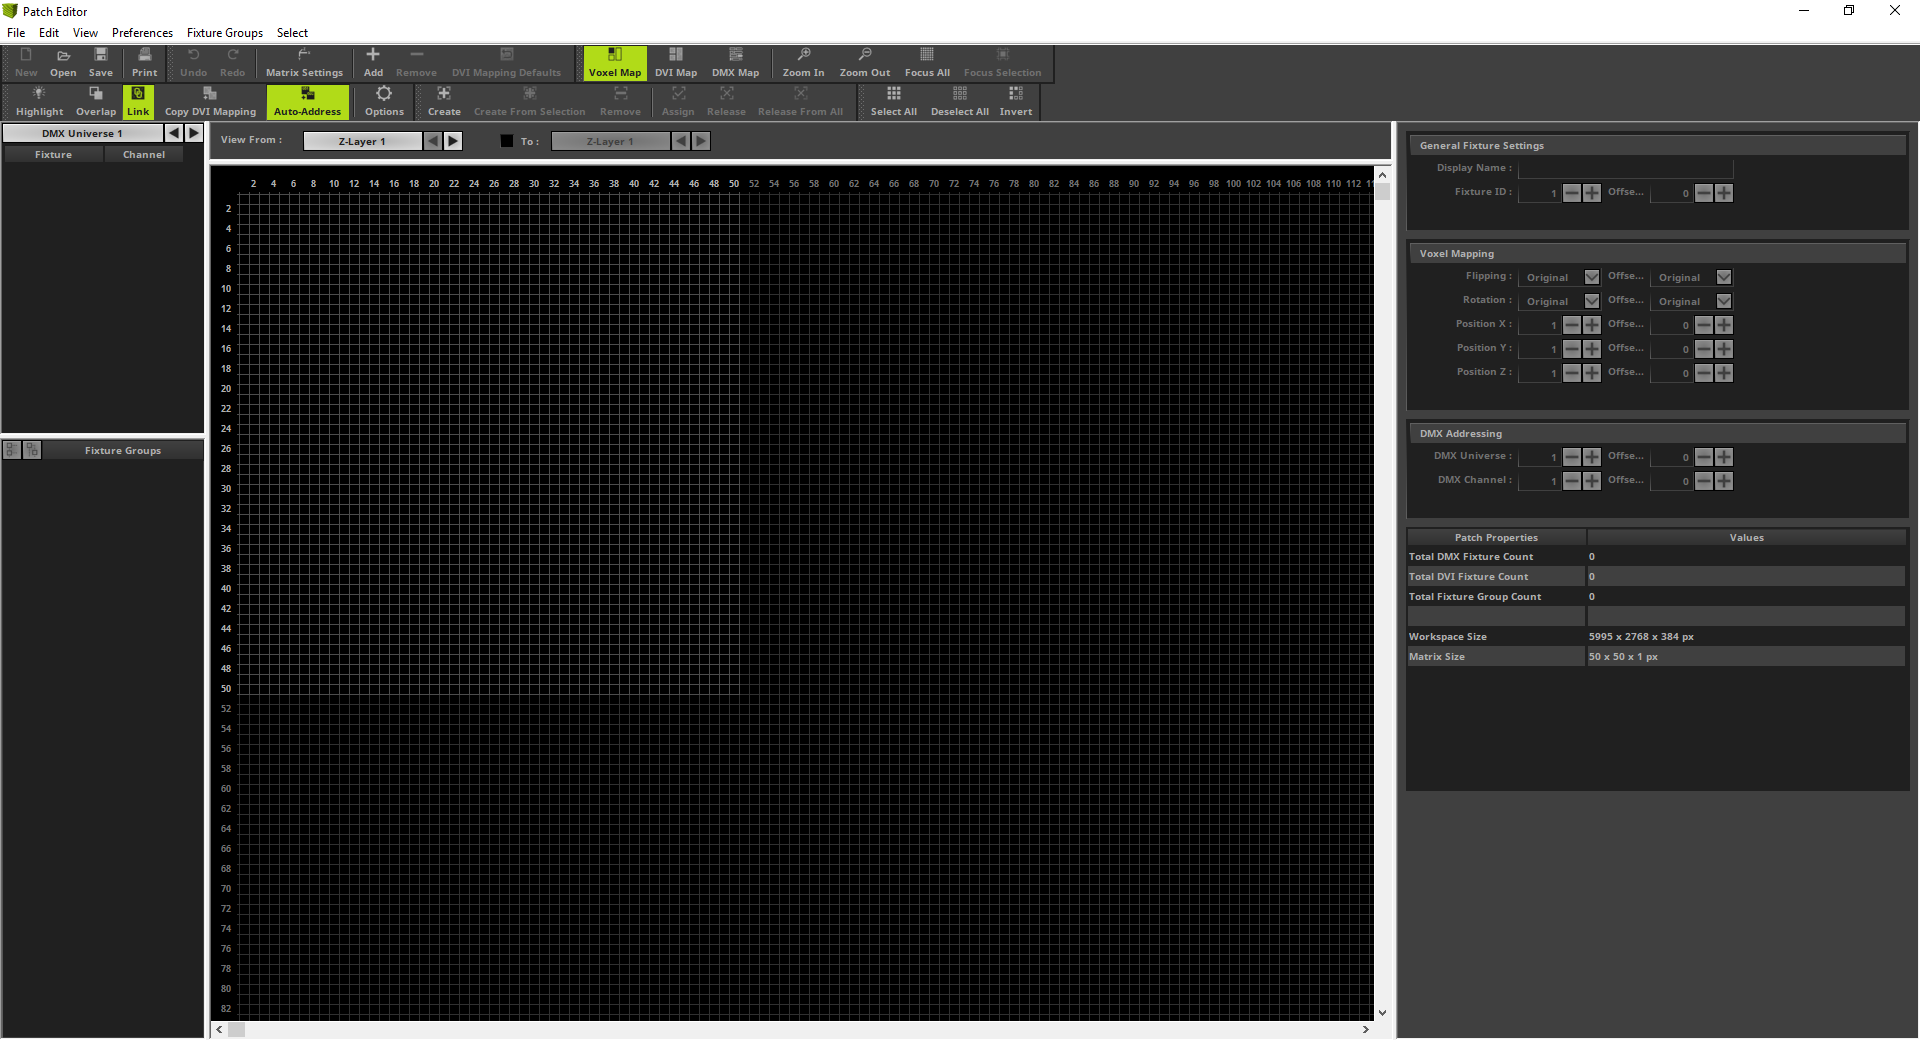
1. |
We will start with an empty patch. So please open the Patch Editor and create a New patch. If you don't know how to create an empty patch in MADRIX 5, please have a look to the following tutorial:
|
||||||||||||||||||
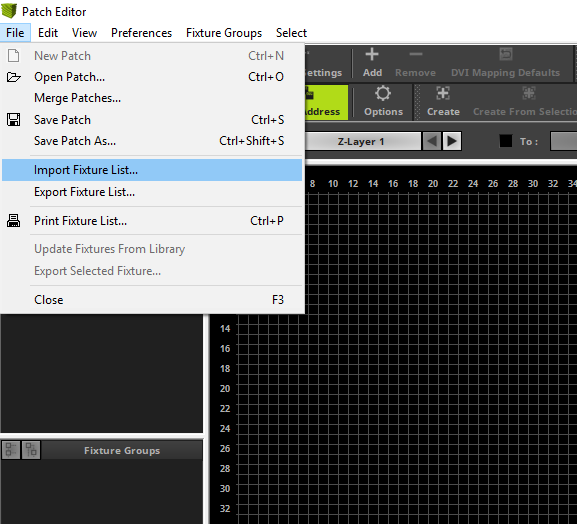
2. |
To import a fixture list in MADRIX please select File > Import Fixture List...
|
||||||||||||||||||
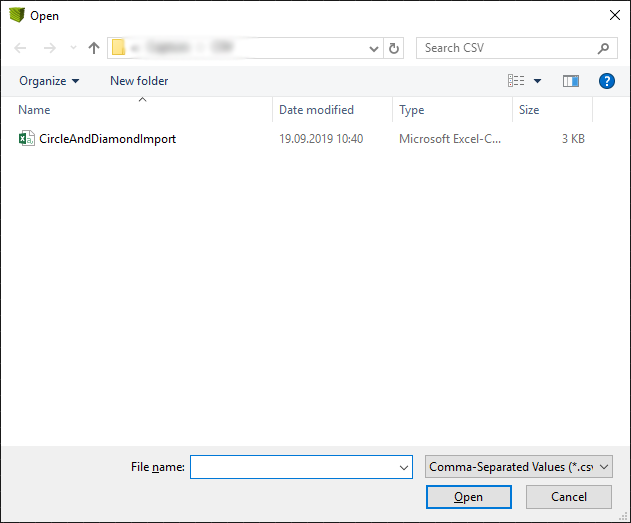
3. |
Now you have to navigate to the desired fixture list file. In this tutorial we are using the file CircleAndDiamondImport.csv which you can download above. Please select the file and click Open.
|
||||||||||||||||||
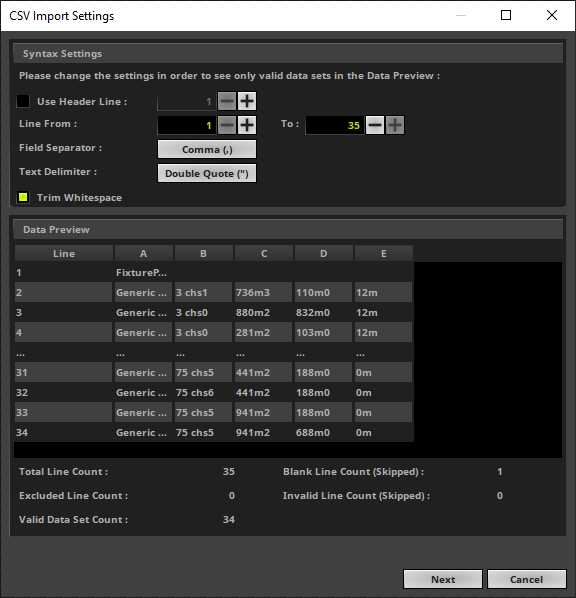
4. |
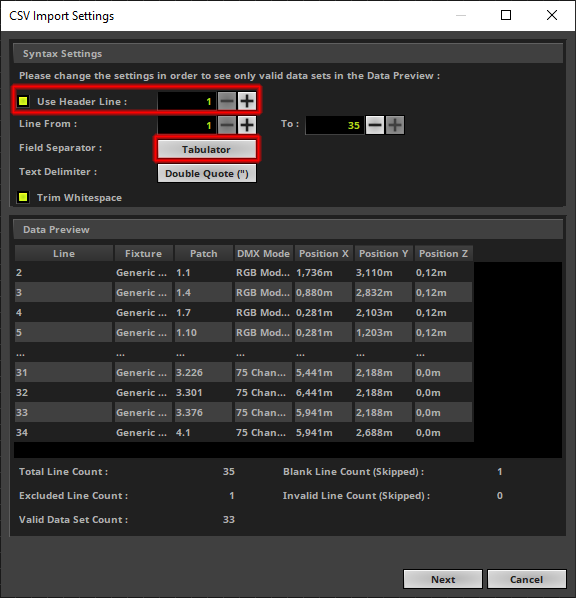
In the CSV Import Settings window we have to adjust the Syntax Settings for the file we want to import. The CSV format is an open standard format and has several possibilities how the fields are separated. To figure out how the fields are separated you can have a look to the file with the Microsoft Windows Editor or any other plain text editor.
In the Data Preview section you can double check if the settings for the syntax are set correctly.
|
||||||||||||||||||
5. |
In our example we have to Enable the Use Header Line option with 1 line and the Field Separator must be changed to Tabulator. When we now have a look at the Data Preview, we will see a correct representation of the columns and lines. If this is the case, we can click the Next button.
|
||||||||||||||||||
6. |
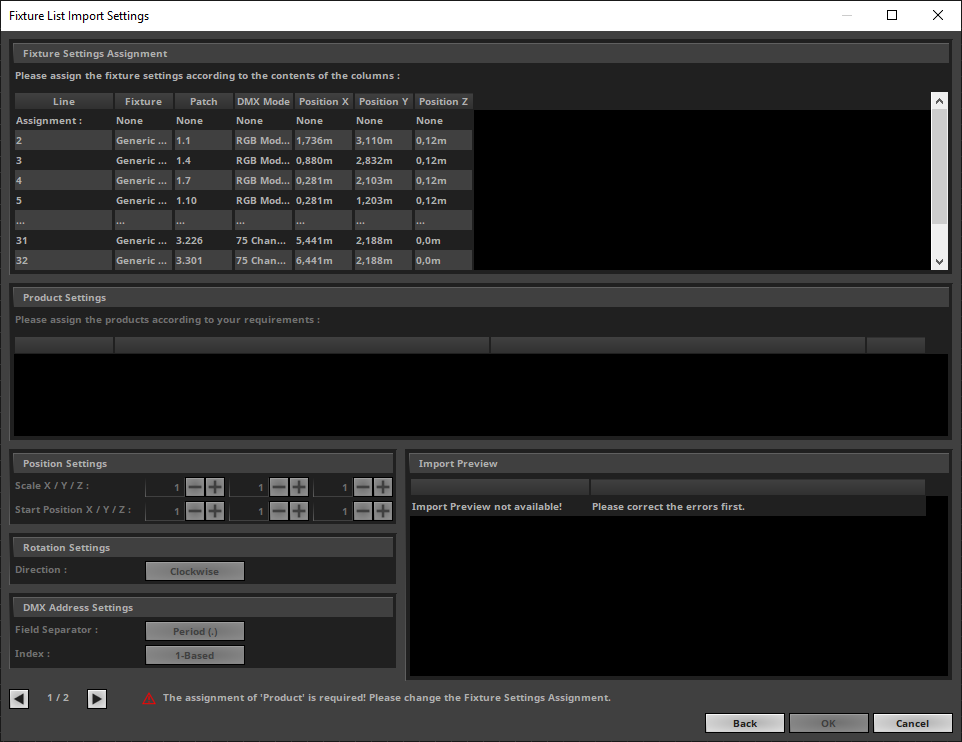
The Fixture List Import Settings window opens. In this window we have to assign the desired columns of the CSV fixture list to the correct import parameters.
|
||||||||||||||||||
7. |
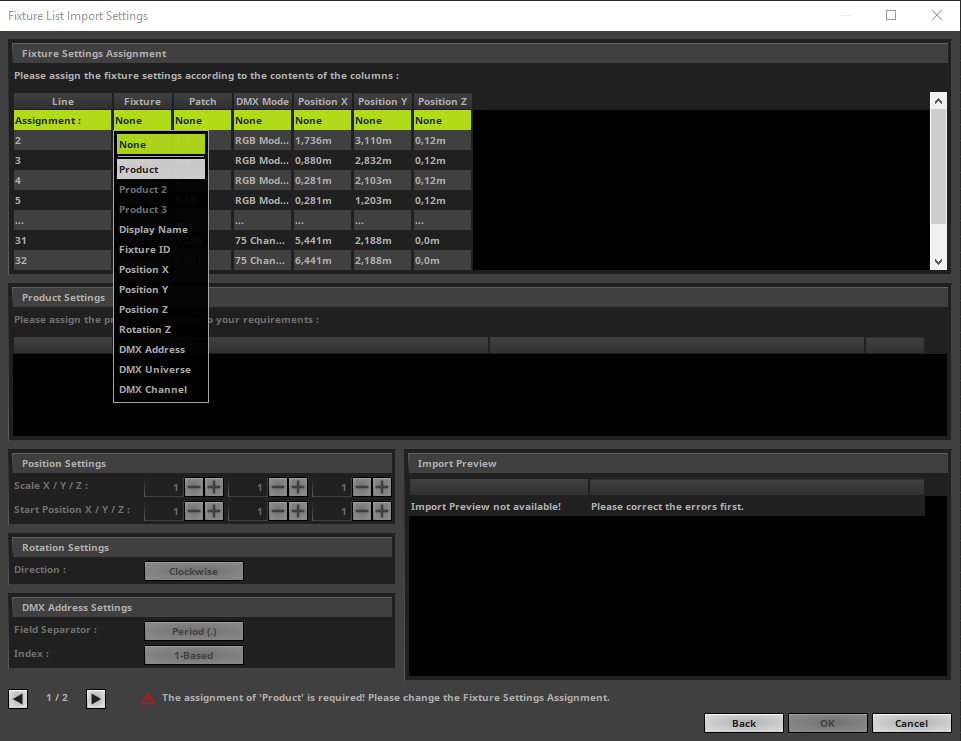
To assign a parameter please perform a double-click with the left mouse button at the Assignment line in each column and the Parameter context menu opens.
|
||||||||||||||||||
8. |
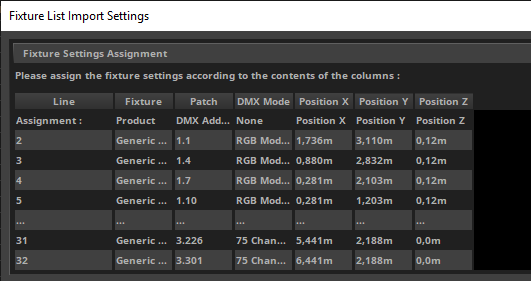
For this fixture list import we assign the columns to the following parameter:
The result should look like the following picture:
|
||||||||||||||||||
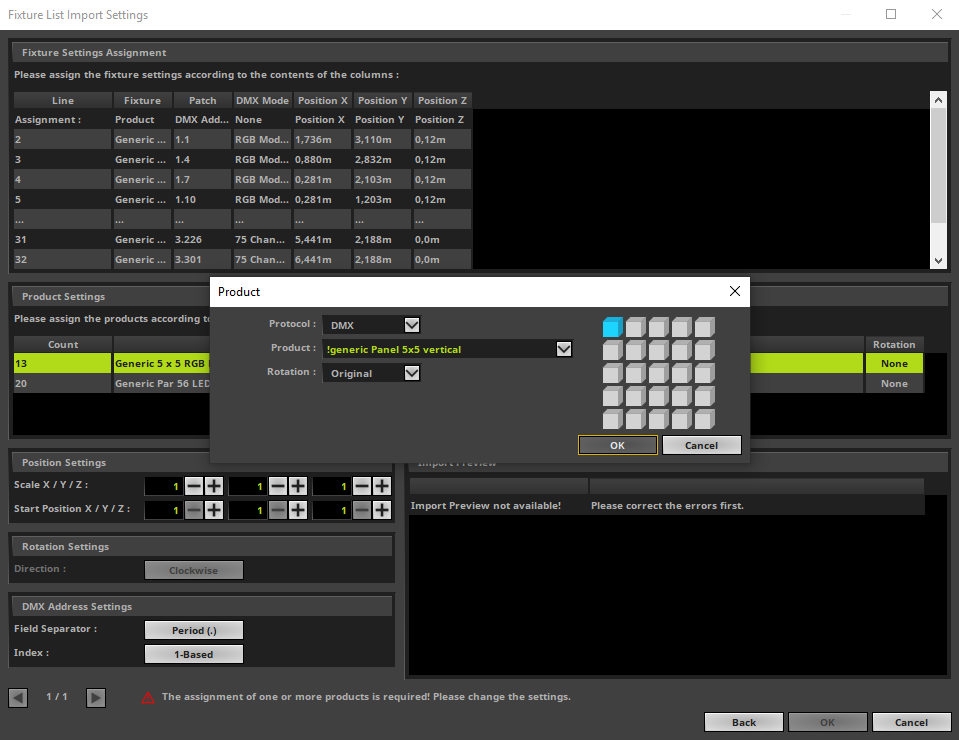
9. |
After we assigned the parameters in the Fixture Settings Assignment section we need to have a look at the Product Settings section. In this section we will get an overview about the different fixtures of the fixture list to be imported.
When we open the Products window the the Generic 5 x 5 RGB Blinder we choose:
•Protocol: DMX •Product: !generic Panel 5x5 vertical •Rotation: Original
Now please click OK.
|
||||||||||||||||||
10. |
Of course the second entry in the list must also be assigned. For this fixture type we choose:
•Protocol: DMX •Product: !generic RGB Light 1 pixel •Rotation: Original
After the settings please click OK.
|
||||||||||||||||||
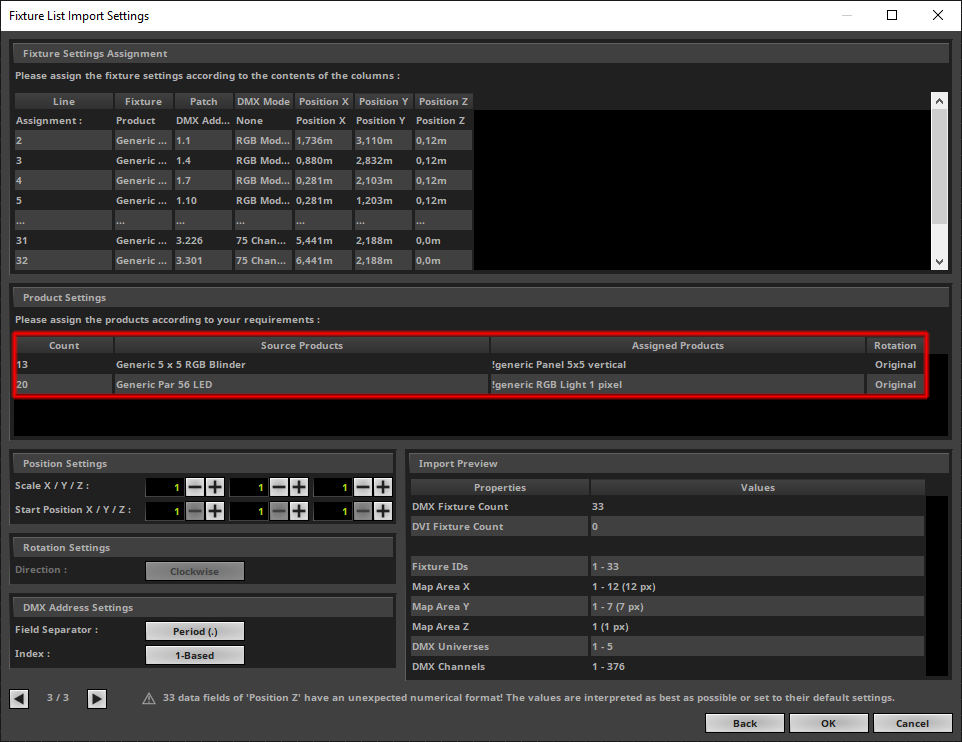
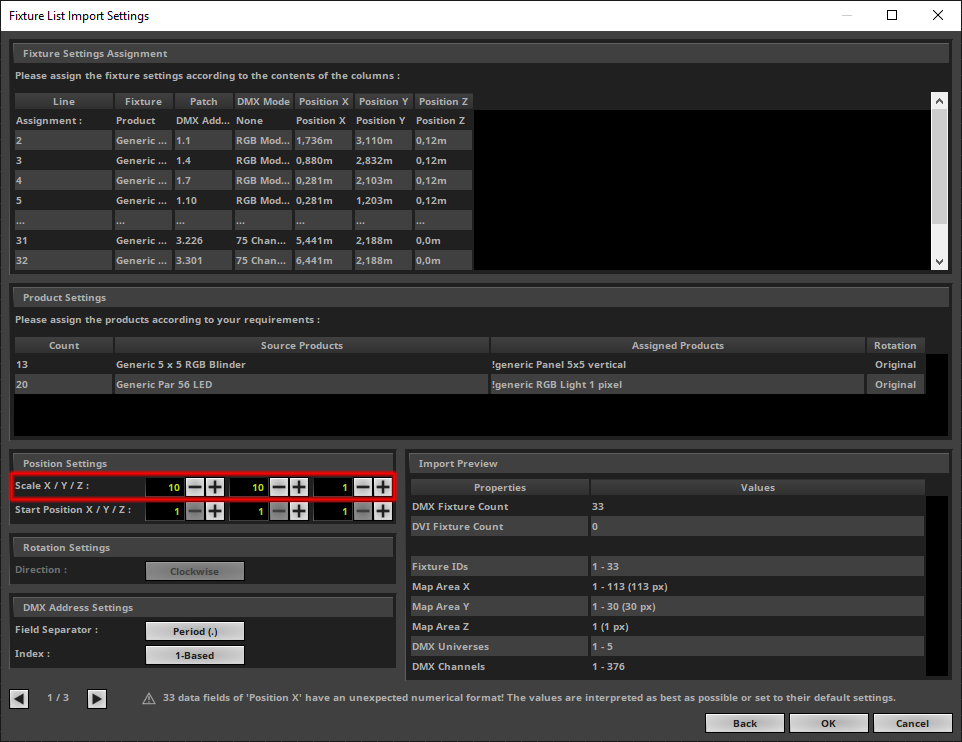
11. |
When we now have a look at the Import Preview section we will get an overview about the properties to the importing patch. In this example we can figure out the Map Area in X and Y are very small for this project. So we are able to scale it. The Scale option is available at the Position Settings section on the bottom left side of this window. We want to Scale it 10 times in X and Y direction. After we set the scale factor we click OK.
|
||||||||||||||||||
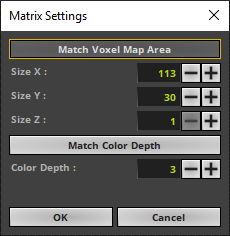
12. |
As always when we work with a patch we have to set the correct voxel map area size. Therefore please open the Matrix Settings, click the Match Voxel Map Area button and click OK.
|
||||||||||||||||||
13. |
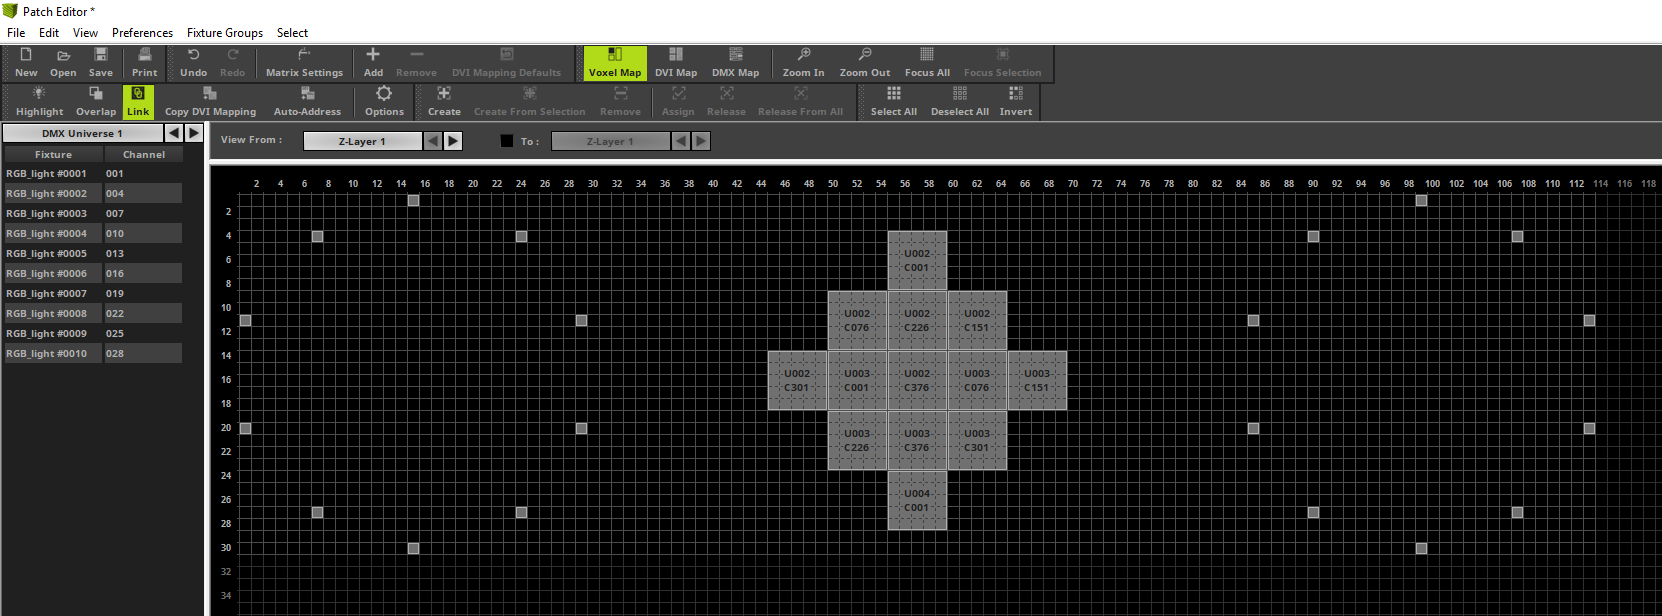
Now the fixture list is imported and the correct size of the voxel map area is set. The patch should look like the following image.
|
Congratulations! You have learned how to import a fixture list in MADRIX 5.