This tutorial shows you how to create a 3D patch with the help of the Patch Editor.
Date: 06/2019
MADRIX Version: 5.0f (Created with)
Corresponding Video Tutorial: »Creating A 3D Patch For DMX Output With The Patch Editor
Task:
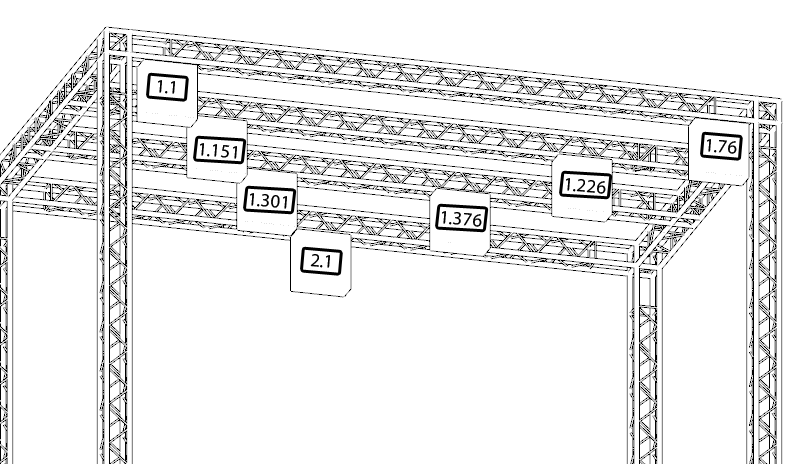
We have to create a patch for seven DMX controlled 5 x 5 LED RGB Pixel Panels which are installed on four layers in the truss rig.
1. |
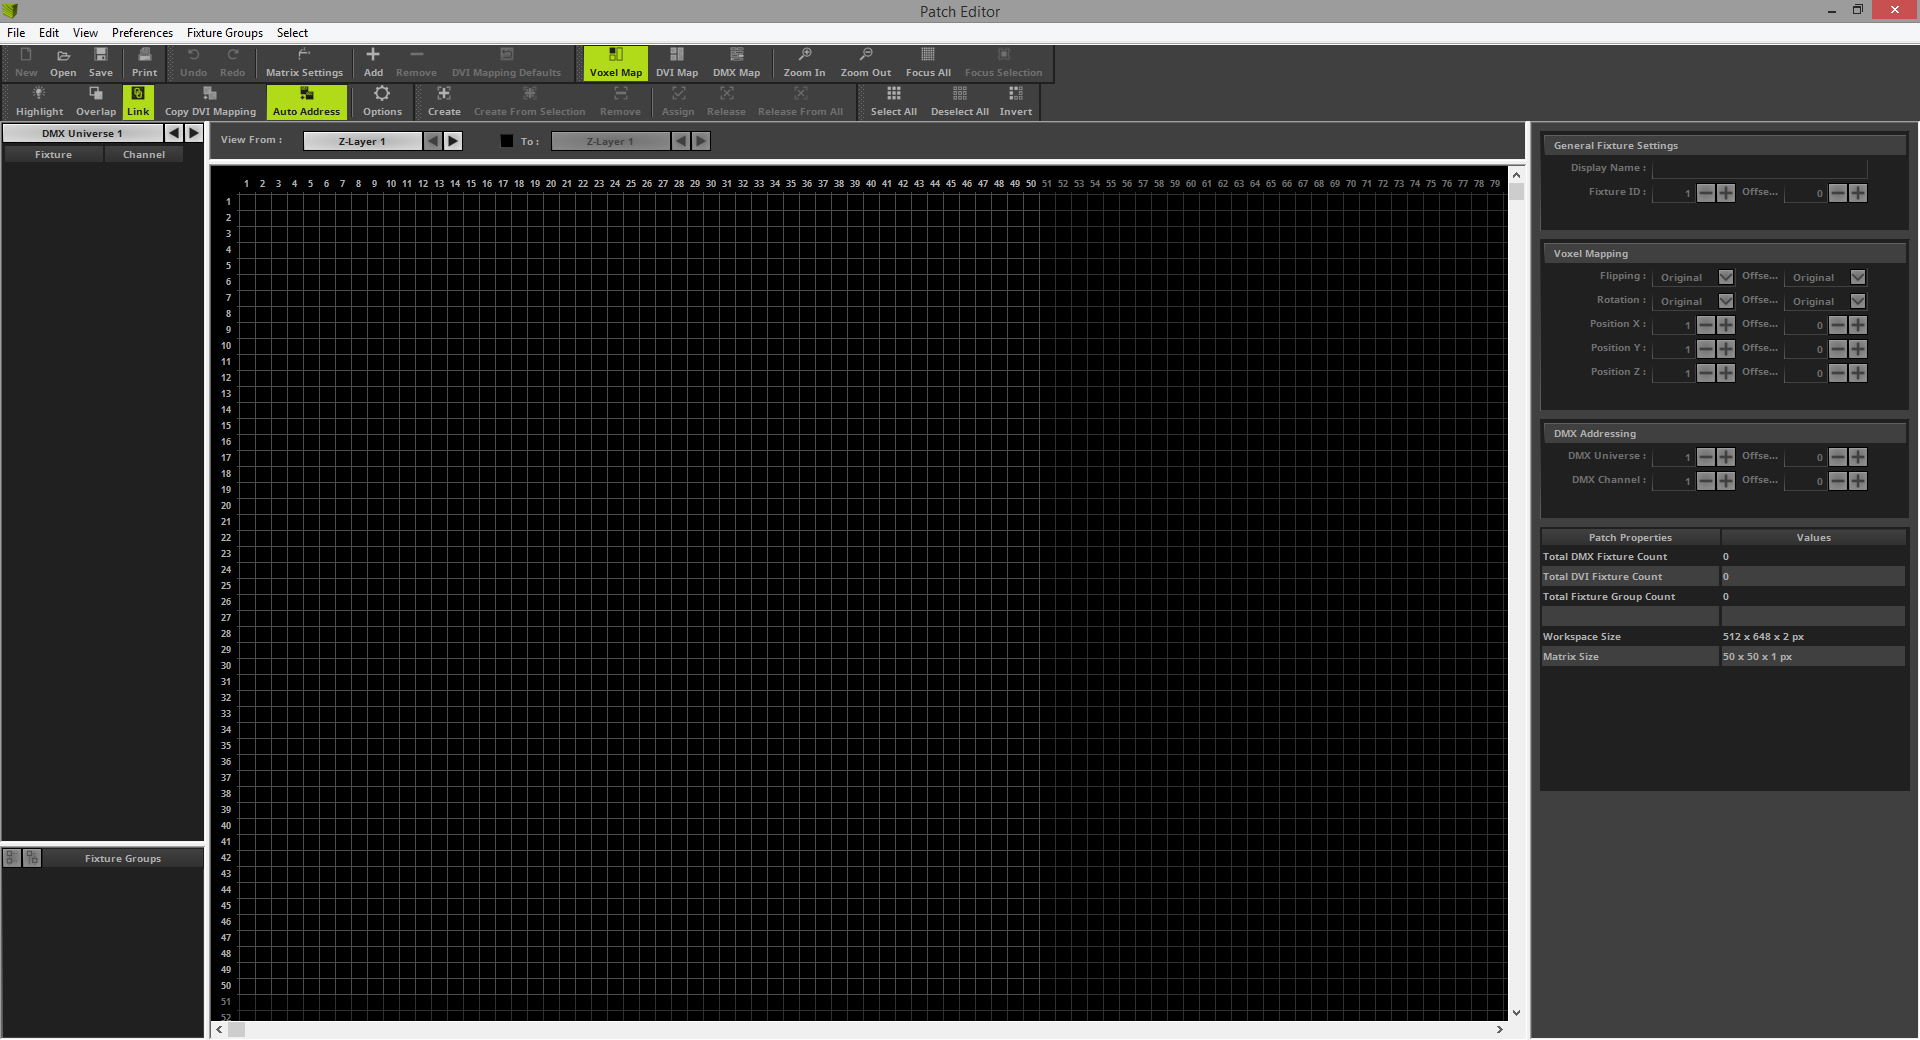
To create this patch we have to remove all current existing fixtures. So please open the Patch Editor and create a New patch. If you don't know how to create an empty patch in MADRIX 5, please have a look to the following tutorial:
|
2. |
Now we can start to add the first fixtures according to our patch plan. To add fixtures to the patch grid please click the Add button in the toolbar.
|
3. |
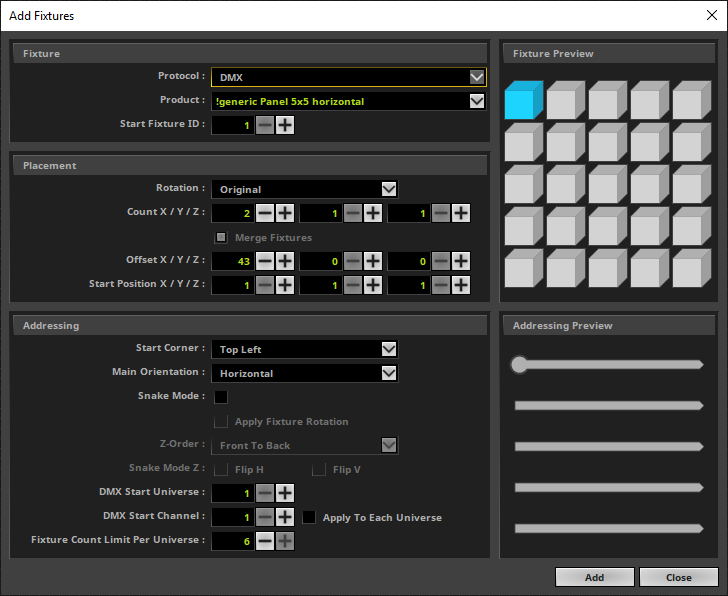
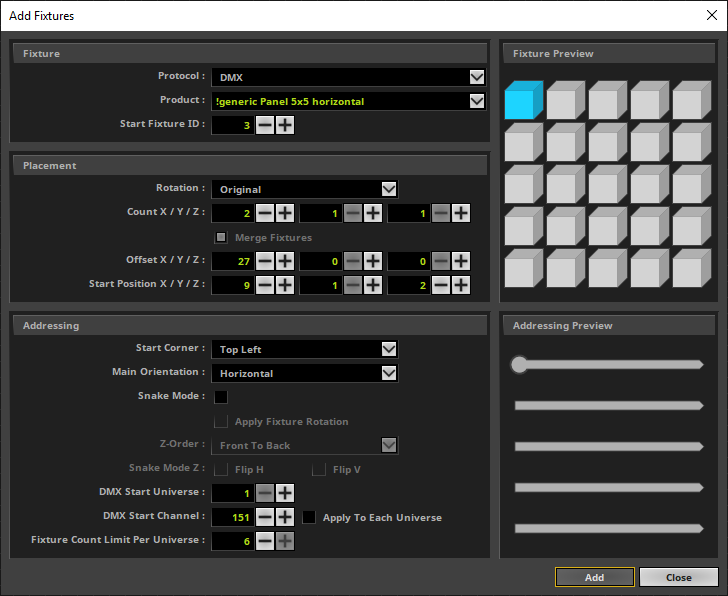
After the Add Fixtures window opens we can start to add our desired fixtures. If you want to learn more about all settings of the Add Fixtures window, please have a look at the following link: »Using The Software > Patching > Patch Editor According to the task we have to patch 5x5 LED RGB Pixel Panels. In the first step we want to add the first two panels for the front left and right side. •Protocol should be DMX •As Product we have to choose !generic Panel 5x5 horizontal
In the Placement section we want to select the correct count and placement (Offset and Start Position) according to the patch plan. We change the settings to: •Count X to 2. We don't need to change the Count Y and Z. It should be 1. •The Offset X will be set to 43 •Start Position X should be 1.
After all necessary settings are changed please click Add.
|
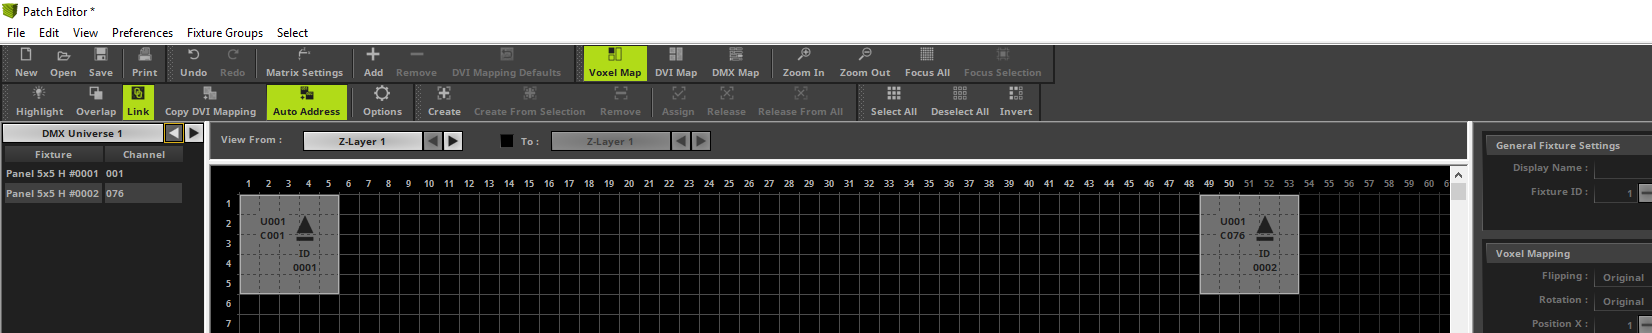
4. |
When we now have a look at the Patch Grid we can see, that we have add two 5x5 Pixel Panels at Z-Layer 1.
|
5. |
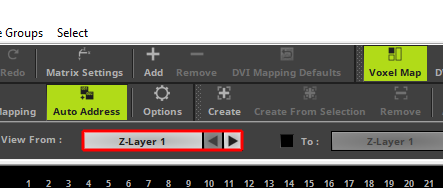
Before we add the next two fixtures at Z-Layer 2 we need to change the view to this Z-Layer.
To change the view of the different Z-Layers simply click the Z-Layer button or the Arrows buttons beside this button to navigate through the different Z-Layers in the Patch Editor.
|
6. |
Now we want to add the two 5x5 Pixel Panels at Z-Layer 2. Therefor please open the Add Fixtures window again. In the Add Fixtures window you will still find the settings of the last added fixtures. In case of this tutorial we want to patch the same Product but at another position. That means we only need to change the Placement before we add the fixtures. If Auto Address is enabled, MADRIX will automatically calculate the next free DMX address for us. So we also don't need to change the settings in this section.
In the Placement section we have to change: •The Offset X will be set to 27 •Start Position X should be changed to 9 and Start Position Z should be changed to 2.
Please click the Add button to insert the fixtures to the patch.
|
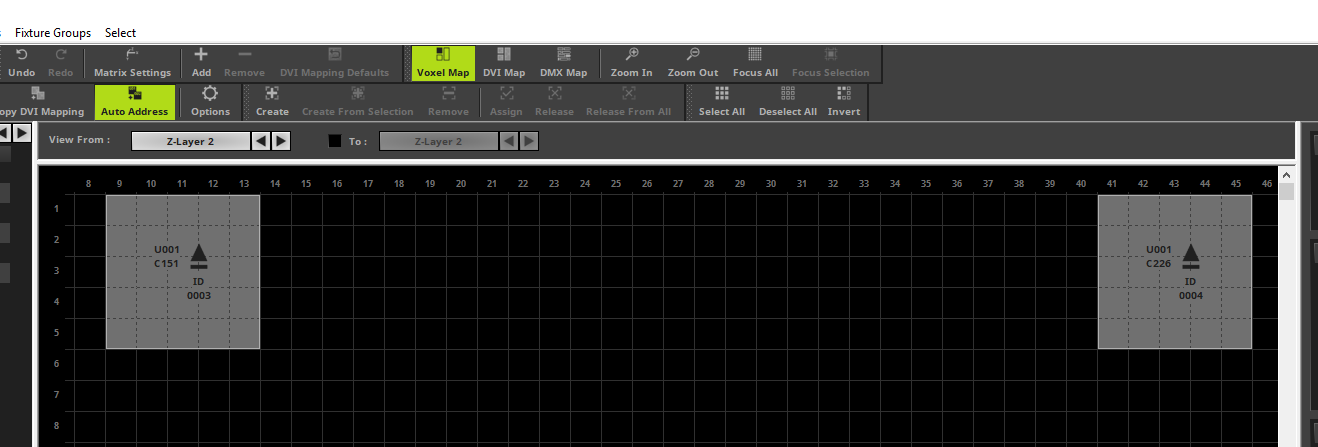
7. |
When we have a look to Z-Layer 2, we find the two added 5x5 Pixel Panels.
|
8. |
In this step we add the two 5x5 Pixel Panels at Z-Layer 3. Therefor please open the Add Fixtures window again and change the necessary settings in the Placement section.
•The Offset X will be set to 11 •Start Position X should be changed to 17 and Start Position Z should be changed to 3.
After we have changed the settings we click Add.
|
9. |
When we have a look at our patch plan, we have to add one more 5x5 Pixel Panel at Z-Layer 4. So we have to change the settings in the Placement section and Add the last fixture for this patch
In the Placement section we have to change: •Count X must be changed to 1 •The Offset X can be set to 0 •Start Position X should be changed to 25 and Start Position Z should be changed to 4.
|
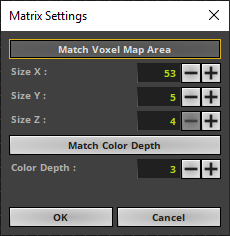
10. |
In this step we have to set the correct matrix size. Please open the Matrix Settings window via the toolbar and click the Match Voxel Map Area button. Now you can see the Size X, Y and Z will be changed to the needed Voxel Map Area. The matched Voxel Map Area includes all fixtures of this patch from the front top left fixture to the back bottom right on. With a click at OK the settings will be accepted and MADRIX will now calculate the effects at this size.
|
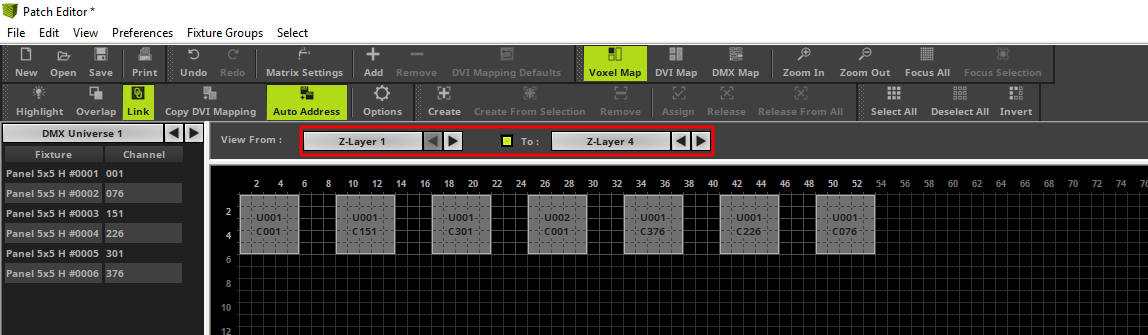
11. |
Now we have patched all fixtures according to our task. As we can seen the Patch Editor creates an own slice for every Z-Layer. With the help of this slices we can create complex patches and our focus will be on one Z-Layer. To get an overview about all Z-Layers we can activate the View From Z-Layer To Z-Layer option in the Patch Editor. Now the fixtures on all Z-Layers which are not fully overlapped will be visible in one Z-Layer slice.
|
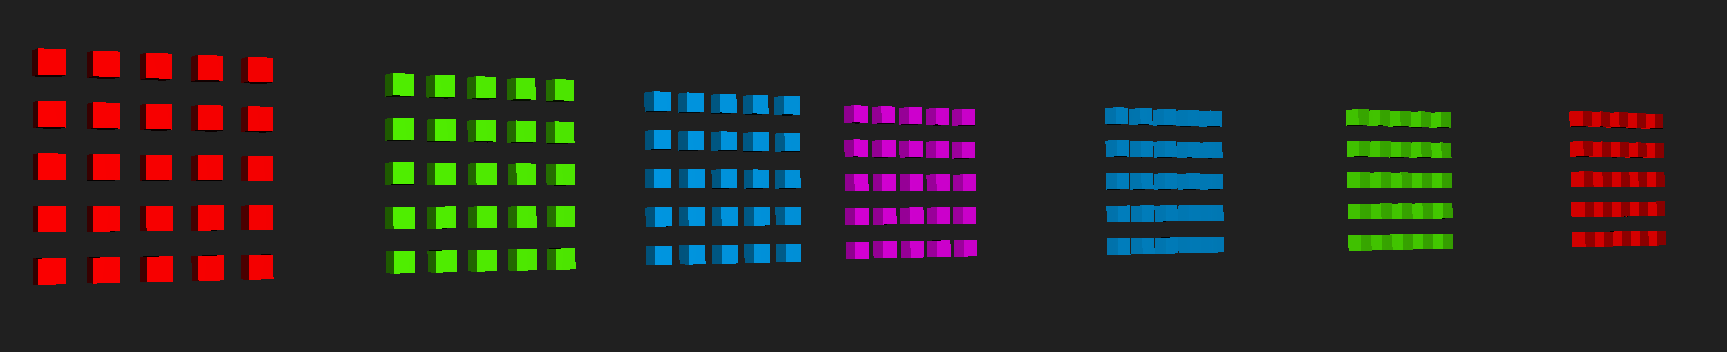
12. |
After we closed the Patch Editor we can have a look at the 3D Mode of the MADRIX Preview and we can see a small 3D patch on which we are able to create stunning effects.
|


Congratulations! You have successfully created a 3D Patch with the Patch Editor in MADRIX.