This topic includes:
▪2] Enabling Drivers In MADRIX 5
You can connect the ORION directly via USB to the computer that runs the MADRIX 5 Software. Data is sent to the ORION via a port and from the ORION to MADRIX 5 over USB.
▪Connect your external equipment [such as, compatible sensors, potentiometers, switches, and triggers] to the required port of MADRIX ORION.
▪Connect MADRIX ORION to your computer via USB.
[Use the provided USB cable.]
▪Make sure to check the power-management options of Windows. Learn more »PC Power Management
▪Make sure that you have configured MADRIX ORION correctly.
2] Enabling Drivers In MADRIX 5
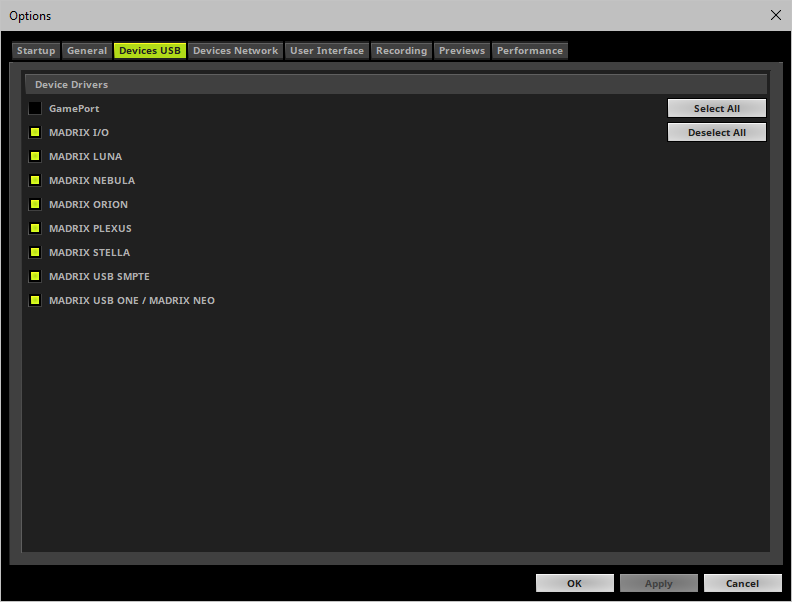
▪Go to the menu Preferences > Options... > Devices USB
[Keyboard shortcut: Ctrl+Alt+O > Devices USB]
▪Activate MADRIX ORION
[The option is activated by default.]
▪Click Apply
▪Close the window with OK
▪Go to the menu Preferences > Device Manager... > DMX Devices
[Keyboard shortcut: F4]
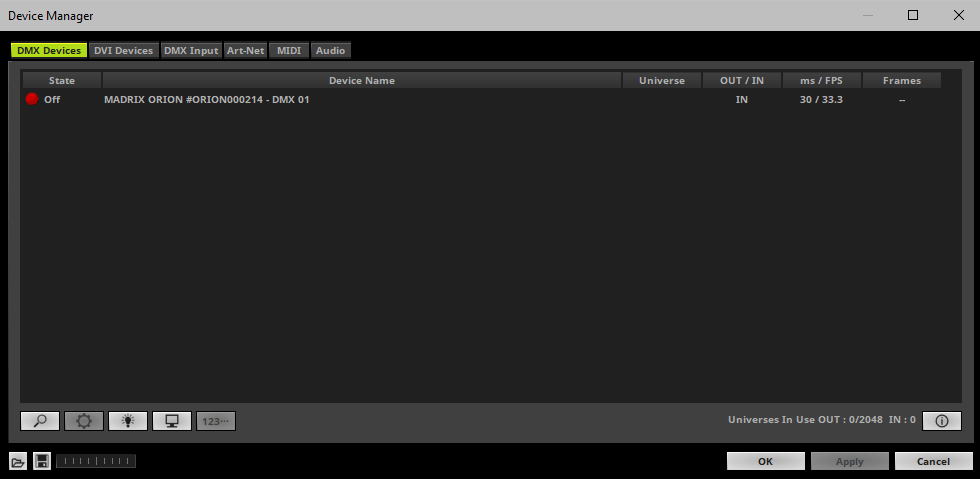
▪Your ORION devices will appear in the list.
▪If your devices are not in the list, click ![]()
[In the screenshot below, one ORION is connected.]
▪Select the required device in the list.
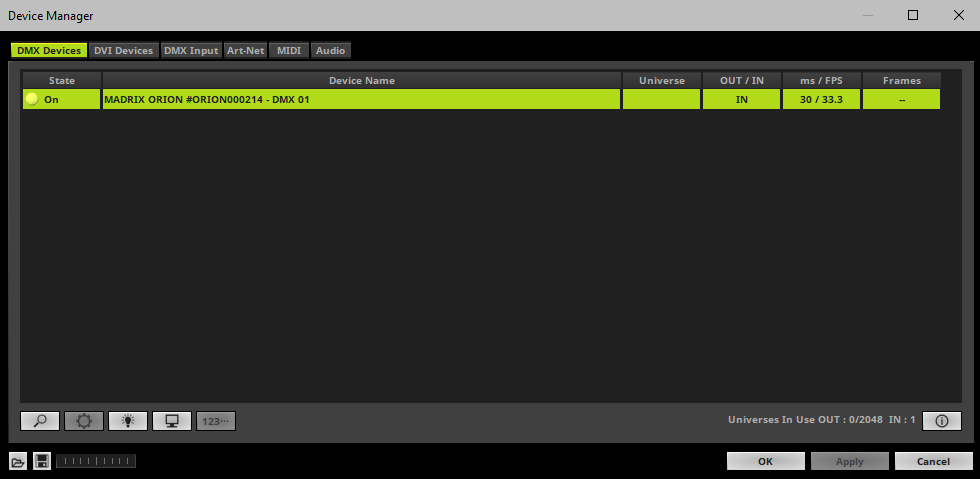
▪Right Mouse Click on the column State to set from Off to On [indicated by green light].
▪IN is automatically activated.
▪If required, change the frame time.
- Right Mouse Click or Left Mouse Double-Click on the column ms / FPS and enter the required number.
- The frame time [in milliseconds; ms] affects the frame rate. The frame rate specifies how fast data is sent to the device or received from it [in Frames Per Second; FPS].
- Increase the frame time in order to decrease the frame rate [e.g., 40 ms = 25 FPS].
- Decrease the frame time in order to increase the frame rate [e.g., 20 ms = 50 FPS].
- The default value is 30 ms / 33.3 FPS.
- The minimum value is 1000 ms / 1 FPS.
- The maximum value is 5 ms / 200 FPS.
Please note: If you want to output high frame rates, make sure to set Main Mixing FPS in the Options to the same value in order to render the same frame rate [It is set to 50 FPS by default. Otherwise, frames will be duplicated].
Please note: If you want to input high frame rates, make sure to set DMX Controller Input FPS in the Options to the same value in order to process the same frame rate [It is set to 50 FPS by default. Otherwise, frames will be duplicated].
- Some LED fixtures might have problems with a low frame time / high frame rate. Then, it is recommended to increase the frame time / decrease the frame rate.
▪Go to the menu Preferences > Device Manager... > DMX Input
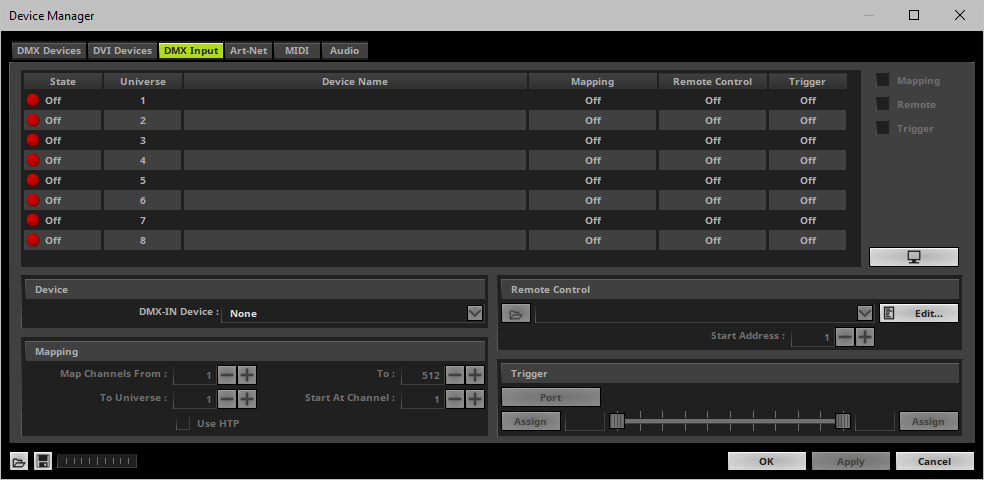
▪Select your preferred DMX Universe in the list.
[By default, DMX universe 1 to 8 are listed. If you wish to increase the number of DMX-IN universes, you can change the setting under menu Preferences > Options... > Performance]
▪Choose your DMX-IN Device in the section Device. Select MADRIX ORION
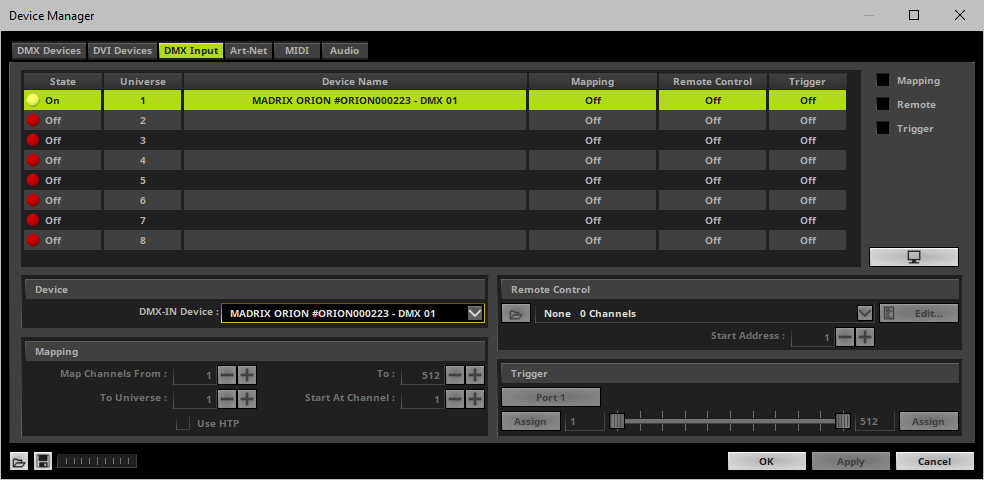
▪DMX-IN is now activated. MADRIX 5 can already receive DMX data.
▪Now, choose how to use incoming data as explained below.
Data
▪At this point, MADRIX 5 is now already receiving any incoming data.
▪You can now use this data, for example for Scripts and Macros.
▪If you want to monitor incoming signals, select your DMX universe/DMX device in the list and click 
Mapping
▪Use Mapping, if you want to route incoming DMX signals through MADRIX 5 to your output [DMX-Thru].
▪First, select your device in the list.
▪Activate Mapping
▪This feature maps incoming data to the specified DMX universe and channels.
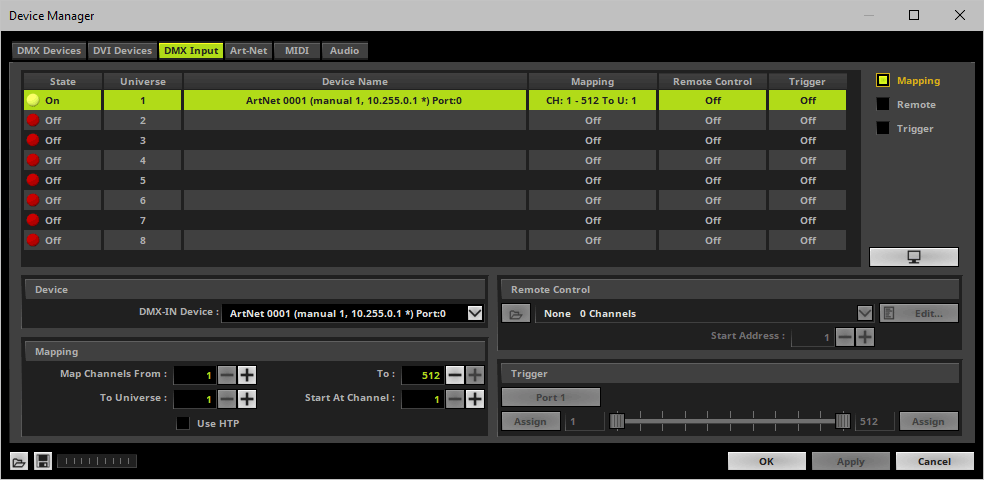
▪Configure the following settings in the section Mapping
- Map Channels From - Defines which incoming channels are used. This is the start channel to specify the range of channels.
- To - Defines which incoming channels are used. This is the end channel to specify the range of channels.
- To Universe - Defines onto which output DMX universe MADRIX 5 should map the specified range of incoming channels.
- Start At Channel - Defines the first DMX channel of the output DMX universe MADRIX 5 should use.
- Use HTP - Activates the Highest Takes Precedence feature. You can map incoming data to a DMX address range that MADRIX 5 already controls. Use HTP and MADRIX 5 will compare incoming values with the DMX data it sends to the DMX output. As a result, MADRIX 5 will only use the highest of both values on a particular channel and send it to the output.
▪Click Apply to confirm.
Remote Control
▪Use Remote Control, if you want to control the MADRIX 5 Software remotely
▪First, select your device in the list.
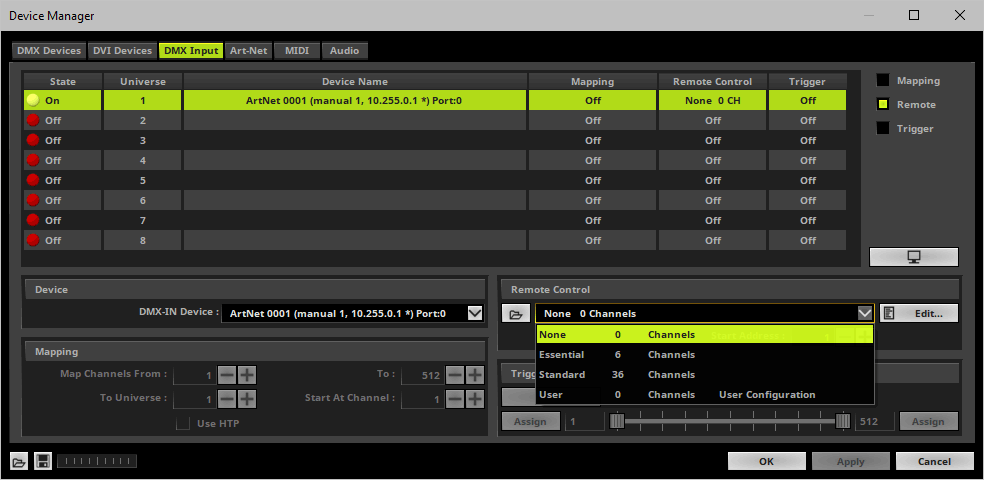
▪Activate Remote
▪Select one of the built-in protocols in the section Remote Control as explained below
or create your own remote configuration.
|
Open - Loads a previously saved MADRIX 5 DMX Remote Configuration file [of the file type *.mdrx]. |
|
Protocols - Choose from a pre-configured protocol [configuration]. |
|
DMX-IN Remote Editor - Allows you to modify a configuration or create a new configuration. |
|
Start Address - Defines on which particular DMX channel the protocol should start. The whole protocol will be mapped to this new address area. |
|
DMX Watcher - Opens the DMX Watcher to monitor your DMX output or input. |
Trigger
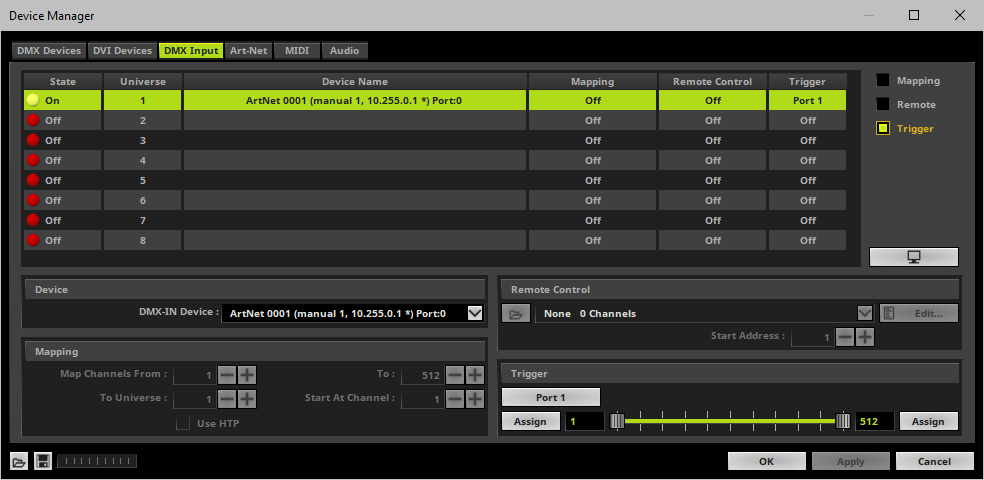
▪Use Trigger, if you want to use incoming signals for the MADRIX 5 TRI Effects.
▪First, select your device in the list.
▪Activate Trigger
|
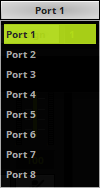
Port - Defines the port [Port 1 - 8] that is assigned to this DMX-IN Device. MADRIX 5 allows you to send trigger signals from up to 8 different devices [8 ports] and assign a MADRIX 5 TRI Effect the corresponding port. |
|
Value Range - Defines the range of incoming DMX values that can be used as trigger signal. |
|
Assign Minimum Value - Automatically assigns the minimum value when using the controller. |
|
Assign Maximum Value - Automatically assigns the maximum value when using the controller. |
| MADRIX 6.06. |
| [Ctrl & +/-] = Zoom In/Out | [Ctrl & 0] = 100% |
|
Previous Next
|
|
Enable Automatic Translation | Activer La Traduction Automatique | 启用自动翻译 |


