This tutorial shows you how you can create a user defined DMX Input remote mapping.
Date: 12/2019
MADRIX Version: 5.2 (Created with)
Corresponding Video Tutorial: »Creating An User-Defined DMX-IN Remote Map
Note:
Before you start to read this tutorial, it is recommended to work through the tutorial »Remote Control Via DMX-IN.
Task:
We want to control the Master, the Crossfader and the Stroage Places of Deck A and Deck B. Furthermore the Master Fader should able to be controlled via DMX Input and the user interface.
1. |
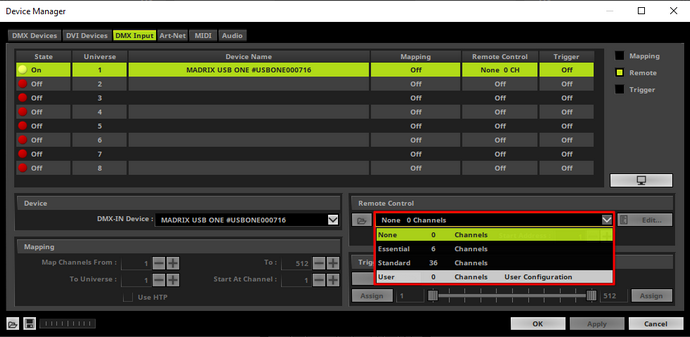
Please configure a DMX Input device like explained in the tutorials »Remote Control Via DMX-IN or »Remote Control Via Art-Net and go to the DMX Input tab of the Device Manager. In the Remote Control section of the DMX Input tab please select the User configuration.
|
2. |
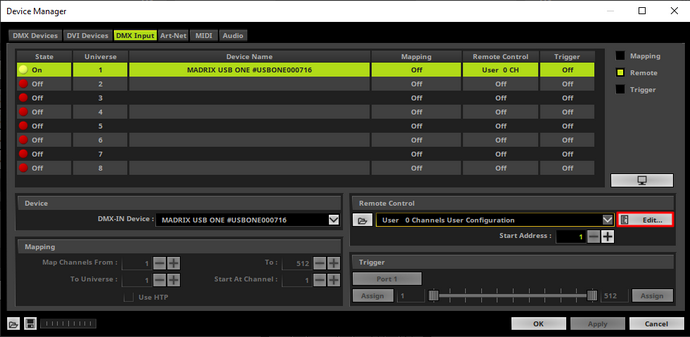
To change the settings of the User configuration we click the Edit button in the Remote Control section.
|
3. |
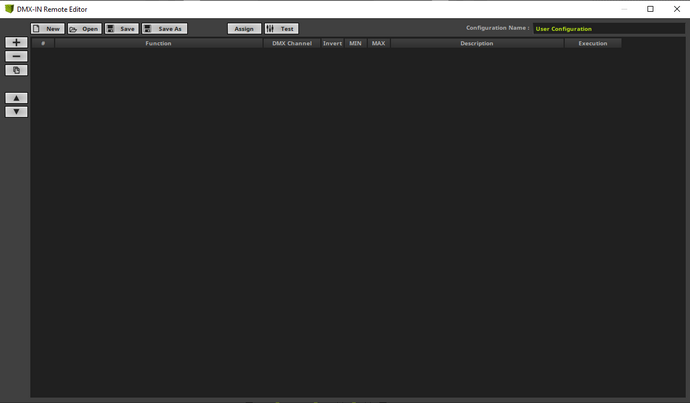
A blank DMX-IN Remote Editor opens. In the MADRIX 5 manual chapter »DMX-IN Remote Editor you will find the full explanation of this tool.
|
4. |
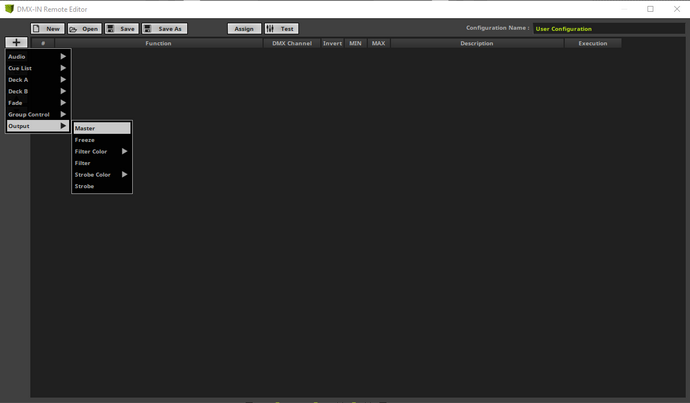
Now we can start to add the desired functionality. According to our task the first remote channel should be assigned to the Master value. Therefore please click + > Output > Master.
|
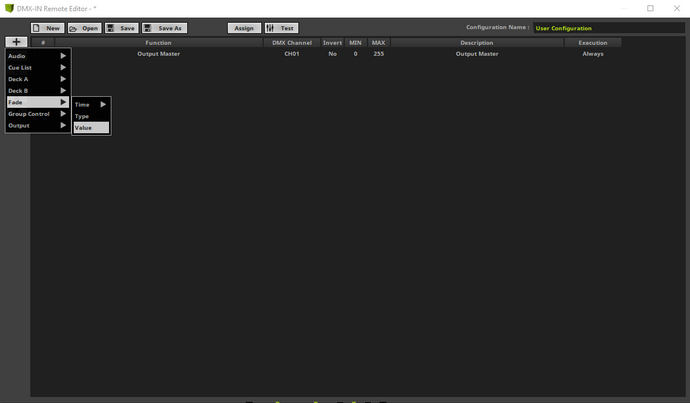
5. |
The second Input channel needs to be assigned to the Crossfader. Please click + > Fade > Value to assign it.
|
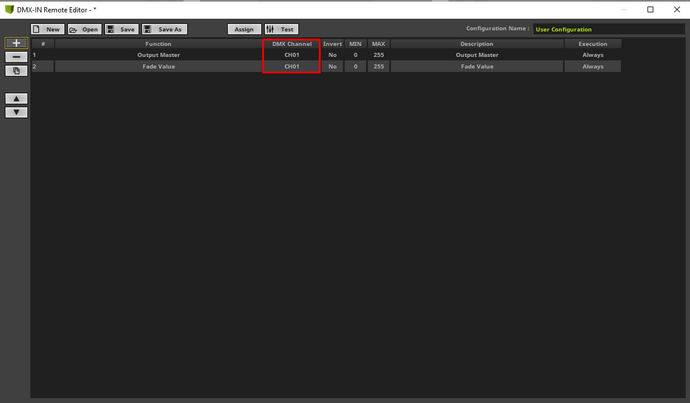
6. |
Now we already added two function add. But both are assigned to DMX Channel 1.
|
7. |
To change the assigned DMX Channel in the DMX-IN Remote Editor you can simply perform a right-click at the DMX Channel column of the desired Function, change the value and press [Enter]. We change the DMX Channel of the Function Fade Value to 2.
|
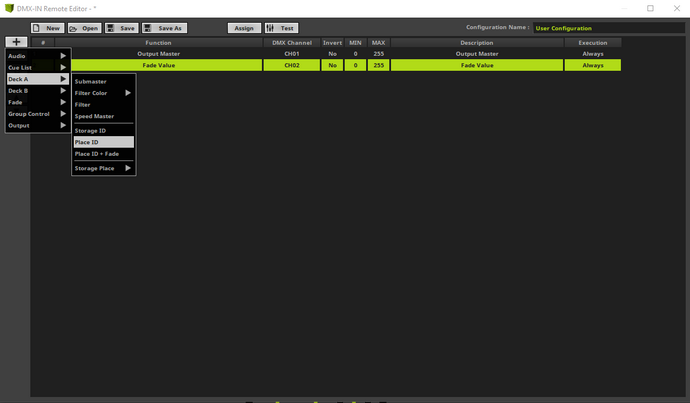
8. |
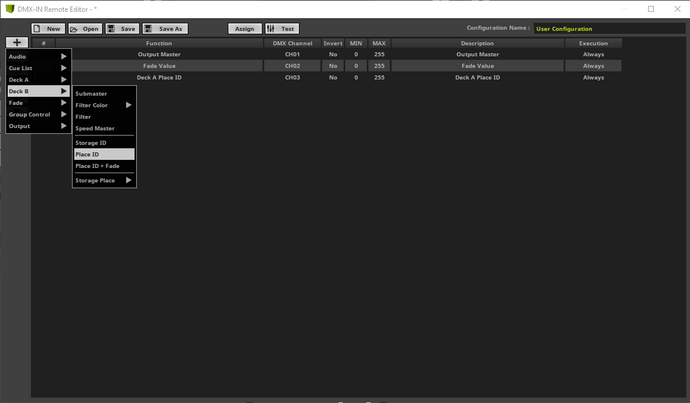
Now we add the control functionality of the Storage Place Deck A. Please go to + > Deck A > Place ID.
|
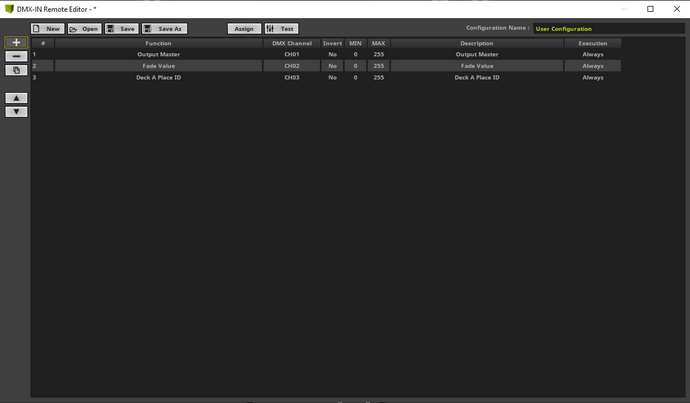
9. |
We change the DMX Channel of the function Deck A Place ID to 3.
|
10. |
As the last function we want to add the remote control for the Storage Place of Deck B. To assign this function please click + > Deck B > Place ID.
|
11. |
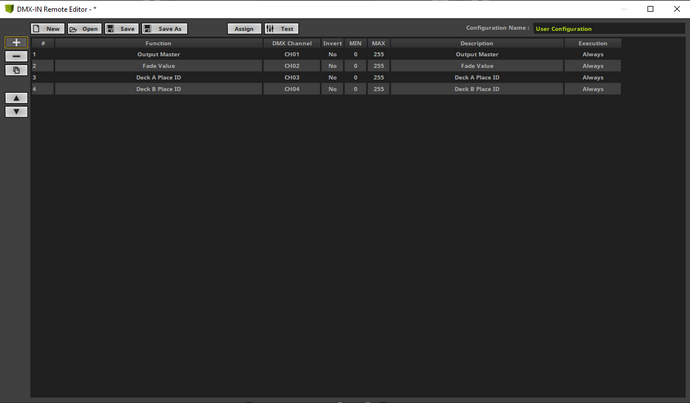
We also assign the DMX Channel of the function Deck B Place ID to the next free DMX channel which is channel 4.
|
12. |
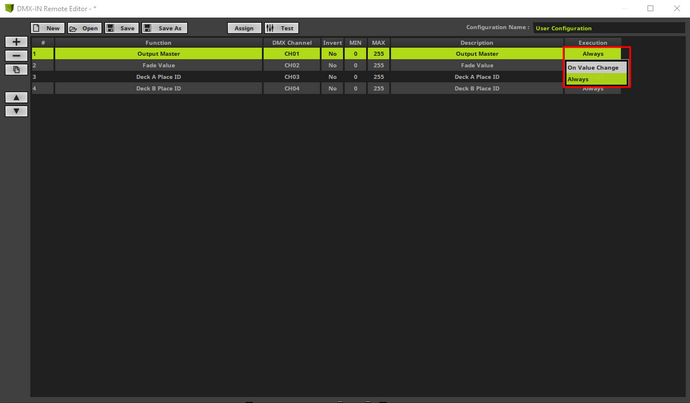
According to our task the Master value should be controllable via the user interface and also the connected console. To assign this functionality we have to change the Execution value to On Value Changed. To change the Execution behavior of the Master function we easily perform a right-click at the Execution column and select On Value Change.
|
13. |
Now the Master can be controlled via DMX Input and the user interface. All other functions can only be controlled via DMX Input because the Execution is set to Always. That means the assigned function will always be set to the value which will be received from the DMX Input. All user interface interaction of the assigned function will be overwritten immediately.
Now we can close the DMX-IN Remote Editor via the X button in the top right corner. We don't need to save the configuration because it is part of the MADRIX setup.
|
14. |
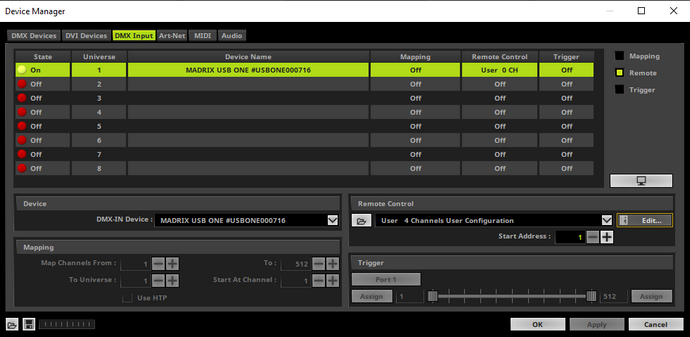
In the Remote Control section of the DMX Input tab we can now see a 4 Channel User Configuration is selected for the remote control of MADRIX.
|


Congratulations! You have successfully learned how to create a user defined DMX Input configuration in MADRIX 5.