In this tutorial, you will learn how to create a setup in LED Studio 10.40D for 16 EUROLITE LED Pixel Mesh 64 x 64. The fixtures will be placed in 4 rows and 4 columns.
Date: 12/2012
LED Studio Version: 10.40D (Created with)
1. |
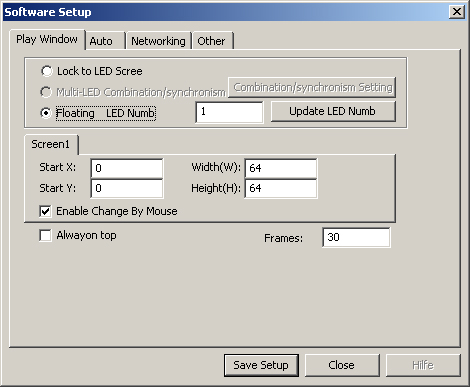
Start the LED Studio software and go to Option > Software Setup
Now, write linsn on your keyboard. There is no edit field for that, so just type it in. As a result, the software will require a password. Enter in the edit field 168 as the password. |
||||||||||||||
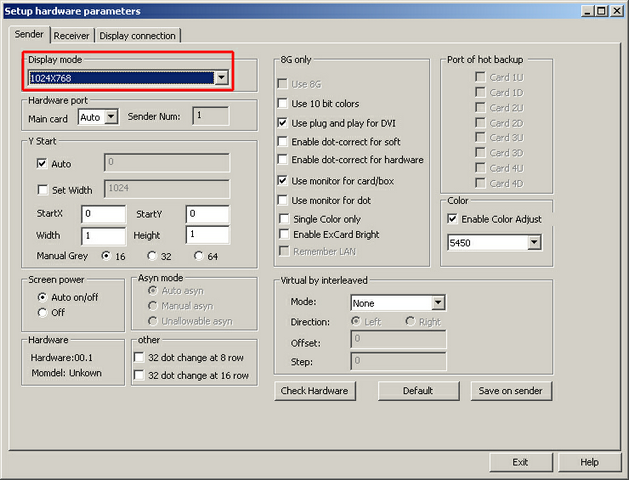
2. |
A new window will be opened. Select the Sender tab and change the Display mode to 1024x768. Then, click Save on sender
|
||||||||||||||
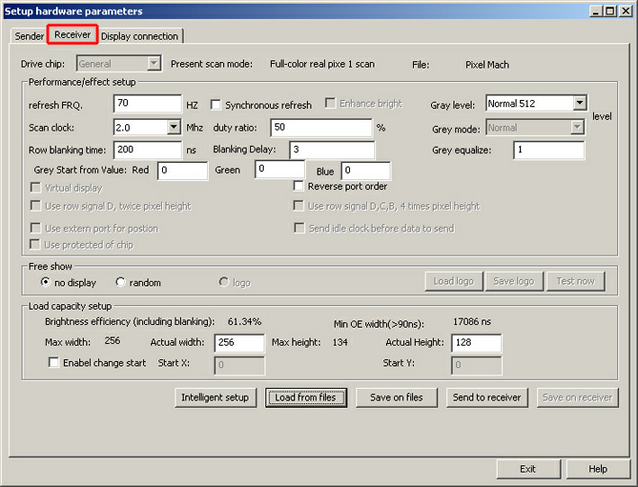
3. |
Change to the Receiver tab, click Load from files, and load the Pixel Mesh.RCG Now change the following settings:
Afterwards, click Send to receiver and then click Save on receiver
|
||||||||||||||
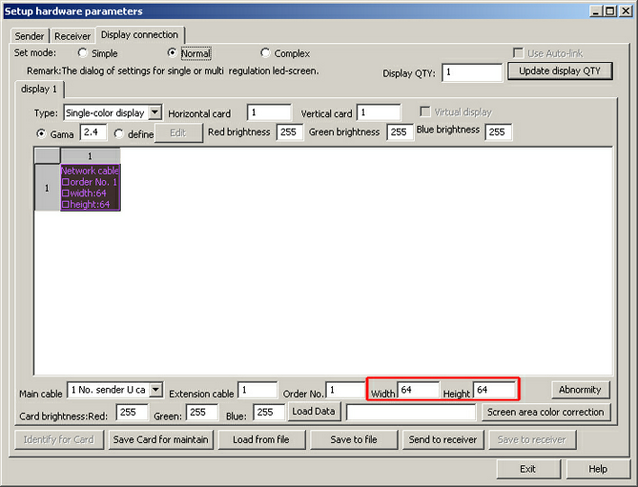
4. |
Change to the Display connection tab and at the bottom change Width to 64 and Height to 64
Now, click again Send to receiver and then Save to receiver |
||||||||||||||
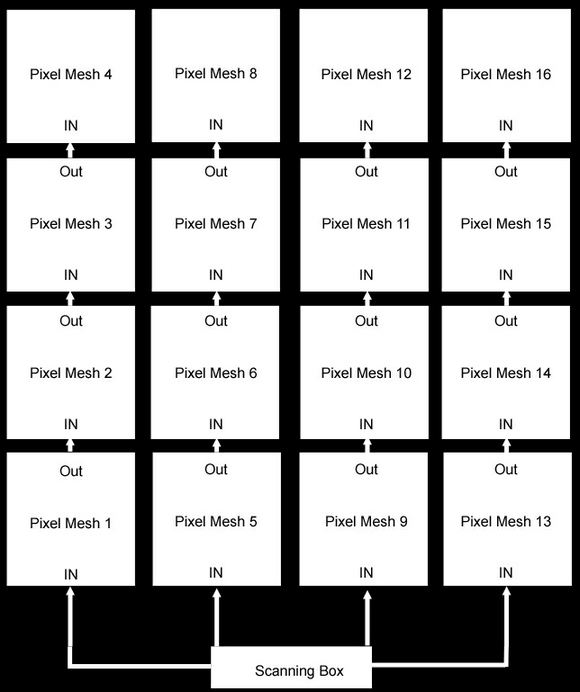
5. |
Note: The fixtures EUROLITE LED Pixel Mesh 64x64 are connected as shown in the following picture:
|
Congratulations! You have just created a setup for 4 rows and 4 columns of the EUROLITE LED Pixel Mesh 64 x 64 fixture.