In this tutorial, you will learn how you can create a dropped equalizer effect in MADRIX.
Date: 09/2014
MADRIX Version: 3.3 (Created with)
Requirements: For this tutorial you will need audio input into MADRIX.
0. |
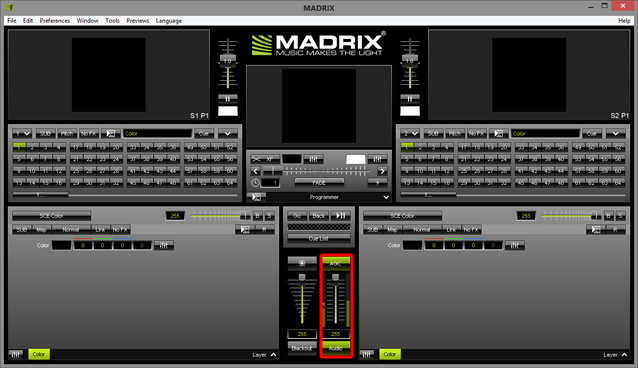
Before we start, make sure that you are receiving audio in MADRIX. Start your audio and check the input in MADRIX with the help of the Audio section in the middle of the user interface of MADRIX. The Audio button should be green and the level meter should show an amplitude.
|
1. |
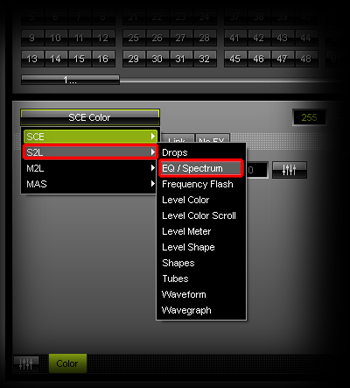
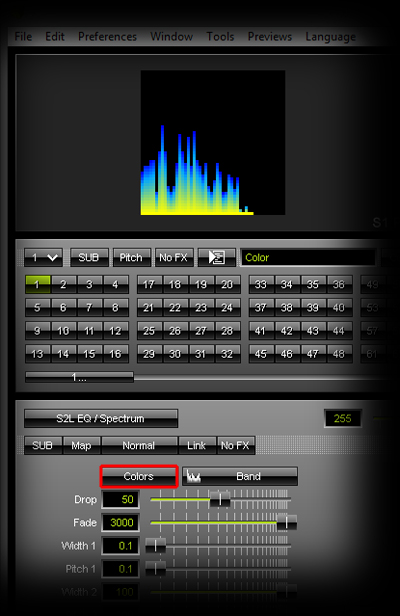
Select a free Storage Place (in this example it is Storage 1, Place 1). Then, choose the S2L EQ / Spectrum effect via the drop-down list in the upper left corner of the Effect Area.
|
||||||||
2. |
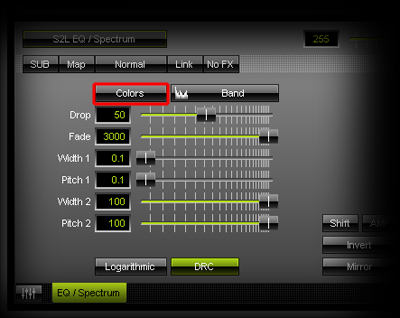
We want to change the colors. Click the Colors button.
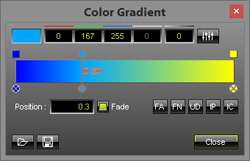
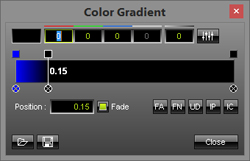
A new window, the Gradient, will be opened. Now, we can change the colors.
We want to change the first color to blue. To do so, change the values of the color fields to: Red = 0, Green = 0, Blue = 255. Now, change the position of the second color: Click on the small box above the gradient and hold the left mouse button down. Then, move the mouse to move it to position 0.30.
Click Close to close the window. |
||||||||
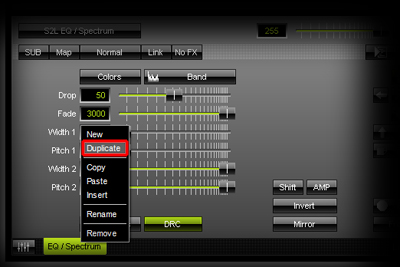
3. |
Perform a right mouse click on the Layer tab (labeled EQ / Spectrum) on the bottom left side and select Duplicate. A new Layer with the same Effect settings will be added.
|
||||||||
4. |
Now, please select the left Layer again.
|
||||||||
5. |
Click Colors again.
This time, change the colors to:
Click Close
|
||||||||
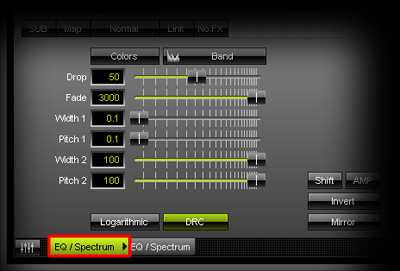
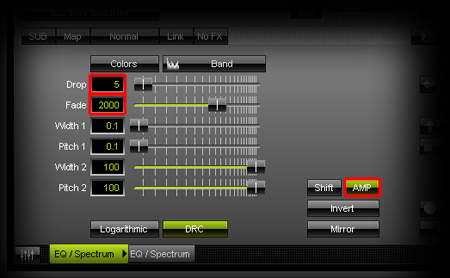
6. |
Adjust the following effect settings:
|
||||||||
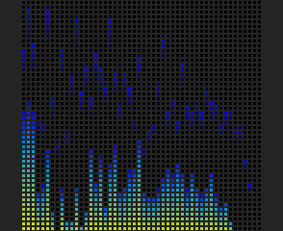
7. |
The result will look similar to this:
|
Congratulations! You have created a dropped Equalizer.