This tutorial shows you how you can create a new MIDI Map for a MIDI controller in MADRIX.
Date: 09/2014
MADRIX Version: 3.3 (Created with)
Requirements: Before we start, please make sure that the drivers of the MIDI controller are installed correctly. The controller needs to be connected to your PC.
In this example, we want to add a MIDI command for the Master Fader, a MIDI command for the Audio Input Fader, and a MIDI command for a direct access to Storage Place S1 P5.
1. |
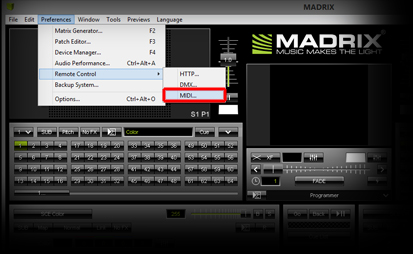
Start MADRIX and go to Preferences > Remote Control > MIDI...
The Device Manager with an active MIDI tab will be opened as a result.
|
||||||||||||||||||||||
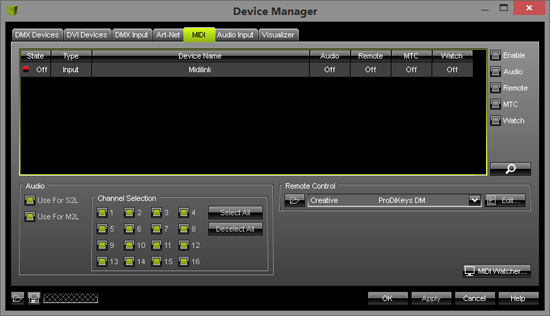
2. |
The device is still Off (red light). We will have to enable the MIDI controller and make it available for MIDI Remote. Select the device in the list and activate the Enable checkbox as well as the Remote checkbox.
|
||||||||||||||||||||||
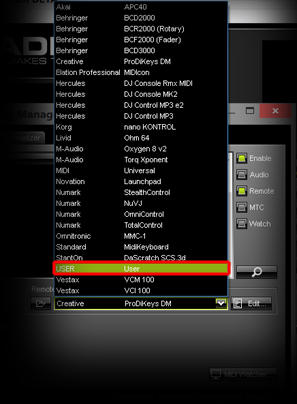
3. |
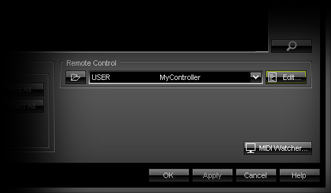
Now search and select the USER configuration in the drop-down menu of the Remote Control section.
|
||||||||||||||||||||||
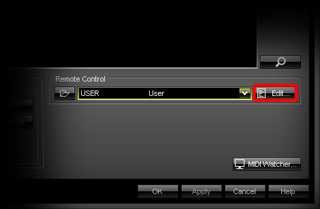
4. |
Click Edit to the right of the drop-down menu.
|
||||||||||||||||||||||
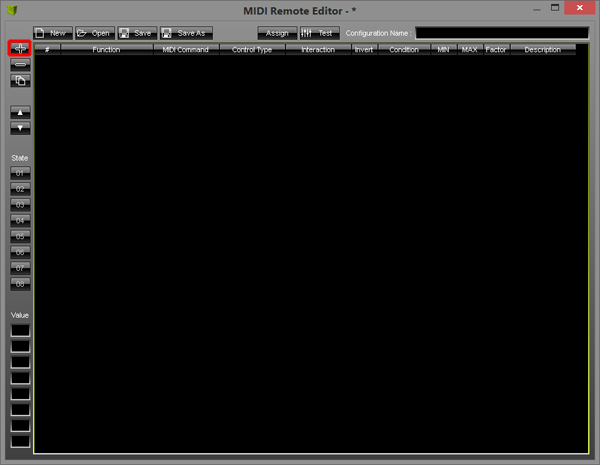
5. |
An empty MIDI Remote Editor will be opened. Click the + button.
Now you can see a drop-down menu with different groups. Select one group and you can see all possible MIDI controls of that group. The classification in groups should help you to find the required MIDI command faster.
|
||||||||||||||||||||||
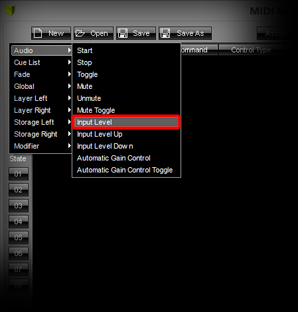
6. |
First, we want to add the MIDI command that belongs to a fader from our MIDI controller in order to control the Audio Input Fader. Go to Audio > Input Level and select it.
|
||||||||||||||||||||||
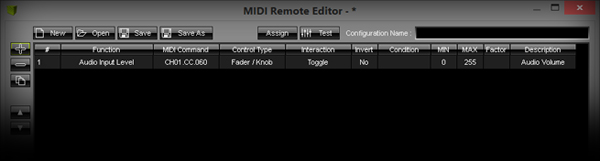
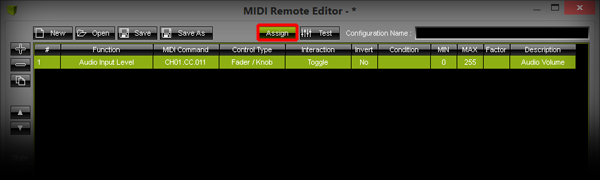
7. |
A new list entry will be added in the MIDI Remote Editor. Audio Input Level should be written in the Function column and CH01.CC.060 should be written in the MIDI Command column.
|
||||||||||||||||||||||
8. |
In order to change the MIDI Command, click Assign. Now, you can "train" the MIDI Remote Editor with the help of your MIDI controller. Select the list entry where you want to change the MIDI command. Then, press the desired button on your MIDI controller, spin an encoder or knob, or move a fader. For this example, we want to move a fader on the controller. You should see that something has changed in the selected line:
|
||||||||||||||||||||||
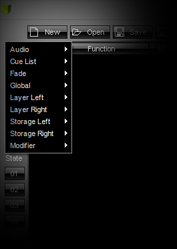
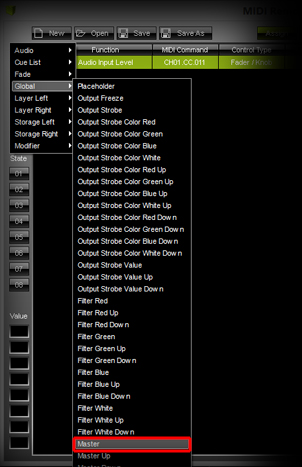
9. |
We will add the second MIDI command (for the Master Fader). Click + again, go to Global > Master, and choose it.
|
||||||||||||||||||||||
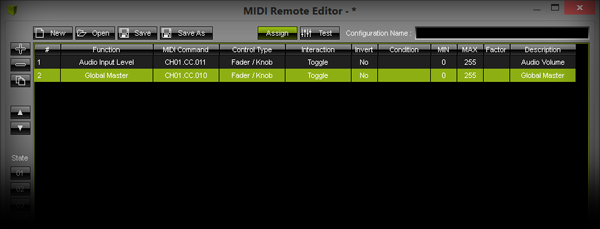
10. |
Select the Global Master list entry and move the desired fader on your MIDI controller (Assign should still be active). You should see that the MIDI Command, Control Type, and Interaction are changed automatically.
|
||||||||||||||||||||||
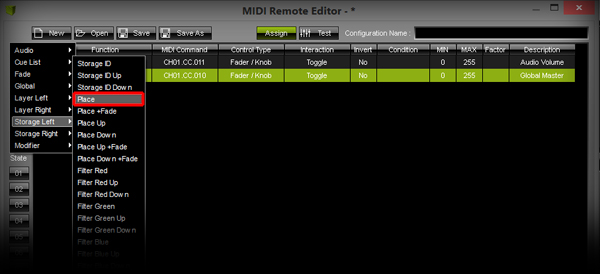
11. |
Now, we want to add a MIDI command for direct access to Storage Left, Storage Place 5. To do so, click +, go to Storage Left > Place, and select it.
|
||||||||||||||||||||||
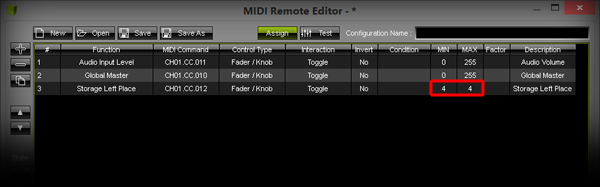
12. |
Select the line in the Device list displayed as Storage Left Place. Then, press your desired button on the MIDI controller. Change change the value for Min and Max to 4 in the MIDI Remote Editor. Note: In the MIDI Remote Editor, Storage Places start at 0.
|
||||||||||||||||||||||
13. |
You are now able to add all desired MIDI commands by yourself. |
||||||||||||||||||||||
14. |
Write a Config Name into to the edit box on the upper right-hand side of the MIDI Remote Editor and click Save As. Select a directory in the window that opens and save the configuration.
Click OK in the Device Manager. |

Congratulations! You have just created a MIDI Map for a MIDI controller in MADRIX.