This tutorial shows you how you can install the MADRIX 5 software.
Date: 09/2019
MADRIX Version: 5.1b (Created with)
System Requirements: Please make sure that your PC meets the system requirements. You can find the requirements »here
Attention: Do not plug any MADRIX hardware into your computer before you install the MADRIX software!
1. |
Download the MADRIX software from »www.madrix.com or connect the MADRIX USB stick to your PC.
|
2. |
If you use a MADRIX USB stick, please open the "Windows Explorer" and you will find a USB Flash Drive called MADRIX. Please perform a double-click on MADRIX_64Bit_Install.exe
|
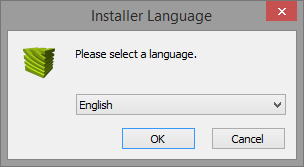
3. |
The Select Language dialog of the Installer will be opened. In this dialog you can choose the language during installation process.
|
4. |
A Welcome window appears. Click Next > and the License Agreement window appears. Click I Agree after reading. Otherwise, you cannot install MADRIX.
|
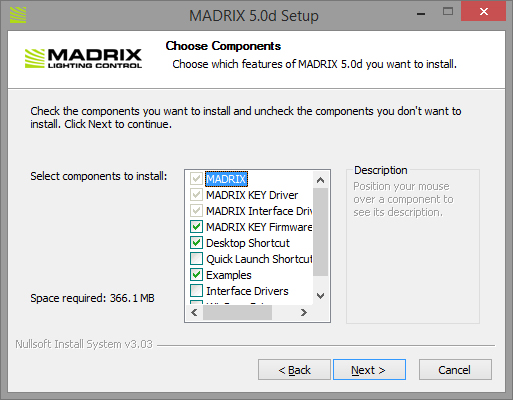
5. |
Now, you can see the Choose Components window.
In this step, you can choose the components you want to install: ▪ MADRIX: It is always required to install MADRIX. ▪MADRIX KEY: Driver It is also always required to install the MADRIX KEY Driver ▪MADRIX Interface Driver: It is also always required to install the MADRIX Interface Driver. It includes the drivers for MADRIX USBone, MADRIX NEO, MADRIX PLEXUS and MADRIX LUNA interfaces. ▪MADRIX KEY Firmware: Installs the latest MADRIX KEY Firmware. ▪Desktop shortcut: Create a shortcut to the MADRIX software on the Windows Desktop. ▪Quick launch shortcut: Creates a shortcut to the MADRIX software in the Windows toolbar. ▪Examples: Installs some Setup examples, including effects, scripts, and color tables for MADRIX. ▪Interface Driver: Choose this option if want use MADRIX software with a supported third-party DMX interfaces. You don't need this option if you want to use the MADRIX software only with MADRIX interfaces or you use MADRIX only with DVI output. ▪WinPcap Driver: Choose this option if you want to control the EuroLite T9 (e.g., LSD screens) or 5A or CoulorSmart Link.
|
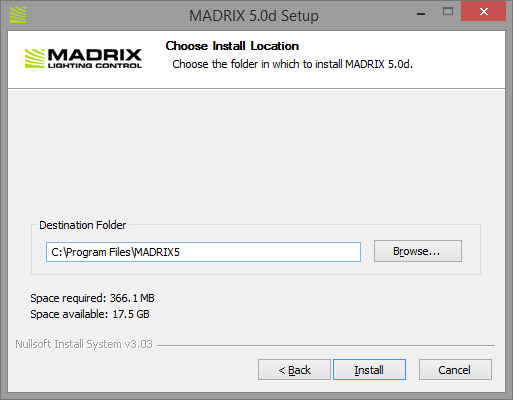
6. |
Now, you can choose the install location.
Click Browse and select your desired destination folder. After that, click Install and the installation process begins. This will take some minutes. When the installation is complete, click Next >
|
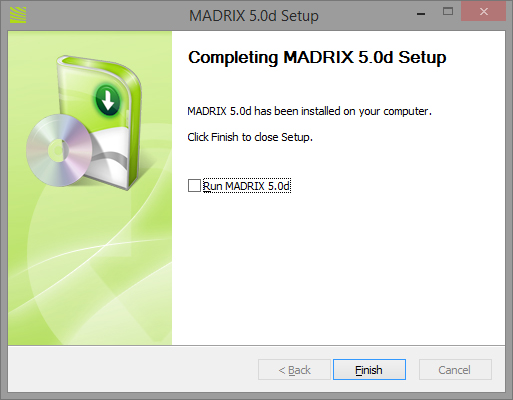
7.1 |
If you want to work with MADRIX 5 in Demo Mode, you can click Finish and MADRIX 5 will start.
|
7.2 |
When installing MADRIX 5 the first time on your PC and you already have a MADRIX 5 KEY, please disable the Run MADRIX 5.X checkbox and click Finish
|
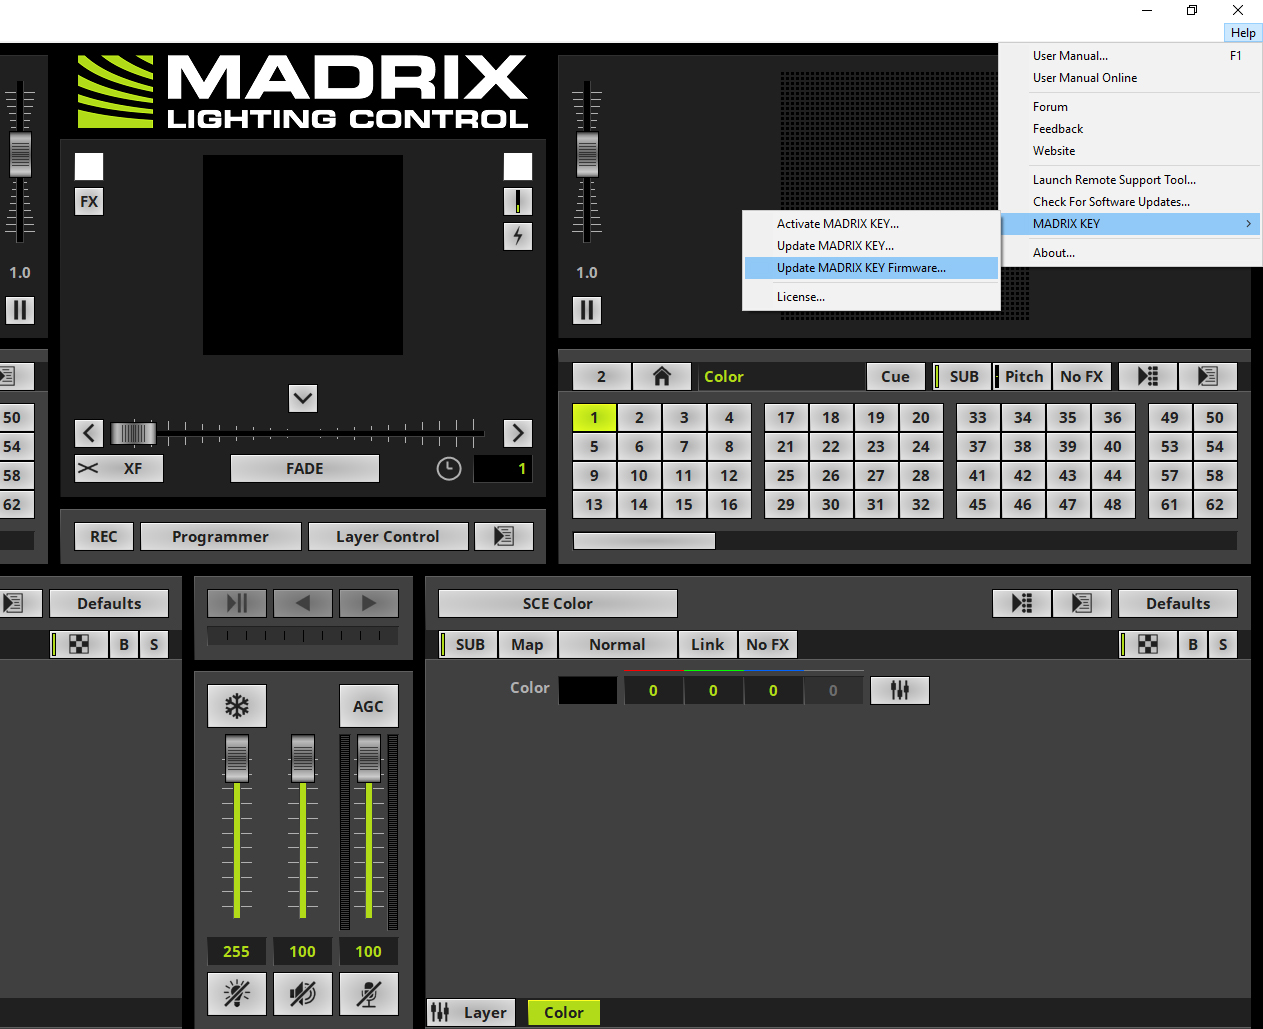
8. |
If you start MADRIX 5 with a connected MADRIX 5 KEY the first time, please make sure that the MADRIX 5 KEY is working with the latest MADRIX KEY firmware.
|
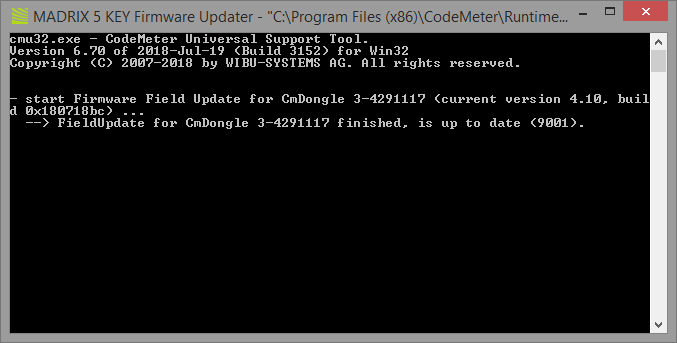
9. |
Please wait until the update process is finished.
|
10. |
If the license of the MADRIX KEY was not activated, you will need to activate it first. In the following tutorial you can learn how the activation works: Activate the MADRIX License.
|
Congratulations! You have successfully installed MADRIX.