|
In this tutorial, you will learn how to create a patch with space between each fixture. This is useful, because of you can create a patch representing your real fixture arrangement (with space) in the club or on stage.
Date: 09/2014
MADRIX Version: 3.3 (Created with)
We want to create a patch with 16 Eurolite PMB-4 COB.
1.
|
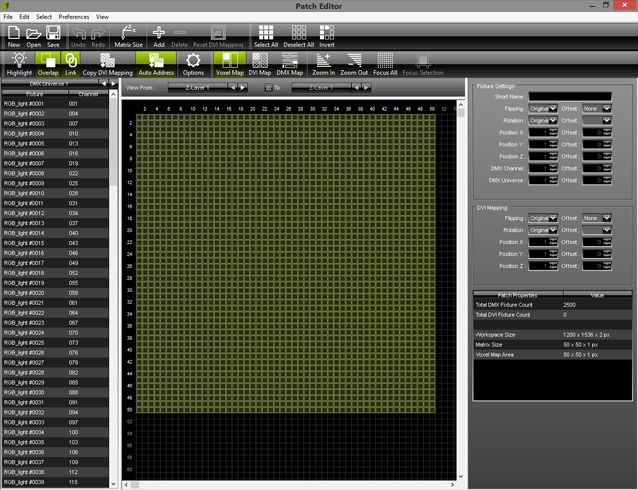
Start MADRIX and open the Patch Editor (Press F3 or go to Preferences > Patch Editor).
|
2.
|
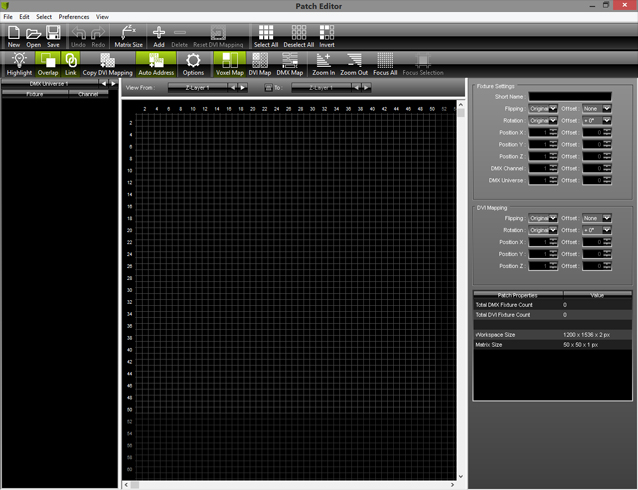
Click New on the toolbar or go to File > New.
Now, click Yes to confirm that all current fixtures will be deleted.

All fixtures will be removed.
|
3.
|
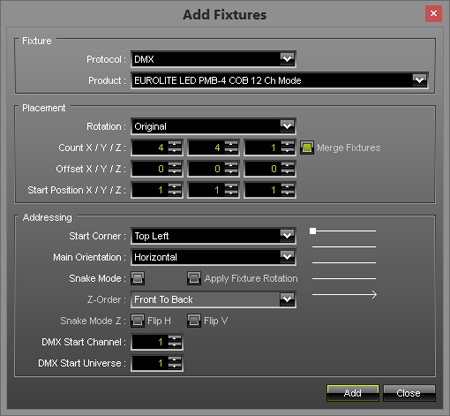
Click Add on the toolbar or go to Edit > Add Fixtures... or press Ins on your keyboard.
| ▪ | Protocol: Should be DMX. If it is not, change it to DMX. |
| ▪ | Fixture: Search and choose EUROLITE LED PMB-4 COB 12 Ch Mode |
| ▪ | Rotation: Should be Original |
| ▪ | Count: Set X to 4, Y also to 4, and Z to 1 |
Leave all other parameters with their default settings and click Add
|
4.
|
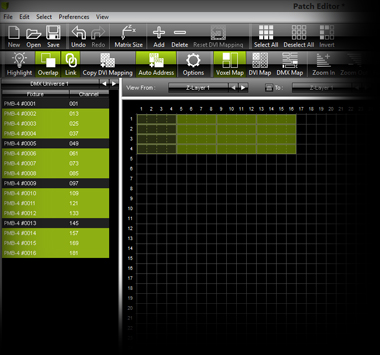
The Patch should look like in the following picture:
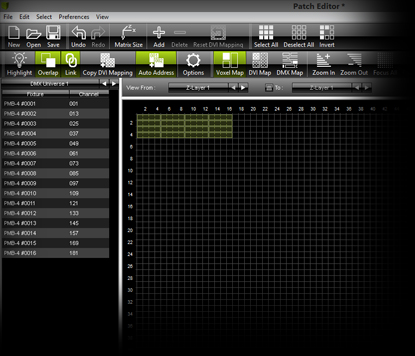
As you can see, there is no space between each fixture. Now, we want to add space between each fixture. Select all the fixtures, except the first column. You can select the fixtures in different ways:
| ▪ | A] Press and hold the Ctrl key down, then click on every device you want to select in the patch. |
| ▪ | B] Press and hold the Shift key down, press the left mouse button and create a selection rectangle above all fixtures you want to select. |
| ▪ | C] Press and hold the Ctrl key down and click on every fixture you want to select in the fixture list on the left side of the patch window. For this example, select the fixtures with the numbers #0002, #0003, #0004,
#0006, #0007, #0008,
#0010, #0011, #0012,
#0014, #0015, #0016. |
| ▪ | Now, click on one of the selected fixtures with the left mouse button, hold the left mouse button down and at the same time move the mouse to the right until the left handed fixtures are at position X = 10 |
| ▪ | Deselect all fixtures (click into a free area of the patch). |
| ▪ | Select all fixtures of the third and fourth column, click and hold the left mouse button down on one of the selected fixtures and move the mouse to the right until the left handed fixtures are at position X = 19 |
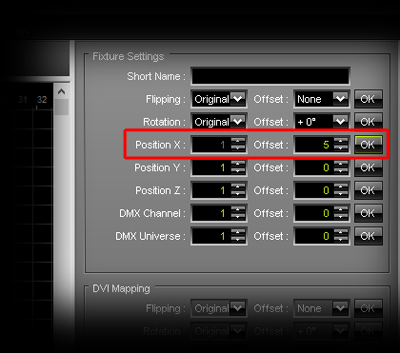
| ▪ | Select all fixtures of the fourth column. Now go to the right side of the Patch window to the settings panel. (If you do not see the panel, go to View > Reset Layout.)
Go to the Fixture Settings category, type in 5 for Offset of Position X, and click OK. The fixtures should be moved to the position X = 28 |
We have created space between each column, but there is still no space between each row. The Patch should now look like this:
We want to add space between rows:
| ▪ | Select all fixtures from row 2 until 4 and move them down until the fixtures of row 2 are at position Y = 5 |
| ▪ | Select the fixtures of row 3 and 4 and move them down until the fixtures of row 3 are at position Y = 9 |
| ▪ | At last, select the fixtures of row 4 and move them down until the fixtures are at position Y = 13 |
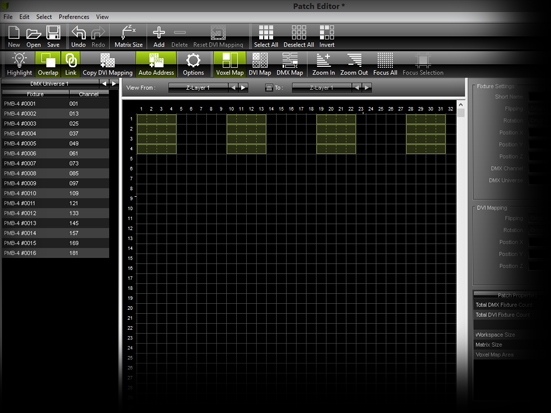
That is it. The patch should look like the patch in the following picture.

|
5.
|
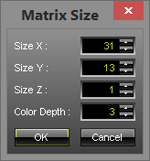
Finally, change the Patch Size to the required total size.
Click Matrix Size on the toolbar and change Size X to 31 and Size Y to 13
Click OK
|
Note: It is recommended to save the patch to an external file, because we will need it in another tutorial. Therefore, go to File > Save Patch As, choose a directory, type in a filename, and click Save
Simply close the Patch Editor and you can work with this patch configuration in MADRIX.
Congratulations! Now you have created a patch that adds space between each fixture.
|