In this tutorial, you will learn how you can create effects and map them to only one fixture of your LED matrix and how you can handle space between your fixtures.
Date: 10/2014
MADRIX Version: 3.3 (Created with)
Note: For this tutorial we are going to use the patch we created in this tutorial »Creating A Patch With Space Between Fixtures
It is also useful to read the tutorial »Working With Layers beforehand.
1. |
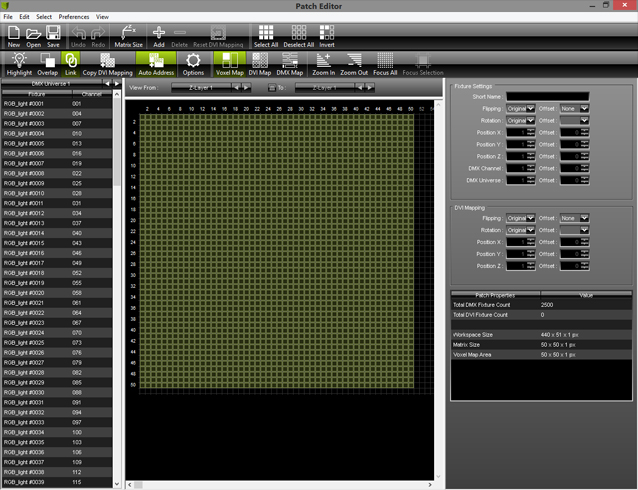
Please open the saved patch of the tutorial »Creating A Patch With Space Between Fixtures
|
||||||||
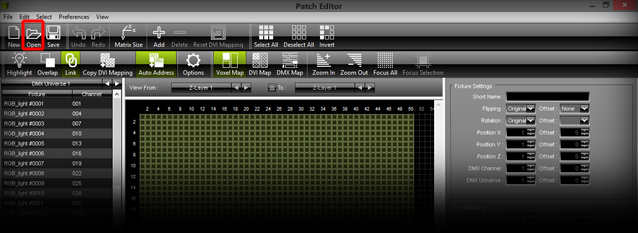
2. |
Click Open on the toolbar and select the saved patch file on your computer's harddisk.
|
||||||||
3. |
The Patch we have just loaded into MADRIX should look like this:
Close the Patch Editor. |
||||||||
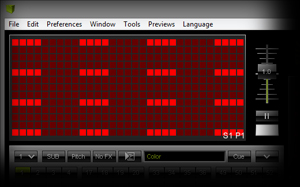
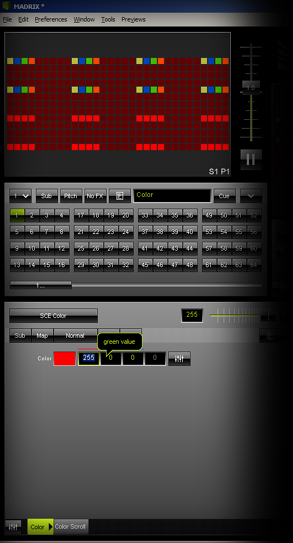
4. |
Change the color of the default effect SCE Color from black to red. This will help you see the patched fixtures better in the Previews of MADRIX. Note: The darker red areas in the Previews are the areas where no fixtures are located. The bright red areas represent the patched fixtures.
|
||||||||
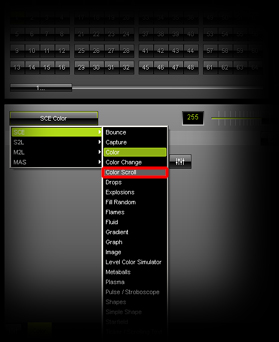
5. |
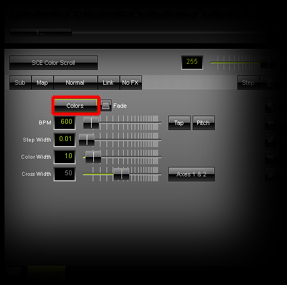
We want to change SCE Color to SCE Color Scroll. To do so, select SCE Color Scroll from the drop-down list of effects.
We want to continue by removing several colors from the Color Table. Click on Colors
Please delete all colors, except Red, Green, Blue, and Yellow.
|
||||||||
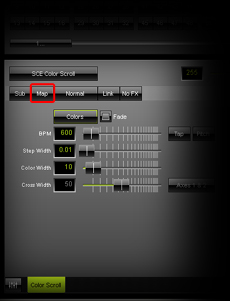
6. |
We want to change the location of the effect on the LED matrix now. Please click the Map button in the Effect Section.
|
||||||||
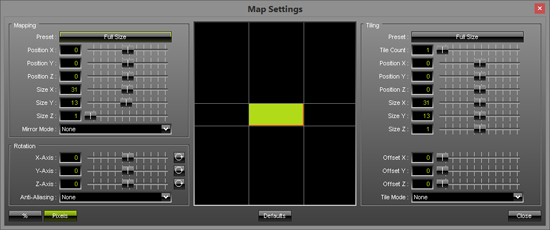
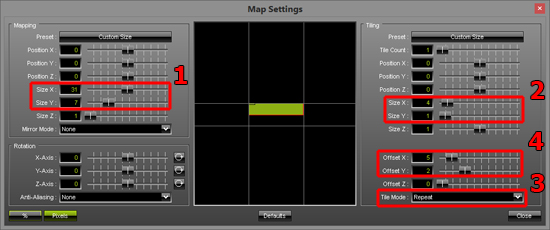
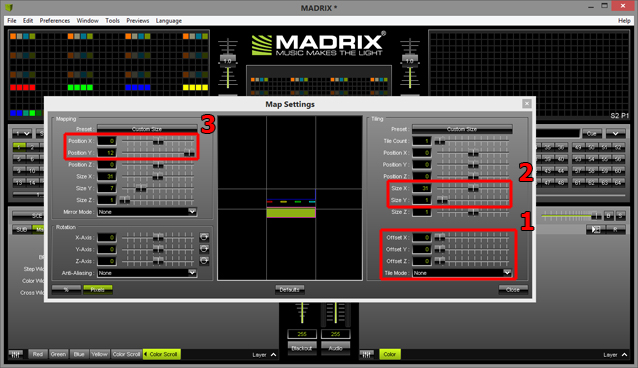
7. |
The Map Settings window will be opened. First, we want to change the range of the values from percentage/relative to pixel/absolute. Click the Pixel button at the bottom.
|
||||||||
8. |
Second, we want to change the size and position of the SCE Color Scroll effect. As you know, every fixture of the Patch has 4 pixels and there is space between each fixture.
Close the Map Effect window. Then, have a look at the Preview of MADRIX. You should see that only fixtures of the first two rows display the SCE Color Scroll effect in repeat mode.
|
||||||||
9. |
Add a new Layer and change the order of the two Layers. SCE Color Scroll should be on the right side, while the new Layer should be on the left side. Change the color of the newly inserted Layer for SCE Color to Red
|
||||||||
10. |
We want to change the mapping of this new SCE Color effect to the first fixture in the third row. Select the Layer Color and click the Map button again.
|
||||||||
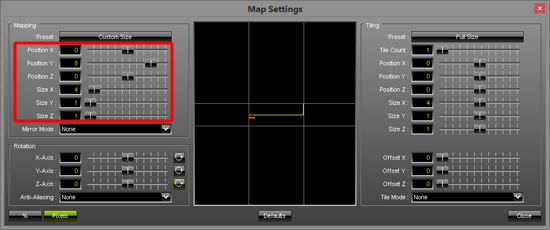
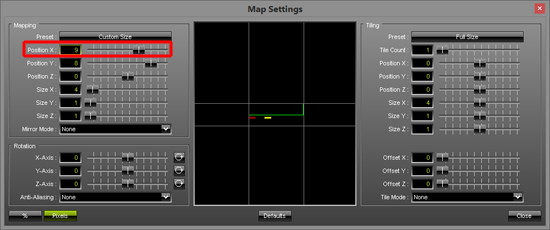
11. |
In the Mapping section change Position Y to 8, Size X to 4, and Size Y to 1.
Then, close the Map Effect window. |
||||||||
12. |
In this step, change the label of the SCE Color Layer from Color to Red. Therefore, perform a double-click with the left mouse button on the label Color and now you can rename the Layer to Red
|
||||||||
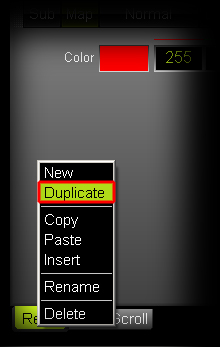
13. |
In this step we want to duplicate Layer Red. Select the Layer and perform a click with the right mouse button on the Layer itself and choose Duplicate from the context menu. The duplicated Layer will be inserted right beside the selected one.
|
||||||||
14. |
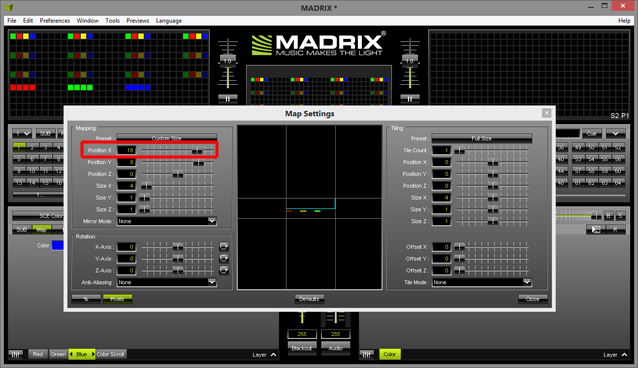
Change the label of the new Layer to Green, change the color of its SCE Color effect to green, and change the mapping in the Mapping section for Position X to 9. We will not change Positon Y, Size X, or Size Y, because the size of the fixture is the same and Position Y has not changed as well.
|
||||||||
15. |
Now, duplicate Layer Green. Change its label to Blue, change the color of its SCE Color effect to blue, and change the mapping in the Map section for Position X to 18
|
||||||||
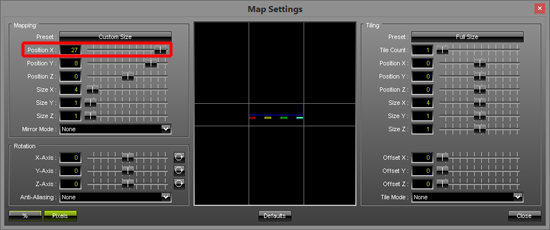
16. |
Duplicate Layer Blue. Change its label to Yellow, change the color of its SCE Color effect to yellow, and change the mapping in the Mappingf section for Position X to 27
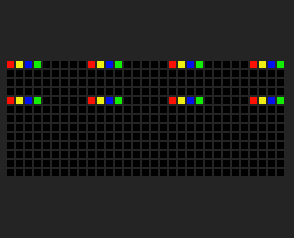
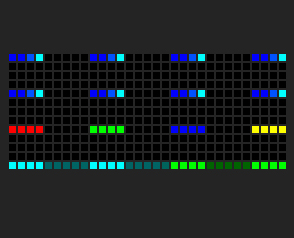
Have a look at the Previews and you can see that each fixture of the third row has now its own color effect. Each fixture of the third row has received its own effect and mapping. |
||||||||
17. |
Finally, we want to map another SCE Color Scroll effect to the fourth row of fixtures (but this time without repetition and the color scroll should be continuous).
|
||||||||
18. |
Close the Map Settings window. Your MADRIX Previews should now display the following effects:
Note: In the last row of the Preview you can see some darker and some brighter areas. Only at the bright areas there are fixtures patched. But for this effect (SCE Color Scroll) it does not matter if there is a fixture or not at every position. The effect will be replayed in the mapping area. The respective fixture fetches the color information at the position of the Patch. |


Congratulations! You have created an effect with different Layers for different fixtures.