This tutorial shows you how you can send MADRIX output data to a screen capture software.
Date: 09/2014
MADRIX Version: 3.3 (Created with)
Note: It is important for this tutorial that the screen-capture software of your fixture is installed and working correclty. If you use the software LED Studio, this tutorial can be very useful to you.
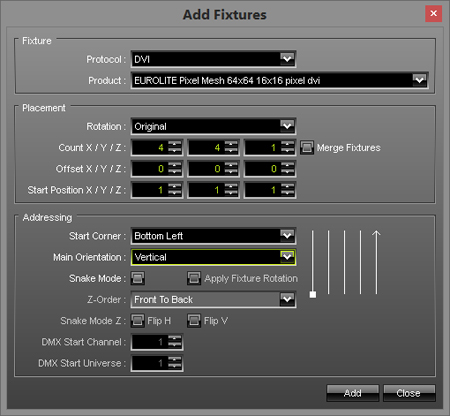
In this example, we want to control 16 EUROLITE LED Pixel Mesh 64x64. The fixtures will be installed in a 4 by 4 grid. We will use the screen-capture software LED Studio 10.4D in this example.
1. |
Configure your screen-capture software. |
||||||||||||||||
2. |
Start MADRIX and go to Preferences > Patch Editor or press the F3 key.
Click OK |
||||||||||||||||
3. |
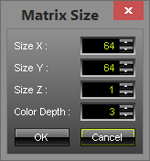
We need to change the Matrix Size to 64 x 64. Click Matrix Size on the toolbar and set Size X to 64, Size Y to 64, and Size Z to 1. This step is necessary because the Patch Size is not be updated after changing a patch and its included fixtures.
Click OK |
||||||||||||||||
4. |
Close the Patch Editor. |
||||||||||||||||
5. |
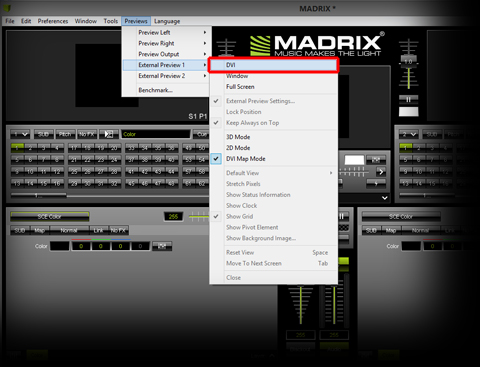
Go to Previews > External Preview 1 and select DVI
Now, you can see a (small) new window according to the size of your patch. In this example, its size is only 64x64 pixels. |
||||||||||||||||
6. |
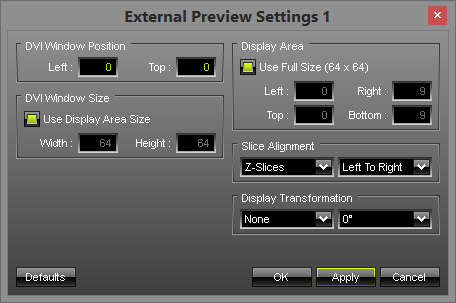
Start your screen-capture software. It is important that the External DVI Preview Window of MADRIX is positioned in the capture area of your screen-capture software. Perform a left mouse button click on the External DVI Preview Window of MADRIX and move it to the position of the capture area while continuing to holding down the mouse button. Or go to Previews > External Preview 1 > External Preview Settings.... The External Preview Settings window will be opened. You can adjust specific settings there:
|
||||||||||||||||
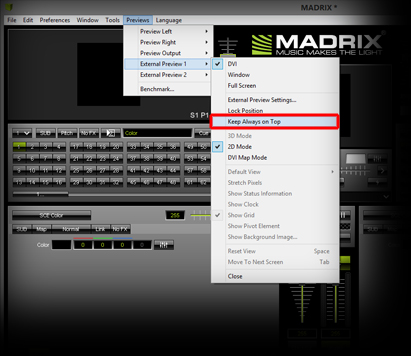
7. |
Now, go to Previews > External Preview 1 and select Always On Top. Often, this is necessary so that no other windows overlay the DVI Preview Window.
|
||||||||||||||||
8. |
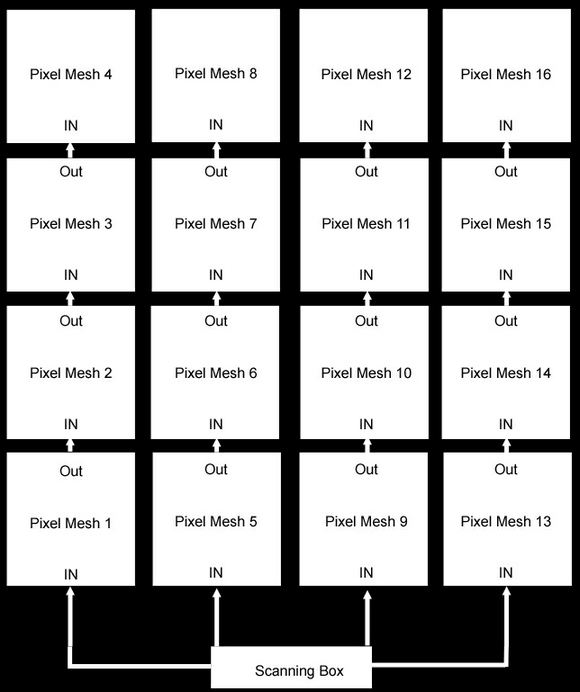
Note: The EUROLITE LED Pixel Mesh 64x64 fixtures we used in the above example are connected as shown in the following picture:
|
Congratulations! You have set up a MADRIX DVI Preview Window for your screen-capture software.