This tutorial shows you how you can configure Light-O-Rama S3 software to trigger effects within MADRIX using E1.31. Triggering can now be done through software control and no longer requires external USB DMX adaptors or an iDMX1000.
Date: 09/2013
LOR S3 Version: 3.6.0 (Created with)
MADRIX Version: 3.0 (Created with)
Note: MADRIX will allow you to trigger effects via E1.31 while outputting to standard DMX controllers. You do not have to have an E1.31 controller connected for this this process to work.
Requirements: Before going any further, you must have a LOR USB 485 Converter connected to the computer. Although we will not be sending any DMX commands out of this unit, the LOR control panel requires it be connected to send an E1.31 stream.
1. |
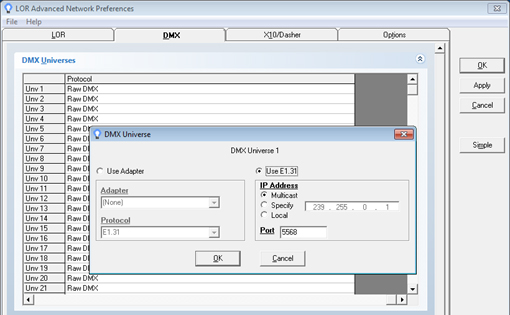
Please start the Light-O-Rama Sequencer (version 3.6.0 or better) and start a sequence as you normally would. Go to Edit > Preferences > Network Preferences. Make sure the DMX tab is selected and click the Advanced button on the right side. Now, a list of DMX universes will be displayed. Please select Unv 1. At the pop-up menu, select Use E1.31, then select Multicast. Click OK and Exit the program without saving.
|
||||||||||||||||||||
2. |
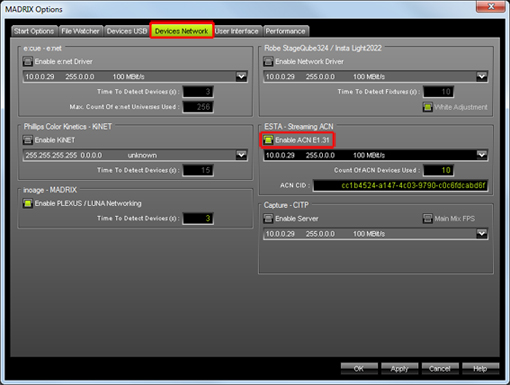
Now, start MADRIX and go to Preferences > Options and click on the Devices Network tab. Please activate Enable ACN E1.31 (the checkbox should be illuminated in green). If you have no other E1.31 devices connected, change the Count of ACN Devices Used to 1, otherwise enter the total number of ANC universes MADRIX will be controlling. Click OK
|
||||||||||||||||||||
3. |
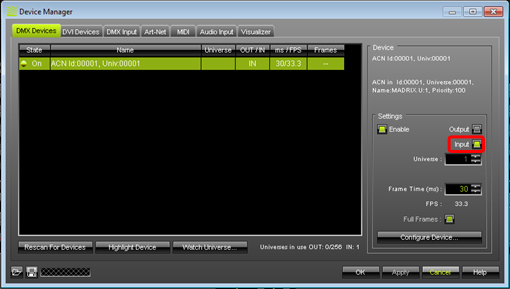
Now, go to Preferences > Device Manager, select ACN id:00001, Univ:00001 and select Input at the Settings panel. Click Apply
|
||||||||||||||||||||
4. |
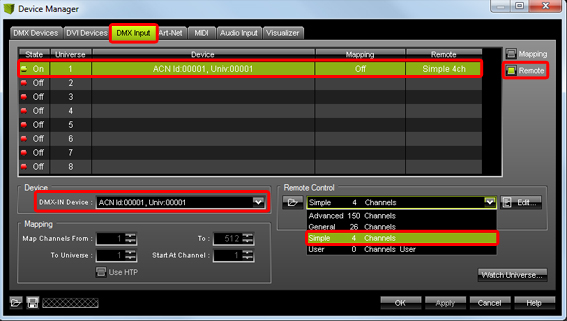
Switch to the DMX Input tab. Click on the first row (Universe 1), from the DMX-IN Device drop-down list select ACN id:00001, Univ:00001, turn on the Remote option (located on the upper right) and select Simple 4 Channels at the Remote Control section. Click OK
|
||||||||||||||||||||
5. |
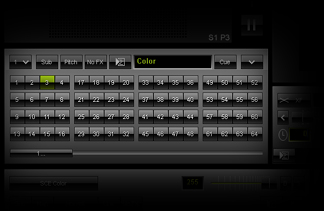
On the MADRIX user interface, change the Fade Time to 0 P Now, save your MADRIX Setup File and exit MADRIX. |
||||||||||||||||||||
6. |
Make sure all programs are closed. Start the programs in the exact order as shown below. If you do not, you will not be able to control MADRIX. Also, make sure the Comm Port Status indicator located in the lower right-hand side of the LOR Sequencer shows blue. If it does not, exit and use LOR Hardware utility to find and assign the Comm Port.
|
||||||||||||||||||||
7. |
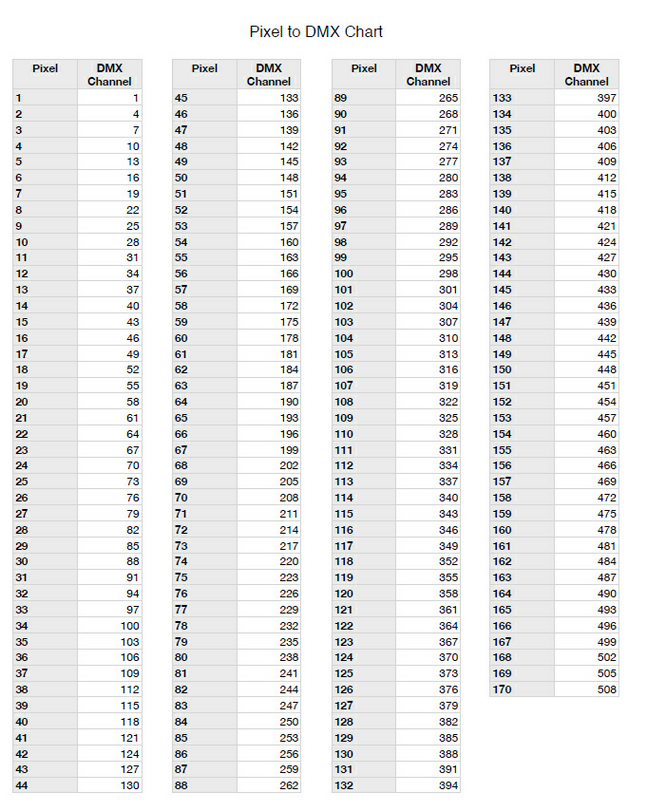
MADRIX 3 now gives you 256 storage groups (Storages) and 256 bins under each storage group (Storage Places). When creating effects for multiple songs, you may find it useful to give each song its own storage group. You can then have 256 effects for each song. Storage groups and bins use the same chart below.
|


Congratulations! You have just configured Ligth-O-Rama to control MADRIX remotely.